
Woodworking turns practical needs and creative ideas into useful, lasting objects. A simple shelf can solve a storage problem, a carefully built table can become the center of a home, and restoring old furniture can preserve both materials and memories. Yet the craft can feel complicated at first: there are countless tools, several ways to make nearly every joint, and many finishes that appear interchangeable until they are applied.

Get business pricing on tools and workshop supplies
- Business-only prices and quantity discounts
- Tax-exempt purchasing
- Multiple users, one account, clear invoices
This guide provides a clear path through the essentials. It covers workshop planning, hand and power tools, project design, joinery, surface preparation, finishing, restoration, and digital fabrication. Use it as an orientation to the craft, then follow the linked guides when you need help choosing equipment or supplies for a specific job.
Begin with the Project, Not the Tool
It is tempting to build a workshop by collecting tools first. A better approach is to choose a manageable project and let its requirements shape your toolkit. A wall shelf may require measuring, cutting, drilling, sanding, and finishing. A cabinet introduces sheet goods, joinery, alignment, and hardware. A sculpted bowl or decorative sign calls for an entirely different set of equipment.
Before buying materials or making a cut, define the object’s purpose, dimensions, location, and expected load. Consider whether it will live indoors or outside, remain dry or encounter moisture, and receive occasional handling or daily wear. These conditions influence the wood species, construction method, fasteners, adhesives, and finish.
Early projects should involve a limited number of parts and repeatable operations. Boxes, small benches, shelves, trays, and basic side tables teach transferable skills without requiring a large workshop. They also make errors easier to diagnose. Once you can produce straight cuts, square assemblies, consistent joints, and smooth surfaces, more complex furniture becomes much less intimidating.
As an affiliate, we earn on qualifying purchases.
Create a Safe and Functional Workspace
A useful workshop does not need to be large, but it does need clear working zones. Reserve space for material storage, cutting, assembly, sanding, and finishing. Keep frequently used tools within easy reach while storing chemicals, sharp accessories, and heavy equipment securely. Good lighting matters at every stage, particularly when marking joinery, inspecting a sanded surface, or applying a finish.
The workbench is the physical center of most shops. It provides a flat reference surface and supports clamping, assembly, planing, sawing, and repair work. Bench size alone does not determine usefulness; stability, working height, vise placement, clamping access, and compatibility with the available space are just as important. The guide to the best woodworking workbenches can help you compare the main formats and decide what suits your projects.
Dust management is another core workshop concern. Capture dust near the source where possible, ventilate the area appropriately, and clean with methods that do not simply return fine particles to the air. Wear suitable eye, hearing, and respiratory protection for the operation at hand. Read the instructions for every machine, bit, blade, adhesive, and finish, and disconnect powered equipment before changing cutters or making adjustments.
Build a Core Hand-Tool Kit
Hand tools develop accuracy and control because they keep you close to the material. Even a power-tool-focused shop benefits from reliable measuring, marking, paring, and fitting tools. A sensible starter collection includes:
- A tape measure and a dependable square
- A marking knife or sharp pencil
- A handsaw suited to the intended cuts
- Chisels in a few practical sizes
- A block plane or smoothing plane
- A mallet and claw hammer
- Screwdrivers and basic sharpening supplies
- Clamps for holding work securely
Quality matters most where an edge, reference surface, or measurement directly affects the work. A sharp, well-adjusted tool is usually safer and more predictable than a neglected one. Learn how to sharpen chisels and plane irons, check squares for accuracy, and protect metal surfaces from corrosion. For a focused overview of foundational equipment, see the guide to essential woodworking hand tools.
Add Power Tools as Your Work Demands Them
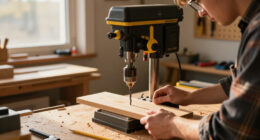
Power tools make repeated work faster, but each purchase should solve a real constraint. A drill and driver are useful across almost every kind of DIY project. A circular saw offers portable straight cutting, while a jigsaw handles curves and interior cutouts. Random-orbit sanders speed surface preparation, and stationary saws become valuable when repeatability and production volume increase.
A router is one of the most versatile additions to a growing shop. With the appropriate bit and setup, it can shape edges, cut grooves, create recesses, trim parts to a template, and form certain joints. Router selection depends on the scale of the work, desired control, bit compatibility, and whether the machine will be used handheld or mounted in a table. Explore the wood router guide for precision and power before choosing a configuration.
Never let speed replace preparation. Secure the workpiece, inspect the cutter, confirm the direction of feed, and make shallow passes when the operation demands them. Test unfamiliar setups on scrap from the same material. A short trial can reveal tear-out, burning, incorrect depth, or an unstable guide before those problems reach the final part.
Understand Wood and Sheet Materials
Wood moves as its moisture content changes. Boards generally expand and contract more across their width than along their length, so furniture must allow for seasonal movement. Wide solid-wood tops need attachment methods that permit this change; rigidly fixing them across the grain can encourage splitting or distortion.
Grain direction also affects cutting and finishing. Planing or routing against difficult grain can cause tear-out, while end grain absorbs many finishes differently from face grain. Read each board before laying out parts, and place visible grain intentionally across a project. Knots, checks, cupping, and internal stress are not merely cosmetic details—they may affect strength, machining, and stability.
Plywood, medium-density fiberboard, and other manufactured panels offer consistent dimensions and broad surfaces. They are useful for cabinetry, templates, jigs, and painted projects, although their edges and dust require appropriate handling. Material selection should follow the project’s structural, environmental, and visual requirements rather than a simple rule that one category is always superior.
Measure, Mark and Cut Accurately
Accuracy begins with a reference system. Choose a straight edge and square end as reference faces, then take related measurements from them. Mark parts together when possible, especially paired legs, rails, dividers, and shelf locations. A physical story stick can transfer repeated dimensions without accumulating errors from a tape measure.
Cut slightly outside a line when a part will be trimmed or fitted later. For joints, test the fit incrementally rather than removing too much material at once. Label every component and mark its orientation before assembly. These habits may seem slow, but they prevent the far greater delay of remaking an ambiguous or undersized part.
Learn Joinery in a Useful Sequence
Joinery ranges from screws and simple butt joints to dovetails and carefully fitted mortise-and-tenon construction. The right choice depends on load, grain direction, appearance, available tools, and whether the object may need to be disassembled.
Start with dependable basics
Begin with reinforced butt joints, rabbets, dados, dowels, and simple lap joints. These teach squareness, alignment, glue application, and clamping pressure. Pocket-hole joinery can be useful in suitable concealed applications, while mechanical fasteners remain practical for shop fixtures and many household projects.
Progress to furniture joints
Mortise-and-tenon joints are well suited to frames, tables, and chairs because they provide substantial long-grain glue surfaces. Dovetails resist being pulled apart and are commonly associated with drawers and boxes. Neither joint is mandatory for every project. Mastery means understanding where a joint works, not inserting the most elaborate option everywhere.
Always perform a dry assembly before applying glue. Confirm that the parts fit, the clamps can reach, and the structure can be brought into square. Prepare cauls, pads, and cleanup materials in advance. Glue-up is a timed operation, so the decisions should be made before the adhesive is spread.
Prepare Surfaces Methodically
A finish cannot conceal poor preparation reliably. Remove machining marks, glue residue, dents, and scratches under bright, angled light. When sanding, move through a sensible sequence of grits rather than jumping abruptly from coarse to very fine. Remove dust between stages and avoid rounding crisp edges unintentionally.
Scrapers and hand planes can leave exceptionally clean surfaces when the wood and grain cooperate. Sanding remains useful for curves, transitions, and many finish schedules. The goal is not to use one method exclusively but to produce a consistent surface appropriate for the coating that follows.
Choose a Finish by Function
Finishes change appearance, but their first job is often practical: slowing moisture exchange, resisting abrasion, making a surface easier to clean, or helping outdoor wood tolerate exposure. Before choosing one, consider contact with water, sunlight, heat, food, skin, and cleaning products. Always follow the manufacturer’s instructions for preparation, ventilation, application, drying, curing, and disposal.
Oils
Oil finishes can emphasize grain and offer a tactile, close-to-the-wood appearance. Formulations differ, so suitability and application requirements must be checked for the specific project. The overview of wood oils for furniture and projects is a useful starting point when comparing options.
Sealers and protective coatings
A sealer can help regulate absorption, prepare a surface for later coats, or serve as part of a protective finish system. The terminology is broad, and products are not interchangeable. Match the formulation to the wood, environment, and intended topcoat. Consult the guide to wood sealers that protect and enhance projects for a closer look at available choices.
Polishes and ongoing care
Polish is generally associated with maintaining or refreshing an existing surface rather than replacing a damaged protective finish. Before applying anything, identify the current finish and test the product in an inconspicuous location. The guide to wood polishes for furniture care can help narrow the options.
Whatever finish you choose, prepare samples using offcuts from the project. Sand them the same way as the final piece and apply the complete finish schedule. A sample reveals color, sheen, grain contrast, and absorption far more reliably than a label or screen image.
Restore and Repair Before Replacing
Furniture restoration begins with diagnosis. A dull surface may need cleaning or maintenance, while peeling, deep scratches, water damage, loose joints, or missing material can require more involved repair. Do not assume that aggressive sanding is the first step; it can remove veneer, soften details, and erase evidence of the object’s construction.
Inspect the piece under good light, identify loose components, and determine whether the finish is stable. Clean gently using methods compatible with the existing surface. Repair structural faults before addressing appearance. If an object may be historically significant or unusually valuable, consult a qualified conservator rather than experimenting with irreversible treatments.
Explore Digital Fabrication and Electronics
Computer-controlled tools extend traditional woodworking rather than replacing it. A CNC router can produce repeated profiles, signs, templates, inlays, and precisely located features, but successful work still depends on material knowledge, workholding, cutter selection, and thoughtful design. Machine size, usable cutting area, software compatibility, rigidity, and dust control all matter. Hobbyists can begin their research with the guide to affordable CNC router machines.
DIY projects can also combine wood with lighting, sensors, switches, and simple controllers. Prototyping the circuit before integrating it into a finished enclosure makes troubleshooting easier and protects completed woodwork from repeated alterations. If your projects cross into basic electronics, the guide to breadboards for beginners and experienced makers provides an entry point for temporary circuit layouts.
Develop Skill Through Deliberate Projects
Progress comes from completing work, reviewing the result, and applying the lesson to the next build. Keep notes about dimensions, bit or blade choices, assembly order, finishing schedules, and mistakes. Save useful templates and jigs, but discard any that are inaccurate or unsafe.
A productive learning sequence might move from a shop fixture to a box, then to a small table, wall cabinet, drawer, and larger piece of furniture. Each project can introduce one new technique while relying on several familiar ones. This keeps the challenge manageable and produces a workshop shaped by genuine experience.
Woodworking is ultimately a practice of observation: noticing grain, listening to a cutting tool, feeling a joint approach its final fit, and watching a finish change under the light. Begin with a clear purpose, work safely, and build accuracy one operation at a time. The best workshop is not the one with the most equipment; it is the one that helps you turn sound plans and carefully chosen materials into finished work.
Fall Picks
fall essentials
As an affiliate, we earn on qualifying purchases.