
To prepare veneer wood for refinishing, start by thoroughly cleaning the surface with a damp cloth or mild detergent, removing all dust, dirt, and grease. Lightly sand with fine-grit paper to improve adhesion, then wipe away dust completely. Next, inspect for damage or imperfections; repair chips or scratches with filler or veneer patches. Finally, smooth out the surface and test your primer or finish on a small area. Continuing will reveal essential tips for a flawless, long-lasting result.
Key Takeaways
- Thoroughly clean the veneer surface with a damp cloth and mild detergent to remove dust, dirt, and grease.
- Lightly sand the veneer with fine-grit sandpaper (220-320 grit) to improve adhesion.
- Remove all dust and residues using a vacuum and a damp, lint-free cloth.
- Inspect for and repair any surface imperfections with filler or veneer patches.
- Ensure the surface is dry, smooth, and free of debris before applying primer or finish.

3M Sandpaper, 220 Grit, 5 Sheets, 9 in x 11 in, Sands Paint, Wood & Metal, Great For General Purpose Sanding, Very Fine Aluminum Oxide Sand Paper (9000NA-20)
General purpose sandpaper
As an affiliate, we earn on qualifying purchases.
As an affiliate, we earn on qualifying purchases.
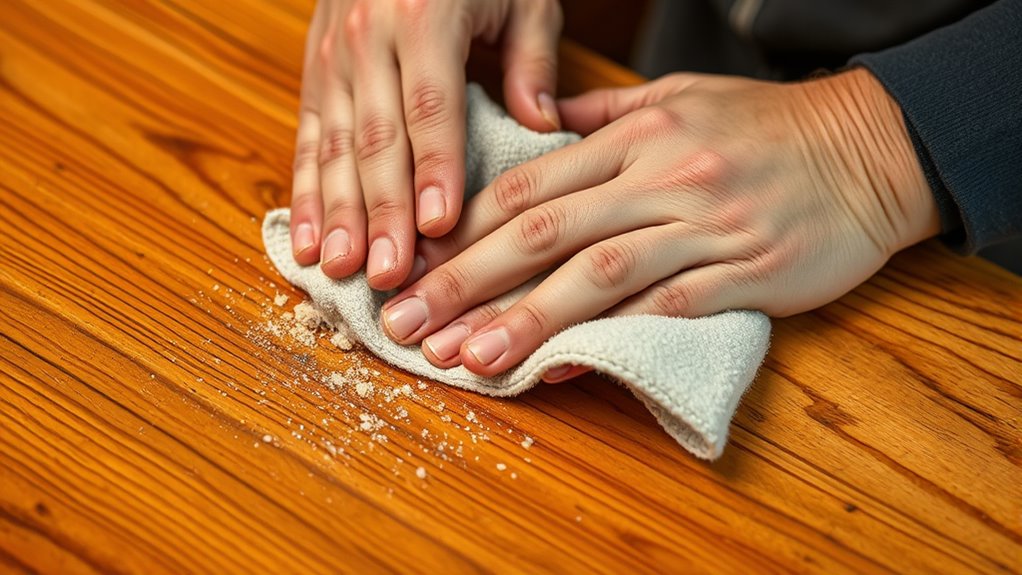
Cleaning the Surface Thoroughly

To guarantee a successful refinishing, you must start by cleaning the veneer surface thoroughly. Begin by removing dust, dirt, and grease with a damp cloth soaked in mild detergent. This step ensures that residues don’t interfere with adhesion. For stubborn stains or greasy spots, use a solvent like denatured alcohol, applying it carefully to break down residues. After cleaning, let the surface dry completely; moisture can hinder the finish. It’s essential to eliminate all debris and contaminants before proceeding, as a clean surface promotes better paint or finish adherence. Take your time to wipe down every area, ensuring no dust or residues remain. A properly cleaned surface sets a solid foundation for a smooth, durable, and professional-looking finish. Incorporating proper surface preparation techniques can significantly improve the adhesion and appearance of your refinished veneer. Additionally, paying attention to indoor-outdoor flow elements can inspire your overall decor choices, ensuring a cohesive look even in refinished furniture pieces.

Guardsman Wax Wood Furniture Filler Sticks, Furniture Scratch Repair Kit for Wood Floors, Cabinets, Chairs, and Furnishings, 5 Colors
Keep your wood furniture looking new with our furniture repair kit, including 5 color blends of wood filler…
As an affiliate, we earn on qualifying purchases.
As an affiliate, we earn on qualifying purchases.
Lightly Sand the Veneer for Better Adhesion
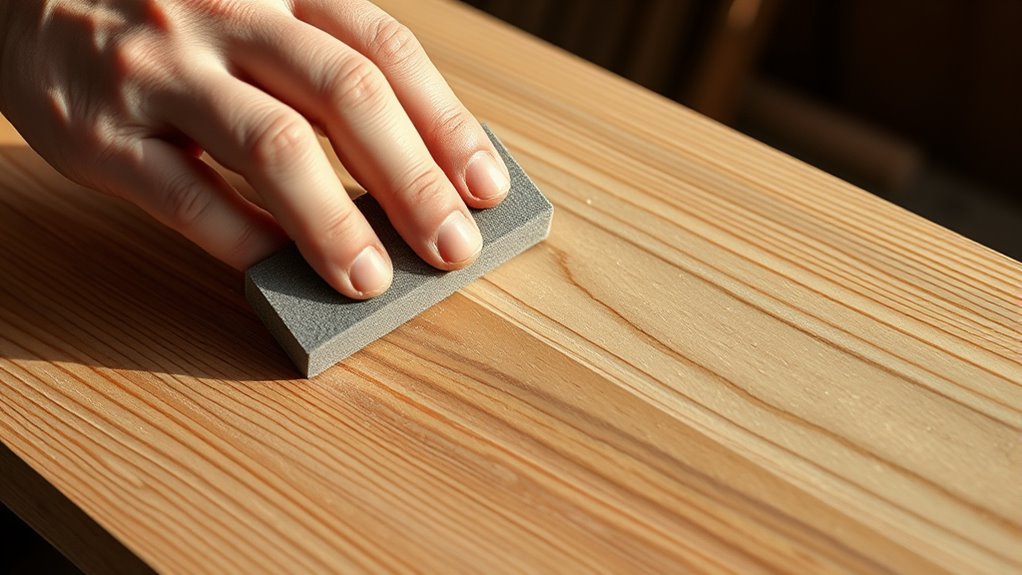
Lightly sanding the veneer is an essential step to guarantee better adhesion of primer and paint. Use fine grit sandpaper, around 220-320 grit, to gently sand the surface in the direction of the grain. This process creates a smooth surface that enhances the adhesion of your finish. Apply light pressure during sanding to avoid removing too much veneer or damaging the grain pattern. Proper sanding reduces the risk of peeling or flaking later on. After sanding, make sure to remove dust thoroughly with a vacuum or damp cloth. A clean, smooth surface allows your primer and paint to stick better, resulting in a more professional, durable finish. Taking this step carefully ensures your refinishing project has a long-lasting, flawless appearance. Additionally, maintaining a safe space for expressing feelings during this process can help you stay mindful and focused on your project.

Effortless Dust Removal | Soft Dusting Brush Tool Attachment for 32mm-35mm Vacuums | Gentle Bristles for Delicate Surfaces
Tired of Dust Damaging Delicate Surfaces? 🧹 You want to keep furniture, electronics, and fragile items dust-free—but regular…
As an affiliate, we earn on qualifying purchases.
As an affiliate, we earn on qualifying purchases.
Removing Dust and Residues Completely
After sanding the veneer, it’s important to remove all dust and residues completely before moving on. Use a vacuum with a soft brush attachment to thoroughly clear loose dust and debris from the surface. Follow up by wiping the veneer with a damp, lint-free or tack cloth to pick up residual dust and fine particles. For stubborn residues or sticky spots, clean with a mild soap and water solution, then dry immediately with a clean cloth. Ensure the surface is completely dry to prevent moisture from trapping under the finish. Regularly inspect the veneer during cleaning to confirm all dust and residues are gone. Achieving a residue-free surface is vital for proper adhesion of paint or finish, making clean dust removal essential in your refinishing process. Additionally, verifying that the surface is free of allergens and airborne particles can help ensure a healthier indoor environment during and after the project air quality. Proper dust removal not only improves finish adhesion but can also contribute to better air purifier performance in your home environment.
CLR PRO Heavy Duty Bleach-Free Mold and Mildew Stain Remover, 1 Gallon Bottle, Unscented Multi-Surface Stain Remover, Works on Tile, Wood, Concrete, Glass and More
TOUGH ON STAINS: This powerful bleach-free formula effectively removes mold and mildew stains, with a formula safer for…
As an affiliate, we earn on qualifying purchases.
As an affiliate, we earn on qualifying purchases.
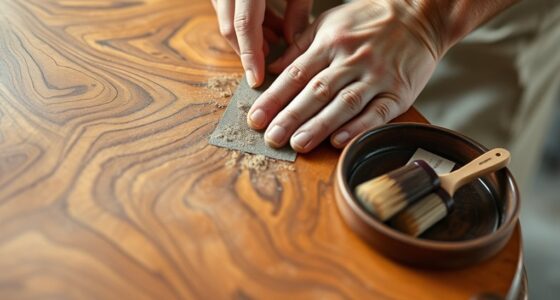
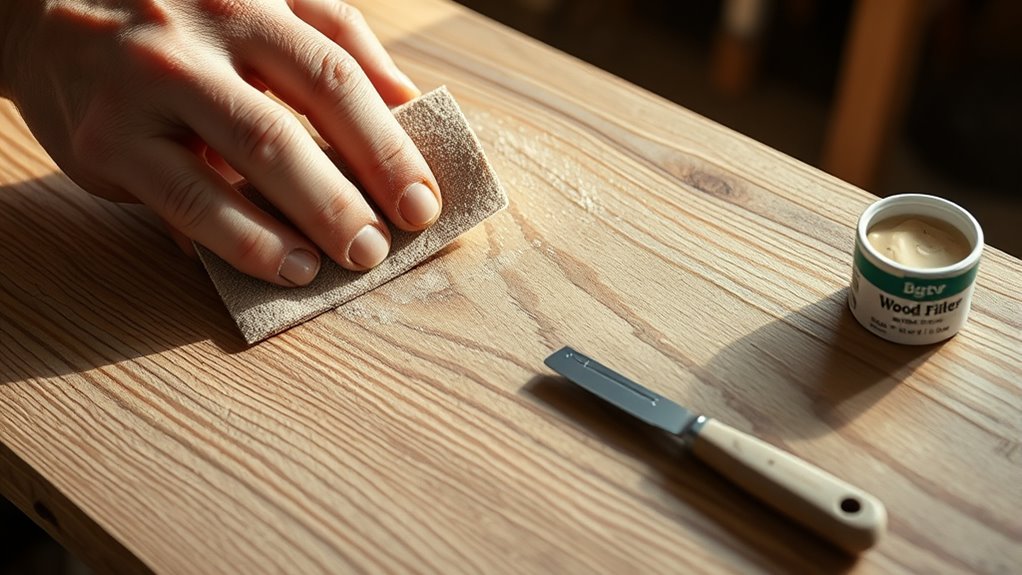
Inspecting and Repairing Surface Imperfections

Careful inspection of the veneer surface under bright, even lighting is essential to identify any chips, scratches, or delaminations that could affect the final finish. Look for surface imperfections like loose veneer edges or delaminations that need repair. Use a small putty knife to gently lift and fix any lifting veneer or chips. Fill small chips and scratches with matching wood or grain filler, then sand smooth once dry. For larger flaws, patch with matching veneer strips, apply adhesive, and press until secure. Lightly sand the entire surface with 220-grit sandpaper to ensure smoothness and adhesion. Focus on these key areas:
| Chips & Scratches | Delaminations | Veneer Edges |
|---|---|---|
| Fill & sand | Patch & press | Repair edges |
Additionally, checking for surface stability can help identify areas prone to future damage, ensuring a more durable refinishing process. Assessing adhesion quality is also important to prevent future peeling or lifting of the veneer. Regularly testing the veneer’s moisture content can help maintain proper adhesion and prevent warping over time. Performing a comprehensive surface assessment before starting can save time and effort by addressing potential issues early. Being aware of surface preparation techniques can further improve the longevity of the refinished veneer.
Preparing for Primer or Finish Application

Once you’ve repaired surface imperfections and smoothed the veneer, the next step is preparing it for primer or finish application. Start by thoroughly cleaning the surface with a damp cloth or mild detergent to remove dust, dirt, and grease. Lightly sand the veneer with fine-grit (220) sandpaper, following the grain, to promote better adhesion of the primer or finish. Be sure to remove all sanding dust using a vacuum or a damp cloth to create a clean, dust-free surface. Address any remaining imperfections or scratches with a suitable wood filler, then sand smooth for an even surface. Testing the primer or finish on a small, inconspicuous area helps ensure compatibility and desired results before applying it to the entire veneer. Incorporating AI-powered analysis can assist in selecting the most suitable finishing products based on the veneer’s specific characteristics. Additionally, considering the surface preparation techniques can significantly impact the final appearance and durability of your refinished veneer. Proper regional knowledge about the type of veneer and environmental conditions can further enhance the success of your project.
Frequently Asked Questions
How Do You Prepare Wood Veneer?
You prepare wood veneer by first inspecting its surface, ensuring it’s clean and free of dust, dirt, and grease. If needed, lightly sand with high-grit paper (like 220 grit) to smooth the surface without damaging the thin veneer. Always follow the grain and use a gentle touch. After sanding, wipe the surface thoroughly to remove any residue, ensuring the best adhesion for your paint or finish.
Can You Sand and Stain Veneer Without Sanding?
Sanding veneer without actually doing it is like trying to smooth rough waters with a paddle—it’s often unnecessary. If your veneer is already smooth and clean, you can apply stain directly, saving time and avoiding damage. However, if there are imperfections or the surface feels rough, a light, fine grit sanding helps the stain absorb better. Be gentle to prevent penetrating or damaging the thin veneer layer.
Should You Strip or Sand Veneer?
When deciding whether to strip or sand veneer, consider the condition of your surface. If the old finish is thick, heavily layered, or stubborn, stripping is the better choice to remove it thoroughly. However, for minor imperfections or light wear, sanding with fine-grit paper is gentler and preserves the veneer. You’ll want to strip only when necessary and prefer sanding for most refinishing projects to avoid damaging the thin veneer layer.
What Grit to Sand Veneer Before Staining?
Did you know that using the right grit can make or break your veneer finish? For sanding veneer before staining, you should start with a grit between 100 and 120 for gentle, smooth results. Then, finish with finer grits like 220 or higher to guarantee a perfectly smooth, absorbent surface. Always sand along the grain and avoid coarse grits above 80 to prevent damage and achieve even stain absorption.
Conclusion
Now that you’ve taken these essential steps, your veneer wood is ready to shine like new. Think of it as giving your furniture a fresh coat of life, turning back the clock. When you approach each stage with care, you guarantee a smooth finish that lasts. Remember, patience is a virtue—taking your time will make all the difference. With your attention to detail, you’ll have a piece that’s truly worth the wait, standing the test of time.