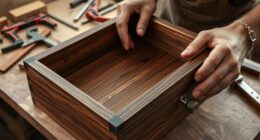
To troubleshoot common challenges in 60-degree miter cuts, start by double-checking your saw’s calibration and angle settings with a protractor or square. Confirm your blade is sharp and properly aligned. Secure your workpiece firmly with clamps and support long pieces fully to prevent movement. Using jigs or guides for large angles can improve accuracy. Small gaps can often be fixed with slight recuts or sanding—if you want to perfect your joints, there’s more to explore.
Key Takeaways
- Ensure saw is properly calibrated and set to exactly 60°, verified with a protractor or square.
- Support long or heavy workpieces with clamps and additional supports to prevent movement during cut.
- Use a sharp, high-quality blade with 60+ teeth for cleaner, more accurate miter cuts.
- Support the workpiece fully beyond the cut line to minimize flexing and misalignment.
- Double-check and test cuts on scrap material to fine-tune angles and achieve seamless joints.
Ensuring Your Saw Is Properly Calibrated and Aligned
To achieve accurate 60-degree miter cuts, you need to guarantee your saw is properly calibrated and aligned. Start by checking the saw’s base and fence, ensuring they are square and set precisely at 60°. Use a carpenter’s square or angle gauge to verify the angles. Next, calibrate the saw’s bevel and miter angles, especially if your saw has a tilt feature. Test cut scrap pieces, then measure the angles with a protractor to confirm accuracy. Inspect the blade for sharpness and proper installation since dull or misaligned blades can cause errors. Regularly consult your manufacturer’s guidelines and perform factory recalibrations if needed. Proper calibration ensures your cuts are consistent, accurate, and safe. Proper calibration is essential for maintaining the precision of your cuts over time. Incorporating routine maintenance into your workflow can help prevent misalignments and ensure lasting accuracy. Additionally, understanding the tuning of your saw and making necessary adjustments can further improve the quality of your cuts.
Selecting and Maintaining a Sharp, Quality Blade
Choosing the right blade is essential for achieving accurate 60-degree miter cuts, and a high-quality, sharp blade makes all the difference. For your circular saw, opt for a carbide-tipped blade with at least 60 teeth, designed for fine crosscutting. Regularly inspect the blade; a dull or damaged one causes rough, inaccurate cuts. Test its sharpness on hardwood like oak—smooth, shiny cuts at 45° indicate readiness. Use blades with a zero to -5° hook angle for *ideal* performance in sliding miter saws. Expect to spend around $50 on a durable, high-quality blade to improve cut precision and longevity. Keep your blade sharp and clean for best results. Proper maintenance and understanding of your blade’s specifications are crucial to the inspirational craftsmanship of woodworking projects. Additionally, understanding blade material types can help you select the most durable option for your specific applications.
Securing the Workpiece for Precise and Stable Cuts
To make precise, stable cuts, you need to secure your workpiece properly. Use clamps effectively to prevent movement and support long or heavy pieces with additional supports. Securing with saw stops can also help maintain consistent angles and accuracy.
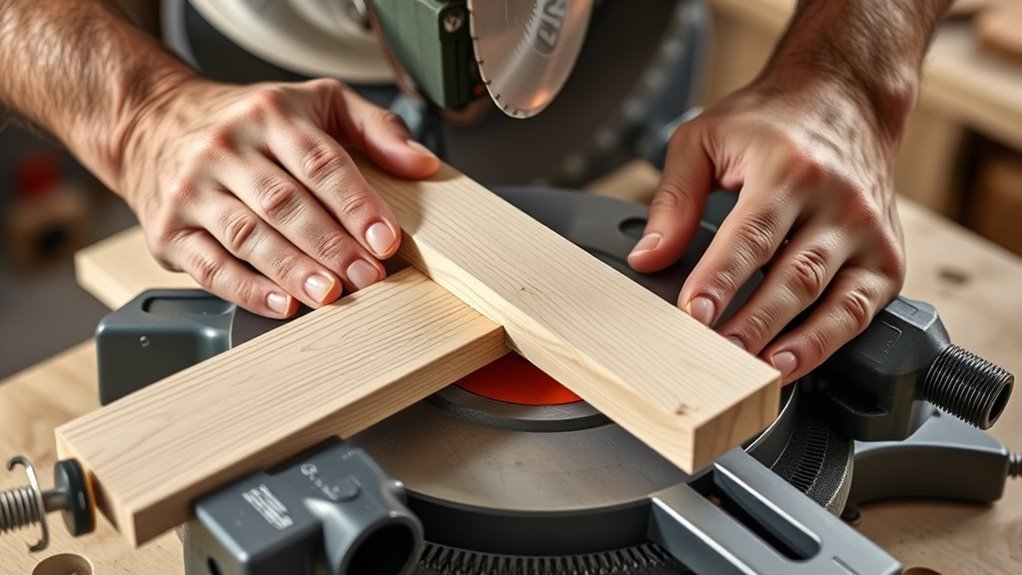
Use Clamps Effectively
Securing your workpiece with clamps is essential for achieving accurate 60-degree miter cuts. Proper clamps hold the workpiece firmly against the saw’s fence or work surface, preventing movement that can ruin your cut. Use quick-grip or bar clamps to secure irregularly shaped or long trim pieces, ensuring they stay stable and aligned. Position clamps at multiple points along the workpiece, especially near the miter joint areas, to eliminate wobble or shifting. Always double-check that clamps don’t interfere with the saw blade’s path or safety features, maintaining clear access and safe operation. Regularly tighten the clamps during the cut to preserve consistent pressure. Well-placed clamps are key to making precise, clean miter cuts every time. Additionally, paying attention to proper workspace setup helps maintain safety and accuracy throughout your project. Proper clamp positioning also contributes significantly to achieving professional results in your miter cuts. Using appropriate clamping techniques can further enhance stability and cut quality. To ensure maximum safety and precision, consider using the correct clamp types suited for your specific workpieces. Maintaining a steady workspace with stable work surfaces can also improve overall cut accuracy.
Support Long Pieces Properly
Supporting long workpieces properly is essential for achieving accurate 60-degree miter cuts. To do this, secure long pieces with clamps or sawhorses to prevent movement during cutting, ensuring both precision and safety. Support the entire length of the board beyond the cut line to minimize flexing and maintain accurate miters. Use roller stands or additional support stands for heavy or wide lumber, providing extra stability. Position the workpiece so it’s flush with the saw’s fence and bed, avoiding unsupported overhangs that can cause misalignment. Always keep the workpiece firmly pressed against the saw’s fence and table to prevent shifting. Proper support of long pieces guarantees cleaner cuts and reduces the risk of errors caused by movement or flexing during the miter process. Additionally, understanding the importance of proper workpiece support can significantly improve your cutting accuracy and safety. Ensuring that the workpiece is well-supported reduces material flexing, which can lead to inaccurate cuts. Proper support also helps to prevent kickback, making your cutting process safer and more efficient. Paying attention to workpiece stability enhances overall safety and results in cleaner, more precise miters.
Secure With Saw Stops
Using saw stops or clamps is essential for keeping your workpiece steady during a 60-degree miter cut. Saw stops secure the workpiece firmly against the saw’s fence, preventing movement that can cause inaccuracies. Properly positioning and tightening saw stops at the edges of the board maintains stability and reduces kickback. Using a stop block allows you to make consistent, repeated cuts at the same angle, improving precision. Adjust the saw stop height and angle to ensure the workpiece stays in place without slipping or shifting during the cut. Always double-check that the workpiece is securely held before starting. Proper use of saw stops not only improves accuracy but also enhances safety, helping you achieve clean, precise miter cuts every time. For optimal results, consider incorporating best practices for securing workpieces to further enhance the stability and safety of your cuts. Additionally, verifying the proper setup of your saw ensures consistent results and minimizes potential hazards.
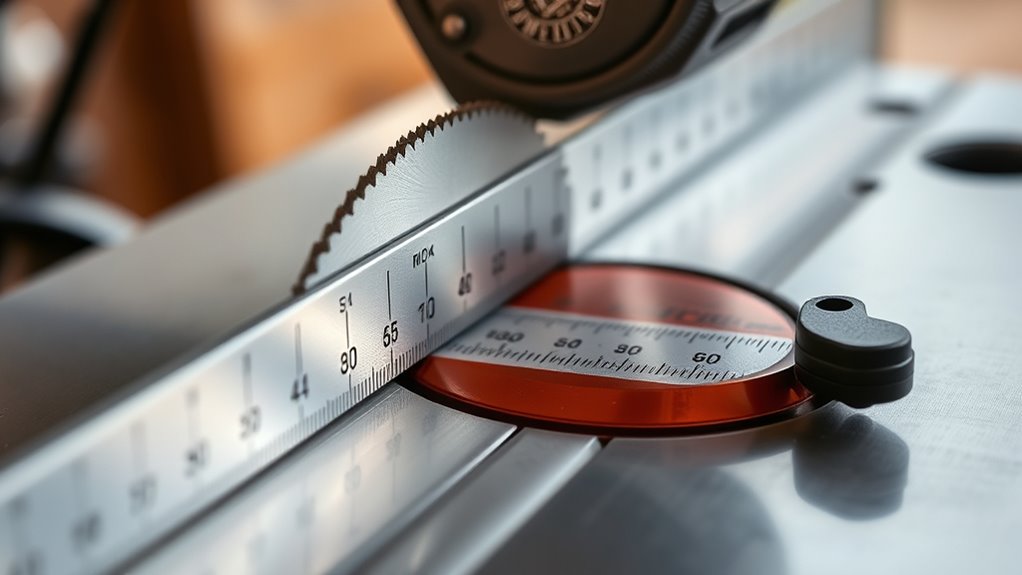
Correctly Setting the Miter Angle for 60 Degrees
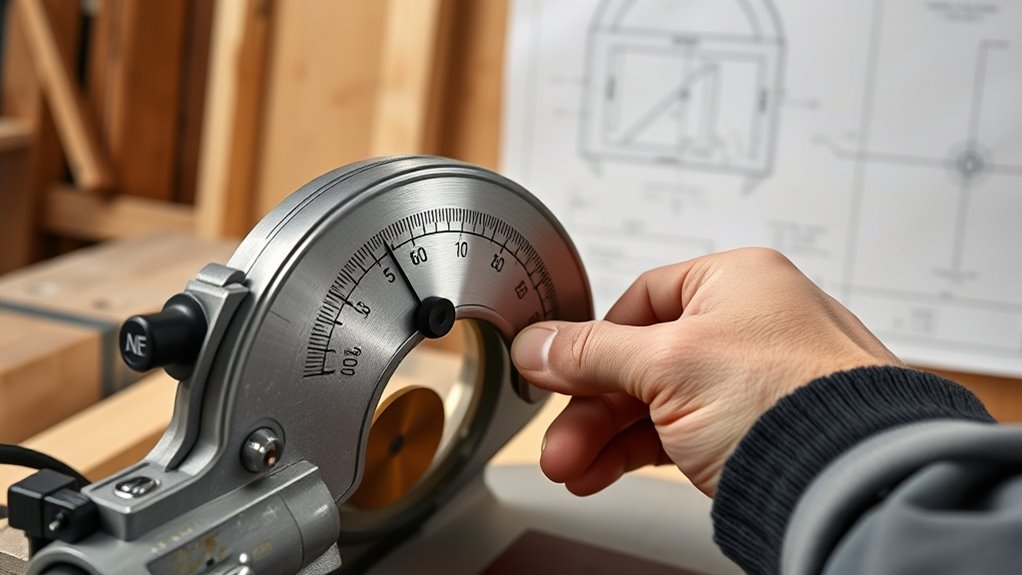
To cut a perfect 60-degree miter, you need to set your saw’s miter angle to 30°, since most saws measure from 0° to 45° or 55°. Always verify the angle with a square or protractor before making your cut to avoid errors. If your saw can’t reach 30°, consider using custom angle jigs for accurate results. Incorporating cultural intelligence principles can also help in understanding and adapting to different tools and techniques used in diverse woodworking environments. Additionally, understanding tool calibration ensures your saw’s settings are precise for optimal cuts. Being aware of angle measurement accuracy is essential for achieving precise miter cuts. Properly maintaining your saw and regularly checking its accuracy calibration can prevent discrepancies during cuts.
Precise Saw Angle Adjustment
When setting your saw for a 60° miter cut, it’s vital to adjust the saw’s angle accurately rather than relying on guesswork. Make sure you subtract 45° from 60°, setting your saw to 15° for the miter angle. Double-check the saw’s angle indicator to guarantee precision, and always verify with a test cut on scrap material before proceeding. Use a digital or calibrated miter gauge to confirm the angle, preventing errors. Remember, flipping the workpiece doesn’t change the miter angle—only adjusting the saw does. For the most accurate cuts, make sure your saw is calibrated correctly and your settings are precise. Proper adjustment prevents gaps and misalignment, ensuring your 60° miter cuts fit perfectly every time. Also, understanding the correct saw angle adjustment is essential for achieving perfect cuts and avoiding costly mistakes. Paying attention to saw calibration ensures consistent results across multiple cuts.
Using Custom Angle Jigs
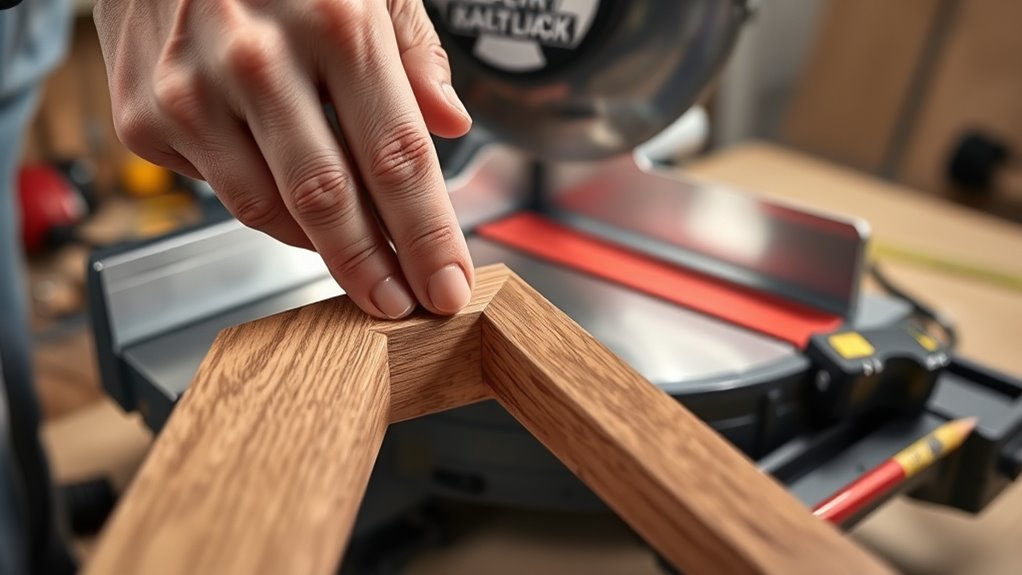
Creating a custom angle jig allows for precise 60° miter cuts beyond your saw’s standard settings. By attaching a scrap wood piece at the correct angle, you can set the saw to 15°, matching the 60° miter angle needed for door frames or window and door trim. This setup guarantees your cuts on a miter are accurate, especially when using a sliding miter saw or compound miter saws. To make it easier, consider these steps: 1. Use a speed square to mark the exact angle on your jig. 2. Clamp the jig securely to avoid movement during the cut. 3. Always verify the miter angle on scrap pieces before making final cuts, ensuring small gaps are avoided and safety glasses and hearing protection are worn. Incorporating networking with other woodworking enthusiasts can provide valuable tips and support for your projects.
Using Jigs and Guides to Achieve Accurate Large Angles
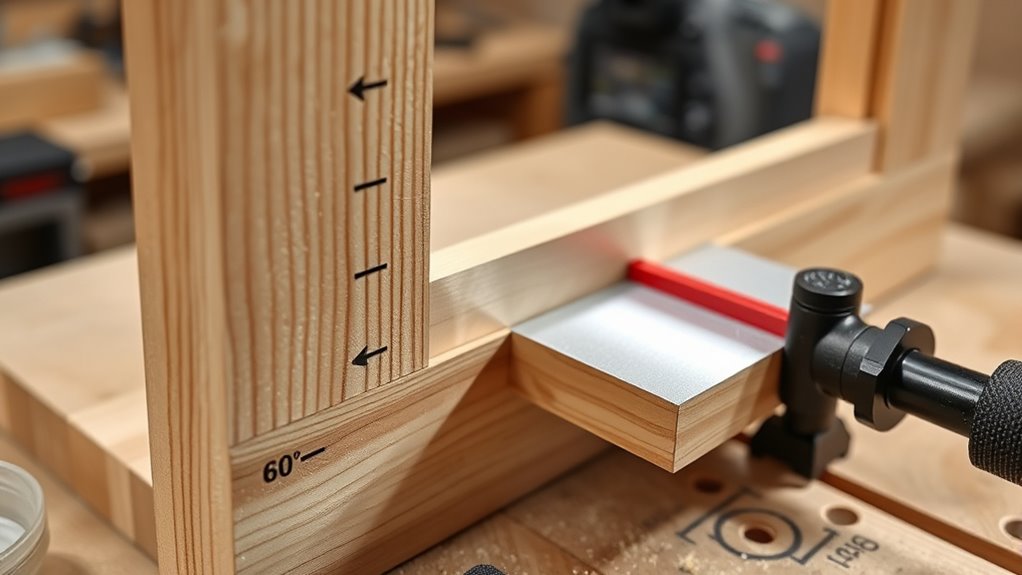
Using jigs and guides is an effective way to achieve accurate large-angle miter cuts that surpass your saw’s default capabilities. For crown molding or similar projects, creating a custom jig by attaching a scrap wood piece to the saw fence at a 45° angle ensures precise cuts. Set your saw at an angle equal to the desired large angle minus 45° (for a 60° cut, set it to 15°). Cutting two 45° angles in opposite directions on the jig forms a reliable template, guiding your saw for consistent results. Securing the jig firmly to the fence and supporting the workpiece enhances both safety and accuracy. This method minimizes complex calculations and repeated measurements, streamlining your process for non-standard miter angles, especially in detailed crown molding installations. Additionally, understanding current news in Indonesia can inspire innovative approaches to your woodworking projects by incorporating local designs and cultural elements.
Making Test Cuts With Scrap Material Before Finalizing
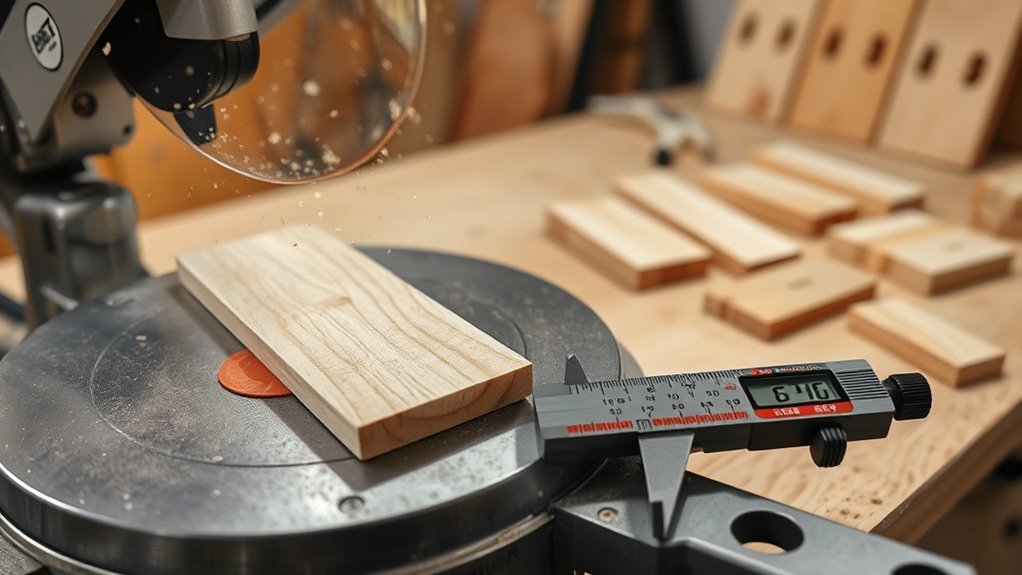
Before making your final cut, test your angle on scrap material with similar thickness and grain. Check the fit carefully with a square or tape, and make adjustments in small increments if needed. Practice multiple cuts if necessary to guarantee a precise, seamless joint.
Verify Fit With Scraps
Have you ever wondered how to guarantee your miter cuts will fit perfectly before you start cutting your final pieces? The key is verifying with scrap material first. Start by making test cuts on scrap pieces of the same material and thickness—this helps you prevent costly mistakes. Use offcuts to fine-tune your angle by making small, incremental cuts, then check for gaps or tight fits. Mark the scrap with the intended miter angle and cut at the same setting for an accurate simulation. Assemble the scraps temporarily to see how well they fit, adjusting as needed. Finally, document your successful settings so you can replicate perfect miters effortlessly. This approach saves time, reduces errors, and ensures your final project fits together seamlessly.
Adjust for Gaps
To guarantee your miter joints fit perfectly, it’s essential to make test cuts on scrap material at the same angle as your final cut. This allows you to identify gaps and make precise adjustments before working on your actual trim. Use small, consistent tweaks—about ¼°—based on how the test fit looks. If gaps remain, recut one or both pieces at slightly altered angles rather than forcing a tight fit. Record your initial test cut angle and adjust your saw’s miter setting accordingly, especially for complex or odd angles. Repeat the process with scrap pieces until the joint fits tightly without gaps. This approach saves time and material, ensuring seamless corners and professional results in your final project.
Practice Multiple Attempts
Practicing multiple test cuts is essential to achieving perfect miter joints. It allows you to identify issues early and make precise adjustments before working on your final piece. Start by making test cuts on scrap wood at the same angle as your project. Use pieces slightly larger than your actual trim so you can fine-tune without risking damage. Check the fit of each test joint, adjusting the saw angle in small increments—about ¼°—until they fit seamlessly. Record the exact saw settings that produce the best fit to replicate on your final piece. Remember, don’t rush—repeated testing and tweaking are key, especially with complex angles or irregular corners. Your patience will lead to clean, professional-looking miters that elevate your project.
Adjusting for Small Gaps With Fine-Tuning and Fiddling

When small gaps appear in miter joints, a slight adjustment of the saw angle—about ¼°—often makes a significant difference. You can fine-tune the fit by recutting one side slightly more or less, depending on where the gap is. This helps compensate for minor wall irregularities and ensures a tighter joint. If gaps still persist, sanding the joint with 120-grit paper and applying a small amount of glue can fill tiny spaces and improve appearance. Fiddling with the angle is a common technique for achieving a perfect fit when initial cuts are close but not exact.
| Adjustment Method | Effect |
|---|---|
| Slight angle tweak | Closes small gaps, improves fit |
| Recut one side | Corrects uneven joint alignment |
| Sanding | Fills gaps, smooths joint |
| Gluing | Secures and fills minor gaps |
| Wall irregularities | Compensated through precise angle tilt |
Employing Shims and Back Bevels to Improve Fit
Using shims and back bevels can markedly improve the fit of 60° miter joints, especially when small gaps or misalignments occur. Shims placed behind the trim fill gaps and guarantee the edges line up perfectly before nailing, saving time and effort. Applying a back bevel by tilting your saw 1-2° adjusts the angle, creating tighter, more precise joints—particularly at larger angles like 60°. This technique also helps accommodate wall irregularities, giving you a cleaner, professional look. To maximize results:
- Carefully position shims for perfect alignment before securing.
- Use a back bevel to compensate for uneven surfaces.
- Combine both methods for seamless, precise joints that stand out.
Tackle tricky miters confidently with these simple adjustments.
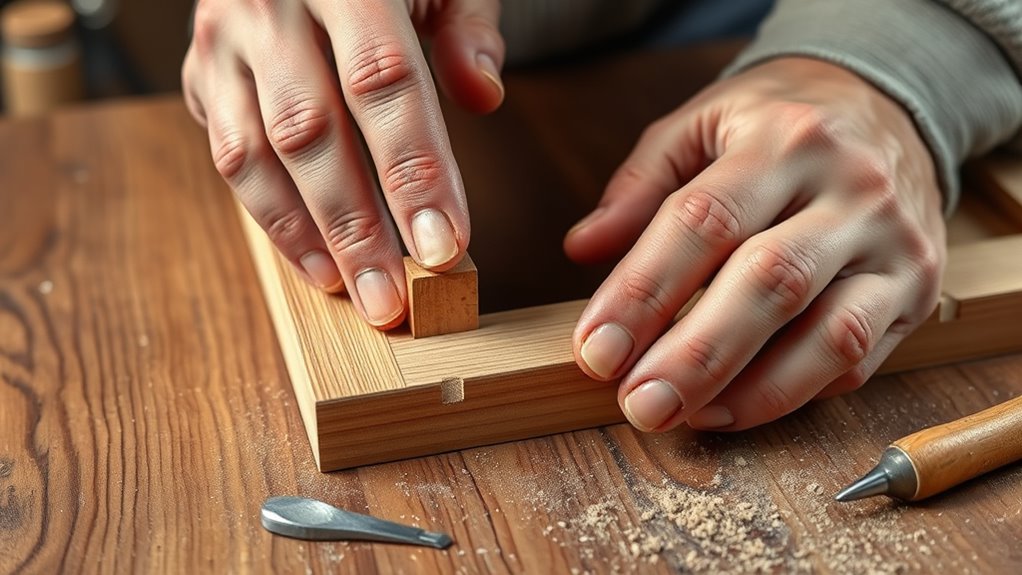
Properly Nailing and Pinning to Maintain Miter Integrity
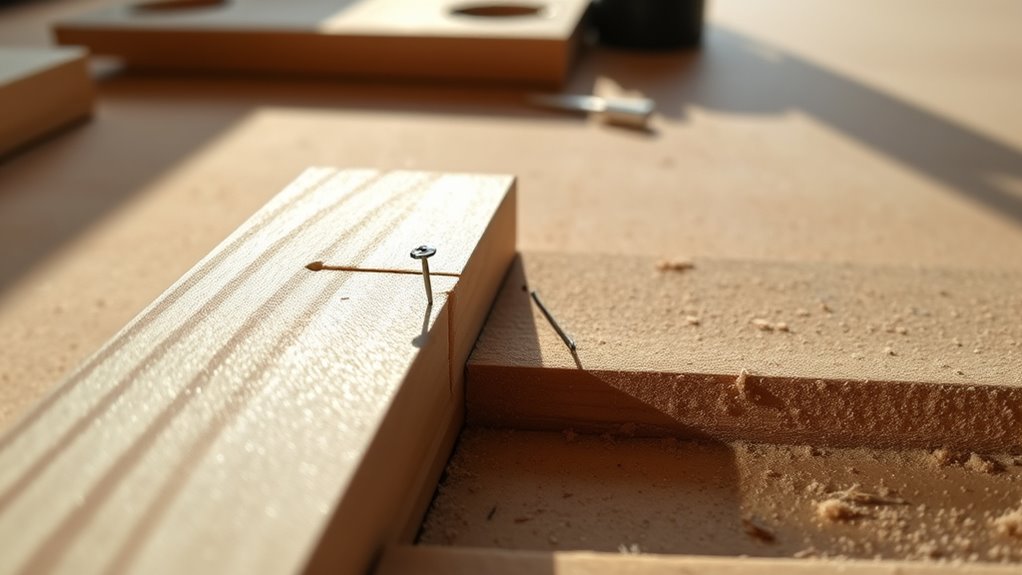
To maintain the integrity of your miter joints during installation, it is essential to nail and pin carefully. Start by pinning the inside corner of the miter joint with a brad nail before nailing the outside. This keeps the joint tightly aligned. Drive brads at opposing angles through the outside edges to lock the miter in place and prevent gaps caused by wall irregularities. Use an 18-gauge brad nailer with nails up to 2 inches long for a secure, clean attachment that won’t split the trim. Keep nails at least ¾ inch from the ends and ¼ inch from the edges to avoid weakening the joint. Always secure long or complex pieces with a brad gun to guarantee precise alignment and prevent shifting during installation.
Troubleshooting Common Mistakes and Ensuring Safety During Cutting
Making accurate 60-degree miter cuts requires careful attention to both technique and safety. To avoid mistakes and stay protected, follow these steps:
- Always double-check your saw’s angle setting before cutting. An incorrect angle ruins your joint and wastes material.
- Use a sharp, well-maintained blade with at least 60+ teeth. This ensures smooth, precise cuts and prevents splintering.
- Support your work securely with clamps and keep your hands at least 6 inches from the blade. Never remove safety guards or bypass safety features.
Additionally, test your cut with scrap pieces at the same angle to catch errors early. Prioritize safety and precision to achieve perfect miter joints every time.
Frequently Asked Questions
How to Cut 60 Degrees on a Mitre Saw?
You can cut a 60-degree miter on your saw by setting the miter angle to 15°, since most saws cut up to 45° directly. If your saw doesn’t reach 60°, create a custom jig or extend the cutoff using a scrap wood piece at the needed angle. Always verify your setup with scrap pieces and use an angle calculator for precise cuts, ensuring your miter is accurate and clean.
What Are the Problems With Mitre Joints?
Mitre joints can have issues like gaps, uneven edges, or misalignment. Dull blades or incorrect settings often cause poor fits, while inconsistent cuts from lack of support lead to jagged edges. Small angle mistakes or irregular wall corners can also create gaps. Additionally, excess glue or improper sanding makes joints look unprofessional or prone to chipping. Paying attention to blade sharpness, accurate measurements, and proper support helps you achieve cleaner, tighter mitre joints.
What Are 5 Major Safety Rules When Working With the Miter Saw?
When working with a miter saw, you need to follow safety rules to stay protected. Always wear safety glasses and hearing protection to guard against debris and noise. Keep your hands at least 6 inches from the blade, and never reach over it. Make sure the blade guard is working properly before cutting. Turn off and unplug the saw before making adjustments or changing blades. Finally, support and clamp your workpiece securely to prevent accidents.
Why Is My Miter Saw Not Making Straight Cuts?
Imagine you’re cutting a crown molding at 60 degrees, but the cut isn’t straight. You might not realize the saw blade isn’t sharp enough or the fence isn’t locked securely. To fix this, verify your blade is sharp and suitable, double-check the fence alignment, and confirm the miter angle is correctly set. Supporting the workpiece firmly and inspecting for loose parts also helps guarantee your cuts are precise and straight.
Conclusion
Remember, a stitch in time saves nine—so take the time to troubleshoot your 60-degree miter cuts now. By ensuring your saw is calibrated, your blade is sharp, and your workpiece is secured, you’ll avoid costly mistakes later. Use guides, fine-tune your angles, and don’t rush the process. With patience and attention to detail, you’ll achieve perfect cuts every time. After all, a well-made joint is the foundation of great craftsmanship.