To perform the zero-degree test on your miter saw, confirm the saw is unplugged for safety. Place a square against the blade and table, then set the blade to zero degrees, adjusting the calibration screws until the blade aligns perfectly with the square. Secure all adjustments tightly and recheck for accuracy. Regularly doing this guarantees precise, safe cuts. Keep in mind, proper calibration is key—learn more about maintaining your saw’s accuracy to get the best results.
Key Takeaways
- Confirm the blade is perfectly perpendicular to the table using a square or digital angle finder.
- Set the saw blade to zero degrees and ensure it aligns flush with the miter gauge or fence.
- Tighten calibration screws or knobs as per the user manual for precise blade alignment.
- Recheck the alignment after adjustments to ensure accuracy and consistency.
- Regularly perform the zero-degree test to maintain cutting precision and safety over time.
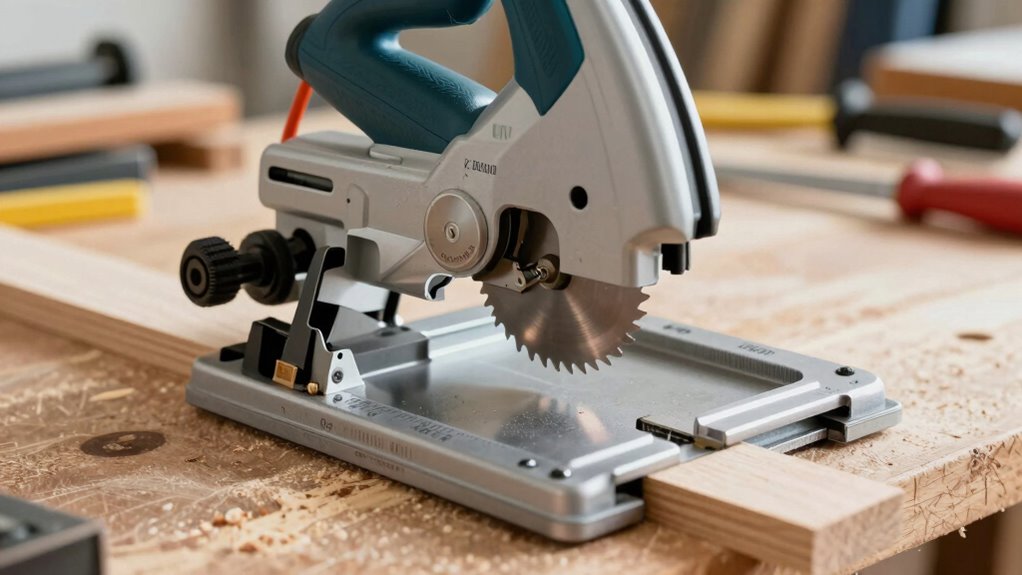
Proper calibration of your miter saw is essential to achieve accurate cuts and guarantee safety during your projects. When your saw isn’t properly aligned, you risk making imperfect cuts that can compromise the quality of your work and increase the chance of accidents. Before diving into any cutting task, it’s vital to perform a zero-degree test to verify the saw’s calibration. This simple check helps ensure that your saw’s blade is perfectly perpendicular to the base, which is crucial for precise, safe cuts.
Calibrating your miter saw ensures accurate cuts and safe operation.
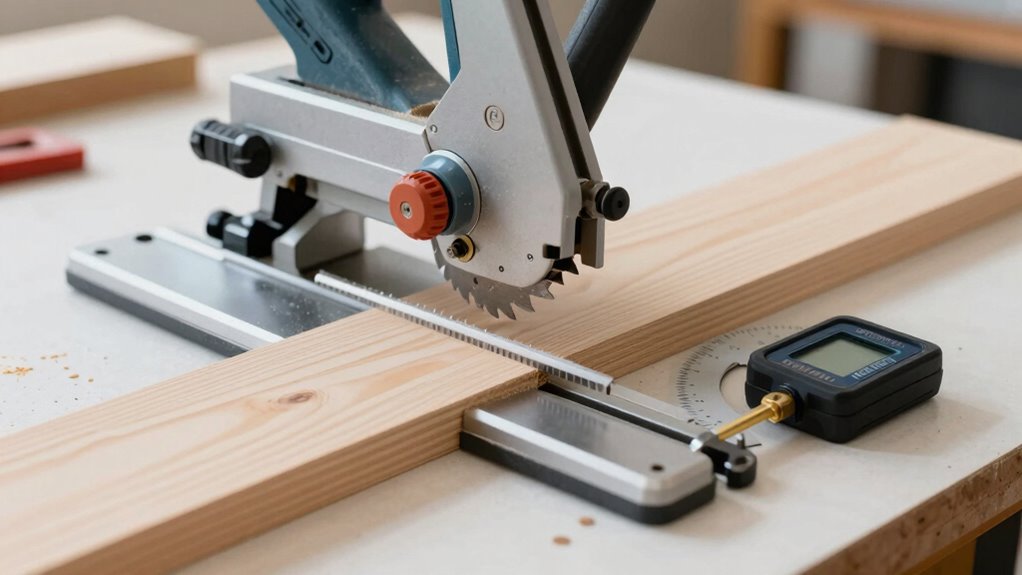
Start by gathering the right calibration tools, such as a combination square or a digital angle finder, to help you make accurate measurements. Using these tools, position your miter saw on a stable surface and set the blade to zero degrees, aligning it with the miter gauge or fence. Make sure the saw is unplugged or turned off during setup to prevent any accidental activation. Once the saw is secured, check the blade’s alignment by placing the square against the blade and the table. If the blade is perfectly perpendicular, the square will sit flush against both surfaces. If there’s a gap or the blade leans away from the square, your saw needs adjustment.
Next, consult your saw’s user manual to find the calibration screws or knobs that allow you to make fine adjustments to the blade’s angle. Carefully tighten or loosen these components until the blade is perfectly aligned with the square. Double-check your work by repeating the measurement; consistency is key. It’s also wise to verify that the miter gauge or fence is square and securely fixed in place, as any looseness here can affect the accuracy of your cuts. Regularly checking the blade alignment and performing this test helps maintain optimal cutting precision over time.
Throughout this process, keep safety precautions at the forefront. Always disconnect the saw from power before adjusting any parts, and wear safety glasses to protect your eyes from debris. Proper calibration tools and careful adjustments not only improve the precision of your cuts but also reduce the risk of kickback or injury caused by misalignment. Regularly performing the zero-degree test ensures your miter saw remains in excellent condition, saving you time and frustration on future projects. Once you’re confident that your saw is properly calibrated, you can proceed with your cuts knowing that safety and accuracy are maximized. Maintaining this routine will help you produce cleaner, more precise work while keeping your workspace safe and efficient.

LEXIVON Aluminum Digital Angle Finder Gauge, 5-inch/130mm Multi-Purpose Protractor, Includes XL Display and Rugged Zippered Pouch (LX-DAF5)
SIMPLE INTERFACE: This digital angle finder features a straightforward 4-button interface for easy operation: ZERO to recalibrate at…
As an affiliate, we earn on qualifying purchases.
As an affiliate, we earn on qualifying purchases.
Frequently Asked Questions
Can Calibration Improve the Cut Quality of My Miter Saw?
Yes, calibration can markedly improve your miter saw’s cut quality by ensuring precise alignment. When you calibrate your saw, you eliminate misalignments that cause uneven or rough cuts. Regularly checking and adjusting your saw’s settings helps maintain accuracy, resulting in cleaner, more precise cuts. This process boosts your confidence in your work and reduces material waste, making calibration an essential step for achieving professional-quality results every time.
How Often Should I Perform the Zero-Degree Test?
You should perform the zero-degree test every time you notice inaccuracies or after changing blades to maintain ideal calibration. Incorporate it into your maintenance schedule, ideally once a month or after extensive use. Regular calibration frequency ensures your miter saw stays precise, preventing uneven cuts. By routinely checking the zero-degree setting, you keep your saw in top shape, ensuring safe, accurate, and professional results with each project.
What Tools Are Necessary for Miter Saw Calibration?
To calibrate your miter saw, you’ll need measuring tools like a combination square or digital angle gauge to check accuracy. An alignment jig can help guarantee the saw’s fence and blade are properly aligned. These tools make it easier to verify and adjust the saw’s settings, ensuring precise cuts. Always use quality, reliable measuring tools for best results and to maintain safety during calibration.
Is Calibration Different for Sliding Versus Non-Sliding Miter Saws?
Yes, calibration varies between sliding and non-sliding miter saws. For sliding models, you need to check both the miter and sliding mechanism alignment to guarantee smooth operation and accurate cuts. Non-sliding models focus primarily on the miter angle adjustment. In both cases, you should verify the zero-degree cut first, adjusting the bevel and miter settings accordingly. Proper calibration guarantees precise cuts regardless of the saw type.
Can Misalignment Cause Safety Hazards During Cuts?
Misalignment can definitely cause safety hazards during cuts. When your miter saw isn’t properly aligned, it increases the risk of kickback, uneven cuts, or the saw slipping, which can lead to injuries. Ignoring misalignment risks your safety and the quality of your work. Regularly checking and calibrating your saw helps prevent these hazards, ensuring safe, accurate cuts every time you use your tool.

IRWIN Tools Combination Square, Metal-Body, 6-Inch (1794468), Blue
The Black, Precision-Etched Scales On This Combination Square Give Accurate 90° And 45° Readings
As an affiliate, we earn on qualifying purchases.
As an affiliate, we earn on qualifying purchases.
Conclusion
Now that you’ve mastered the zero-degree test, your miter saw is ready to cut with confidence. Think of calibration as tuning a finely crafted instrument, where each adjustment sings in harmony. When your saw’s angles are true, your projects come to life with precision and grace. Keep this practice in your toolbox, and watch your craftsmanship flourish like a well-oiled machine, turning every cut into a masterpiece waiting to be revealed.

394589-01 Screw Compatible with Dewalt Miter Saw Stand – Replace for DWS779 DWS780 DW703 DW704 DW705S – 2 Pack
Part Number: Screw part number 394589-01, replacement for Dewalt miter saw screws. Measures approximately 0.80 X 0.40 X…
As an affiliate, we earn on qualifying purchases.
As an affiliate, we earn on qualifying purchases.

POWERTEC 71828 Table Saw Angle Gauge, Digital Angle Finder Protractor, Digital Level Box, 1 Pack, Digital Angle Gauge for Woodworking, Table Saw, Miter Saw
INCLUDES: (1) Digital Level Angle Finder Box (Battery NOT included). The Angle Gauge is ±0.2° in accuracy (±0.1°…
As an affiliate, we earn on qualifying purchases.
As an affiliate, we earn on qualifying purchases.