Before staining, always prepare your wood surface properly to prevent blotching and achieve a uniform color. Lightly sand the wood with fine-grit sandpaper along the grain, and remove all dust using a tack cloth or damp rag. Proper sanding opens the pores evenly, reducing uneven stain absorption. When you focus on thorough surface prep, you’ll notice a smoother, more consistent finish. Keep going to discover more tips that will help guarantee your project turns out flawless.
Key Takeaways
- Apply a pre-stain conditioner or wood conditioner before staining to ensure even color absorption.
- Sand the wood surface thoroughly with fine-grit paper along the grain to smooth out uneven areas and open pores.
- Remove all dust and debris after sanding using a tack cloth to prevent blotching caused by surface contaminants.
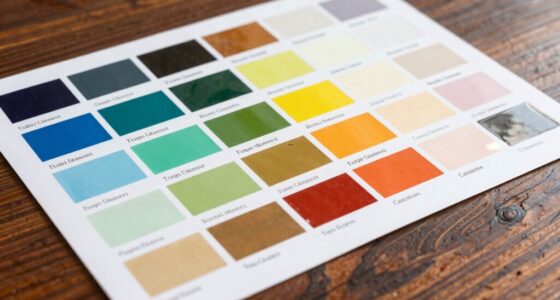
- Test the stain on a hidden area to check for color consistency and adjust application techniques if needed.
- Use a pre-stain conditioner especially on soft or porous woods prone to blotching, for a more uniform finish.

If you’ve ever dealt with stubborn stains that leave blotchy marks on your fabric or upholstery, you know how frustrating it can be to restore the original look. The same challenge applies when finishing wood surfaces, especially if you want an even, professional appearance. One common issue is uneven stain absorption, which results in blotching and highlights the wood’s natural grain inconsistencies. To fix this, the key is to prepare the surface properly before applying the stain. This involves understanding your wood grain and employing effective sanding techniques to create a smooth, uniform surface that accepts stain evenly.
Start by examining the wood grain pattern. Different types of wood have varying grain densities and textures, which influence how stain penetrates. If you notice areas with more pronounced grain or uneven texture, you’ll want to focus on those spots during sanding. Use a fine-grit sandpaper, ideally between 220 and 320 grit, to gently sand the entire surface. This process removes any existing finish, dirt, or oils that can interfere with stain absorption. Pay particular attention to the wood grain; sanding along the grain prevents scratches that can show up after staining. Proper sanding techniques help open the wood’s pores uniformly, reducing the risk of blotching and ensuring a consistent color. Additionally, understanding how wood grain characteristics impact stain absorption can help you choose the best finishing approach.
As you sand, work slowly and evenly, maintaining consistent pressure. This approach prevents creating dips or uneven spots that could cause blotches later. Once finished, wipe away all dust with a tack cloth or a damp rag. Removing dust is essential, as residual particles can interfere with stain penetration and lead to uneven coloring. If you find areas that are particularly uneven or have stubborn grain patterns, you might consider lightly sanding again or using a sanding block for better control. The goal is to achieve a smooth, uniform surface that’s ready to accept stain evenly.

Varathane 381123 Water Based Pre-Stain Wood Conditioner, Quart
- Prepares wood for even stain color: Pre-stain wood conditioner preps wood for even color
- Fast-drying, easy-to-use formula: Easy to use, water-based formula dries fast for quick project completion
- Reduces blotching on soft woods: Low odor wood conditioner prevents blotching on soft woods and ensures a high quality finish
As an affiliate, we earn on qualifying purchases.
As an affiliate, we earn on qualifying purchases.
Frequently Asked Questions
Can Stain Blotching Occur on All Types of Wood?
Yes, stain blotching can occur on all types of wood because each wood grain absorbs stain differently. Open-grain woods like oak tend to absorb more stain unevenly, leading to blotches, while closed-grain woods like maple absorb stain more evenly. To prevent this, you should use a pre-finish step that seals the wood surface, helping to control stain absorption and achieve a more uniform color across any wood type.
How Long Should the Pre-Finish Step Be Applied?
Like painting a sunrise, the perfect application duration for your pre-finish step is vital. You should apply it evenly and let it dry completely, usually requiring a drying time of 15 to 30 minutes. Keep an eye on the wood’s surface; once it feels tack-free, you’re ready to move on. Rushing this step risks uneven stain absorption, so patience guarantees a beautifully consistent finish.
Is Special Equipment Needed for the Blotching Fix?
You don’t need special equipment for the blotching fix, but you should have proper tools like brushes, rags, and gloves. Always follow safety precautions by wearing gloves and working in a well-ventilated area to avoid fumes or skin contact. Use brushes or applicators suitable for your finish, and clean tools thoroughly afterward. These steps guarantee safe handling and effective application, resulting in a more even stain color.
Can This Method Be Used on Previously Finished Wood?
Imagine a smooth, glossy surface ready for a new touch of life. You can apply this wood treatment to previously finished wood, but you must guarantee finish compatibility first. Lightly sand the surface to remove the top layer, then follow the blotching fix steps. This process helps even out color, but always test a small area first to avoid damaging the existing finish and to confirm it responds well to the treatment.
What Are Common Mistakes to Avoid During the Process?
You should avoid applying the pre-finish step too early or too late, as improper application timing can cause uneven results. Always check product compatibility to prevent reactions that damage your wood. Rushing the process or skipping surface preparation can lead to blotching or streaks. Take your time, follow manufacturer instructions carefully, and test on a small area first to guarantee even color and proper adhesion.
Conclusion
By following this pre-finish step, you’ll guarantee your stain application is smooth and even, preventing blotching before it starts. Don’t leave things to chance—taking this extra moment can save you from a world of frustration later on. Remember, a stitch in time saves nine, so tackle the blotches early for a flawless finish. With this simple fix, your project will look professional and polished, making all your efforts worthwhile.