Did you know that nearly 70% of DIYers struggle with baseboard cutting? This surprising statistic highlights just how crucial the right tools for baseboards can be in transforming a home project from ordinary to exceptional. When it comes to DIY baseboard installation, mastering the art of precise cuts is essential for a flawless finish. By choosing the appropriate tools and techniques, you’ll not only enhance your skills but also ensure your baseboards look impeccable. In this guide, we’ll explore top choices like the oscillating multi-tool and the Japanese pull saw, both of which offer unmatched versatility and precision for any project.
Key Takeaways
- Proper tools are essential for effective baseboard cutting.
- Mastering cutting techniques enhances your DIY skills.
- Oscillating multi-tools offer versatility in baseboard projects.
- Japanese pull saws provide precision and ease of use.
- Investing time in learning techniques leads to polished results.
The Importance of Proper Baseboard Cutting
Proper baseboard cutting offers significant advantages that enhance both the visual appeal and functionality of your home. By ensuring clean and precise cuts, you create a professional finish that aligns with your design vision. Understanding effective baseboard cutting techniques allows for seamless joints that blend well with door frames and walls, eliminating unsightly gaps or mismatched angles.
This knowledge contributes to the benefits of proper baseboard cutting, as it establishes the foundation for high-quality baseboard joinery. Techniques like mitering and coping not only improve aesthetics but also accommodate the natural expansion and contraction of wood, preventing future issues. Ultimately, having these skills empowers you to handle baseboard projects with confidence and expertise.

Choosing the Right Tool for Cutting Baseboards
Selecting the appropriate tools for cutting baseboards is essential for achieving clean and professional results. A miter saw stands out as one of the best tools for power cutting, ensuring precision angles for various baseboard joints. On the other hand, if you prefer a more hands-on approach, the hand saw vs. power tools debate favors a Japanese pull saw for straightforward hand cutting tasks. Its simplicity makes it an excellent choice for DIY enthusiasts.
For those tackling intricate trim work, oscillating multi-tools offer flexibility and ease. These versatile tools can handle a variety of cutting tasks, making them a valuable addition to your toolkit. Your choice should reflect the specific needs of your project, whether you require complex cuts or straightforward trimming.

| Tool Type | Best Use | Advantages |
|---|---|---|
| Miter Saw | Precision angles | High accuracy and speed |
| Hand Saw | Straight cuts | Affordable and portable |
| Oscillating Multi-Tool | Intricate cuts | Versatile and easy to control |
| Japanese Pull Saw | Hand cutting | Clean cuts with minimal effort |
Reasons to Use an Oscillating Multi-Tool
The oscillating multi-tool has rapidly gained popularity among DIY enthusiasts and professionals alike. Its unique design accommodates a wide range of attachments, making it a go-to choice for projects requiring precision and versatility. Understanding the benefits of oscillating tools unveils why this tool should be a staple in your workshop, especially when it comes to cutting baseboards.
Versatility of Oscillating Tools
This tool excels in various applications beyond just cutting baseboards. With its ability to handle different materials like wood, drywall, and even metal, an oscillating multi-tool truly shines in complex projects. The range of attachments available allows you to tackle various cutting styles, from detailed work to broader cuts. This adaptability reduces the need for multiple tools, saving both space and money.
Efficiency in Cutting Baseboards
When time is critical during installation, the oscillating multi-tool offers rapid and clean cuts. Its precision minimizes the need for additional finishing work, ensuring that your baseboards fit seamlessly. By providing clean joints, you can significantly enhance workflow and overall aesthetics in your projects. Choosing this tool for cutting baseboards means you will enjoy the perfect cut every time.

Understanding the Japanese Pull Saw
The Japanese pull saw stands out in the world of hand tools, particularly for tasks like baseboard cutting. Its unique design and traditional cutting techniques offer distinct advantages over other saws. If you’re seeking a tool that provides precision and simplicity, look no further than the Japanese pull saw.
Benefits of Using a Hand Saw
One of the primary benefits of hand saws is their ease of use in various situations. The Japanese pull saw allows for cutting on the pull stroke, requiring less effort while providing greater control. This feature makes it easier for you to execute intricate cuts that might be challenging with traditional push saws.
Additionally, the portability of hand saws like the Japanese pull saw means they can be used even in tight spaces. You won’t have to wrestle with electrical cords or battery life whenever you need to make a quick cut. This convenience also extends to outdoor projects or smaller jobs where mobility is key.
| Feature | Japanese Pull Saw | Traditional Hand Saw |
|---|---|---|
| Cutting Technique | Pull Stroke | Push Stroke |
| Control Level | High | Moderate |
| Portability | Excellent | Good |
| Effort Required | Low | High |
| Ideal For | Intricate Cuts | General Use |

In summary, a Japanese pull saw not only embodies the benefits of hand saws but also represents a fascinating blend of innovation and traditional craftsmanship. Embracing this tool can enhance your cutting precision and elevate your overall woodworking experience.
Essential Techniques for Measuring Baseboards
Accurate measurements play a vital role in achieving a polished result when installing baseboards. Utilizing effective measuring techniques for baseboards streamlines the process and minimizes the chance of errors. One effective approach involves measuring from the corner outward. This method provides consistency and helps you avoid miscalculations that could arise from inaccurate tape placement.
Employing a laser measurer can further enhance your accuracy, especially over long stretches of boards. Such tools offer precision, reducing the likelihood of human error. For manual measuring, using a block to minimize tape bends can greatly assist in ensuring straight, clean measurements.
Marking directly on the board can simplify decision-making during installation. Be mindful that wall angles may differ, particularly in older homes where corners are rarely square. Keeping this in mind during your baseboard layout will guide you to make the necessary adjustments, ensuring a seamless fit. Remember these measurement tips as you prepare for your next baseboard project.

How to Cut Baseboards Like a Pro with This Tool
DIY baseboard installation can elevate the look of any room, but proper cutting techniques are crucial for achieving a seamless finish. Whether you opt for an oscillating multi-tool or a Japanese pull saw, understanding the steps for cutting baseboards correctly will ensure your project stands out with professional baseboard cuts.
Step-by-Step Guide to Cutting Baseboards
Follow these important steps for effectively cutting baseboards:
- Measure the area where the baseboard will be installed. Use a tape measure to ensure accuracy.
- Mark your cutting line clearly with a pencil. Consider using a square for perfectly straight lines.
- Set up your tool with the appropriate blade designed for cutting baseboards.
- Secure the baseboard against the saw, making sure it won’t slip during the cut.
- Execute the cut steadily, maintaining control of the saw throughout the process.
Tips for Achieving Precise Cuts
Precision is key when cutting baseboards. Incorporate these tips into your workflow:
- Double-check your measurements and marks before making any cuts.
- Use a fence or guide to help achieve straight cuts.
- Control the speed of your tool to avoid rushing, which can lead to mistakes.
- Practice on scrap pieces to build familiarity with the cutting tool.

Coping vs. Mitering: What You Need to Know
When approaching baseboard finishing, understanding the difference between coping and mitering techniques can greatly enhance your results. Mitering techniques involve cutting each piece of baseboard at an angle, usually 45 degrees, to connect them at corners. This method provides a clean look, but it can be less forgiving, especially if walls aren’t perfectly straight.
On the other hand, coping techniques allow for a more flexible fit. Instead of cutting both pieces at an angle, one piece is cut with a contour that matches the shape of the adjoining baseboard. This technique often results in tighter joints that can better accommodate wood movement due to changes in temperature and humidity.

Many professionals prefer coping for interior corners because it typically leads to a more polished finish. While both methods require skill and precision, knowing when to apply each technique will ultimately improve your craftsmanship in baseboard finishing.
| Technique | Advantages | Disadvantages |
|---|---|---|
| Mitering | Clean angles, visually appealing | Less forgiving of imperfect angles |
| Coping | Flexible fit, better for wood movement | More challenging to master |
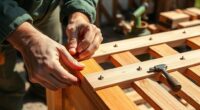
Installation Tips for Seamless Baseboard Joints
Installing baseboards requires precision, especially at the joints. Use these baseboard installation tips to ensure your project looks professional. Start by cutting your baseboards accurately, paying attention to angles for seamless joints. When it’s time to install, position each piece carefully and use a block to nudge them into place. This helps achieve tight fits without crowding the casing, which can detract from the overall appearance.
If adjustments are necessary, don’t hesitate to trim your cuts until you obtain perfect fits. Remember, the quality of these joints plays a vital role in the overall aesthetic of your space. For the best results in baseboard finishing, take the time to ensure each connection is flawless.

| Tip | Description |
|---|---|
| Measure Twice | Always double-check your measurements to ensure accurate cuts. |
| Use Quality Tools | Invest in good quality cutting tools for cleaner edges. |
| Fill Gaps | Use caulk to fill any gaps between the baseboard and wall for a smooth finish. |
| Sand Edges | Sand edges after cutting to avoid sharp corners or rough spots. |
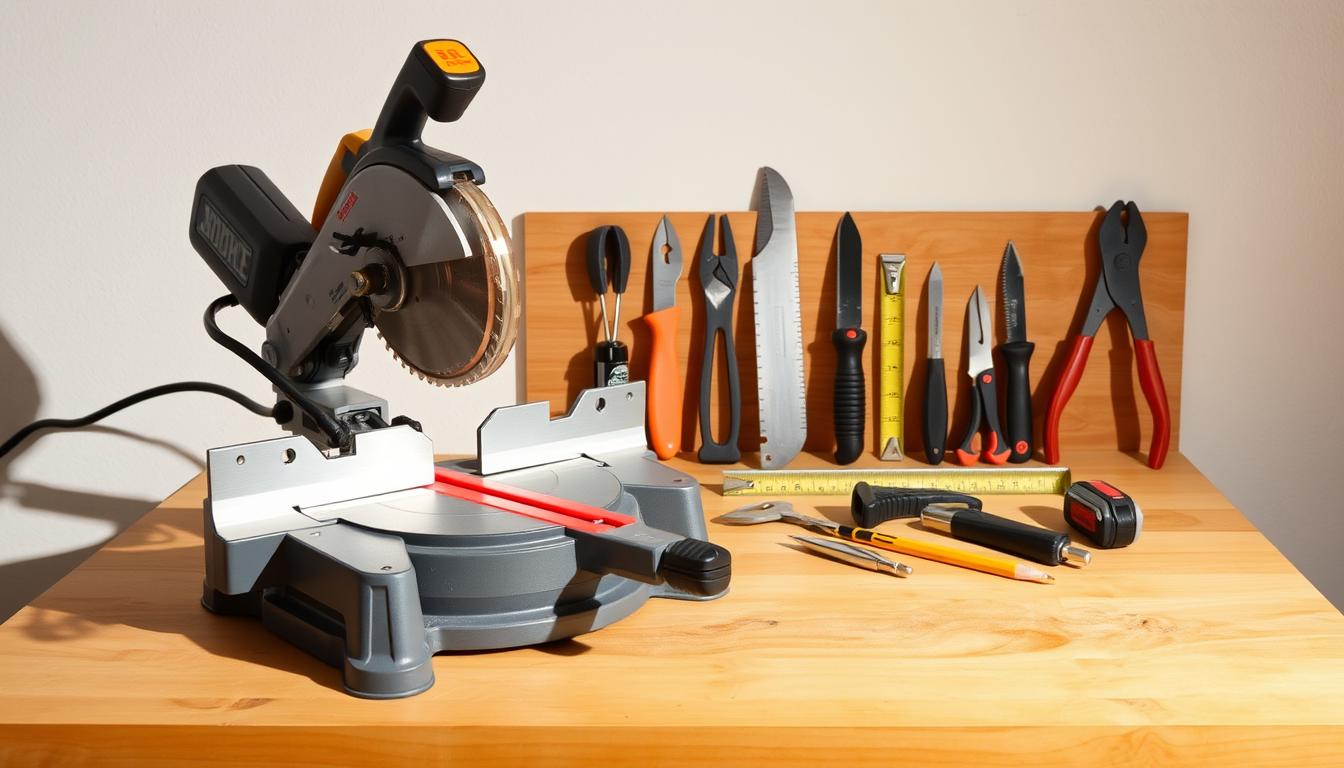
Tools to Have on Hand for Baseboard Projects
Having the right tools for installing baseboards can make all the difference in the quality and efficiency of your installation project. Begin by assembling a collection of essential woodworking tools to tackle your baseboard tasks with confidence. Start with a miter saw or a reliable hand saw for accurate cuts. An oscillating multi-tool adds versatility, especially for intricate cuts around corners and obstacles.
A measuring tape ensures you get precise measurements, while a utility knife is essential for trimming and adjustments during installation. Don’t forget clamps to secure your pieces in place and a level to guarantee straight and even placements. A nail gun saves time and effort compared to traditional nailing methods, adding to your overall project efficiency.

Having a well-thought-out baseboard project checklist can streamline the overall process. Ensure that each tool is in good condition, and prepare your workspace for a professional results.
| Tool | Purpose |
|---|---|
| Miter Saw | Precise angle cuts for corners |
| Oscillating Multi-Tool | Versatile cuts for tight spaces |
| Measuring Tape | Accurate length measurements |
| Utility Knife | Trimming and fine adjustments |
| Clamps | Securing pieces during installation |
| Level | Ensuring even installation |
| Nail Gun | Speedy nailing for secure joints |
Conclusion
Mastering baseboard cutting techniques can transform the appearance of your home. With the valuable insights shared in this baseboard installation guide, you now have the essential knowledge to carry out your projects effectively. Each method discussed—from using oscillating multi-tools to understanding the benefits of the Japanese pull saw—has been tailored to enhance your cutting proficiency.
By following these professional tips, you can achieve precision in your cuts, ensuring seamless joint installations. This not only elevates the aesthetic appeal of your interiors but also boosts your confidence in tackling future DIY endeavors. Remember, the right tools and techniques can make all the difference in your baseboard projects.
As you embark on your journey to enhance your space, keep these strategies in mind. With practice and the right approach, you’re well on your way to being a baseboard cutting expert, creating an inviting atmosphere in every room of your home.