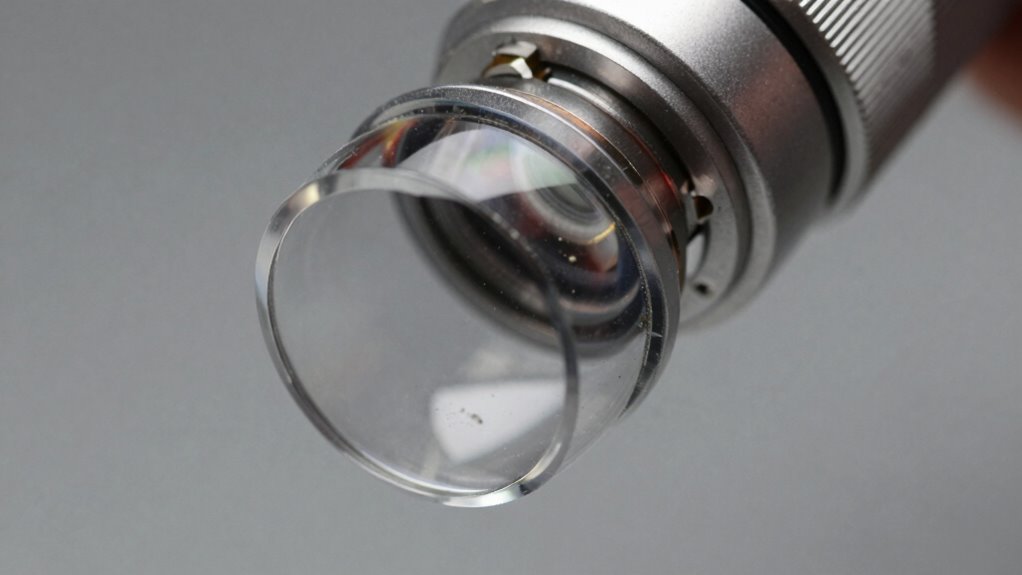

A tiny smudge or fingerprint on your laser lens can drastically reduce engraving quality by scattering or distorting the laser beam. This small dirt affects focus, leading to uneven cuts, faded marks, or blurry images. Regularly cleaning your lens with proper tools and gentle techniques keeps the optical clarity intact and guarantees peak performance. Maintaining a clean lens prevents costly damage and improves results—learn the right methods to keep your laser at its best.
Key Takeaways
- Tiny smudges on the lens can scatter or distort the laser beam, compromising engraving accuracy.
- Regular cleaning prevents small smudges from accumulating and affecting laser performance over time.
- Use gentle, lint-free cloths and optical cleaning solutions to effectively remove smudges without scratching.
- Immediate cleaning after use ensures smudges don’t set and preserve optimal beam focus.
- Proper lens maintenance enhances engraving quality, reduces errors, and extends equipment lifespan.

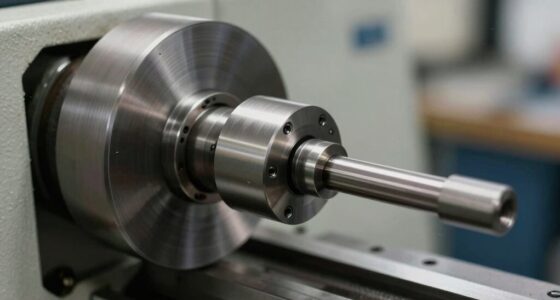
Have you ever noticed your laser equipment’s performance decline due to dirty lenses? If so, you’re not alone. Over time, dust, fingerprints, and smudges can accumulate on the lens surface, substantially affecting optical clarity. When the lens isn’t clean, the laser beam becomes scattered or distorted, leading to uneven engraving, inconsistent cuts, or faded marks. The key to maintaining ideal laser performance is regular attention to maintenance routines that prioritize lens cleanliness. By keeping your lenses spotless, you guarantee that the laser beam remains focused and precise, delivering high-quality results every time.
Optical clarity is fundamental to laser engraving and cutting. Even the tiniest smudge can cause a drop in beam intensity or lead to misalignment, which impacts the final output. Dirt and debris act like tiny barriers, preventing the laser from reaching its full potential. This not only compromises the quality but can also strain the laser equipment, increasing the risk of damage over time. Consequently, establishing consistent maintenance routines is essential. These routines should include gentle cleaning methods, such as using specialized lens wipes or soft, lint-free cloths, along with appropriate cleaning solutions designed specifically for optical components. Avoid harsh chemicals or abrasive materials that could scratch or damage the delicate surface of the lens.
Incorporating regular cleaning into your maintenance routines helps you catch dirt and smudges before they become major problems. It’s best to clean the lens immediately after each use or at the end of each workday, especially if you’re working in a dusty or smoky environment. When cleaning, handle the lens with care, holding it by the edges to prevent leaving fingerprints on the surface. Use a gentle, circular motion to wipe away particles, and ensure no residue remains. Additionally, understanding lens maintenance is crucial for extending the lifespan of your equipment and ensuring optimal performance. Remember, a clean lens not only improves optical clarity but also extends the lifespan of your equipment. Neglecting routine cleaning can lead to lens scratches, clouding, or even permanent damage, which can be costly and time-consuming to repair.

Arsvita CD Laser Lens Cleaner Disc Cleaning Set for CD/VCD/DVD Player, Safe and Effective
【Why to Use】Laser Lens Cleaner for CD/VCD/DVD players experiencing slow loading, skipping or freezing of discs during playback.
As an affiliate, we earn on qualifying purchases.
As an affiliate, we earn on qualifying purchases.
Frequently Asked Questions
How Often Should Laser Lenses Be Cleaned for Optimal Performance?
You should clean your laser lenses regularly, ideally every 20 to 30 hours of use, to prevent lens contamination. Frequent cleaning maintains peak performance by removing dust, smudges, and debris that can affect engraving quality. Keep an eye on the lens condition and increase cleaning frequency if you notice a drop in precision or if the environment is dusty. Consistent maintenance ensures your laser operates at its best.
Can Improper Cleaning Damage the Laser Lens?
Did you know that improper cleaning can cause lens damage in over 30% of cases? Yes, if you don’t follow proper cleaning frequency and techniques, you risk scratching or misaligning the lens. You should handle cleaning carefully, using appropriate materials, and avoid excessive force. Ignoring proper procedures can lead to costly repairs and reduced engraving quality, so always clean with precision and patience to protect your lens.
What Tools Are Safest for Cleaning Delicate Laser Lenses?
You should use soft, lint-free cloths or microfiber towels for lens maintenance, ensuring they’re gentle enough for delicate laser lenses. Avoid harsh abrasives or paper products that can scratch. Use a small amount of lens cleaning solution specifically designed for optical surfaces. Clean your lenses regularly—about once a month or as needed—based on usage—to prevent dirt buildup. Proper cleaning tools help maintain peak laser performance and prevent damage from improper cleaning techniques.
Are There Specific Cleaning Solutions Recommended for Laser Lenses?
You might think any cleaning solution will do, but for laser lenses, it’s best to stick with manufacturer-recommended solutions like isopropyl alcohol (preferably 99%) or specialized lens cleaning solutions. Avoid harsh chemicals that can damage delicate coatings. Regular lens cleaning frequency depends on usage, but don’t overdo it—once a month usually suffices. Proper cleaning guarantees the best engraving quality, because sometimes, the tiniest smudge truly wrecks everything.
How Can I Tell if My Laser Lens Needs Cleaning?
You’ll notice your laser lens needs cleaning if you see lens fog or dust buildup, which can cause a decrease in engraving quality. If your laser’s beam seems less precise, or the engraving appears blurry or inconsistent, it’s time to inspect the lens closely. Regularly check for these signs to maintain peak performance, and clean the lens carefully before dust or fog impacts your results further.

ZEISS Pre-Moistened Lens Cleaning Wipes, 200 Count
Gentle: ZEISS lens wipes are pre-moistened and designed to remove smudges and dirt for a through gentle cleaning.
As an affiliate, we earn on qualifying purchases.
As an affiliate, we earn on qualifying purchases.
Conclusion
Think of your laser lens as the eye of a master artist. When tiny smudges cloud its vision, even the sharpest tools can’t create their best work. Regular cleaning keeps this eye clear, ensuring your engravings stay crisp and flawless. Don’t let a small speck blind your potential—shine a light on your craft by keeping your lens spotless. After all, a clear eye sees the masterpiece hidden within every detail.

700 Sheets Lens Cleaning Tissue Paper – Premium Lens Paper for Microscope, Camera Lenses, Laser Lens, Precision Optics, Ideal for Lens Cleaning and Maintenance, Lens Cleaning Wipe
Complete Cleaning Solution: Includes 700 sheets of lens cleaning tissue paper, perfectly sized for cleaning delicate surfaces such…
As an affiliate, we earn on qualifying purchases.
As an affiliate, we earn on qualifying purchases.

SmoTecQ 32 Pack Microfiber Cleaning Cloths for Glasses (Individually Wrapped) – Premium Optical Lens Cleaner for Screens, iPhone, iPad, Camera & Eyeglasses – Washable & Lint Free (Black & Grey)
THE VALUE CHOICE – 32 PREMIUM PACK: Experience brand-name quality without the price tag. You get 32 professional-grade…
As an affiliate, we earn on qualifying purchases.
As an affiliate, we earn on qualifying purchases.