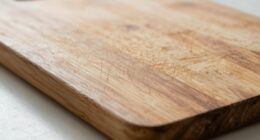

To finish oak without dark grain lines, you need to fill the pores properly. Choose a filler that matches your oak or opt for clear to keep the natural look. Before applying, make sure the surface is clean, smooth, and dry. Use a putty knife to press filler into the pores, wipe away excess, then let it dry and lightly sand. Proper pore filling creates a smooth, even surface—stay tuned to learn more about perfecting your oak finish.
Key Takeaways
- Match pore filler color to oak or use clear to prevent dark grain lines from showing through the finish.
- Properly prepare the surface by cleaning and sanding to ensure optimal filler adhesion and even application.
- Apply pore filler evenly with a putty knife, pressing into open pores, then wipe away excess immediately.
- Allow the filler to dry fully, then lightly sand for a smooth, uniform surface before finishing.
- Using high-quality, compatible pore fillers and correct application techniques helps achieve a dark-line-free oak finish.
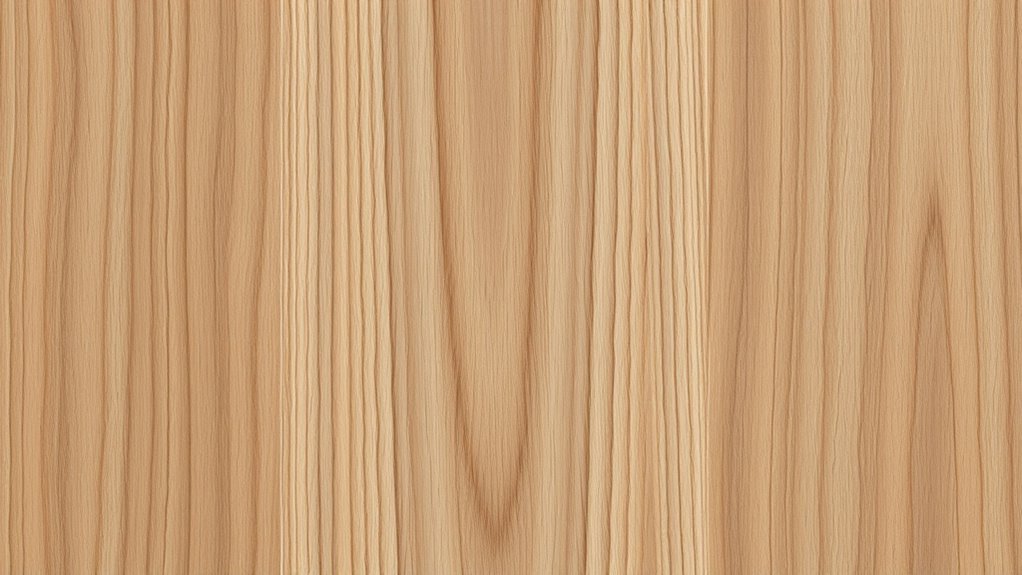
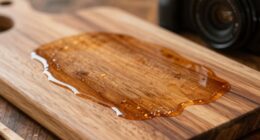
Finishing oak can highlight its natural beauty, but its open pores often require filling to achieve a smooth, professional-looking surface. Oak’s distinctive grain pattern adds character, but without proper pore filling, the finish may appear uneven, dull, or marred by dark grain lines that distract from its natural elegance. To maintain the clarity of the grain pattern and enhance the overall aesthetic, you need to choose a pore-filling method suited for oak. The right filling not only smooths the surface but also improves finish durability, guaranteeing your project lasts through years of use without chipping or wearing unevenly.
Finishing oak requires pore filling to enhance beauty and durability.
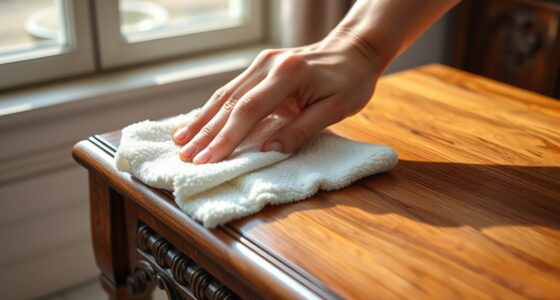
Start by selecting a pore filler that matches the color of your oak or is clear, depending on your desired look. A clear filler preserves the natural tone and grain pattern, making the wood appear seamless and vibrant. For a more uniform appearance, especially if you want to conceal the open pores completely, a tinted filler can help balance the color and prevent dark lines from showing through the finish. Before applying, verify your oak surface is clean, sanded smooth, and free of dust. Proper surface prep is vital because any debris or roughness can interfere with the filler’s adhesion and lead to an uneven finish.
When applying the pore filler, use a putty knife or a soft cloth to press it into the grain pattern thoroughly. Work in small sections, making sure the filler fills all the open pores evenly. Excess filler should be wiped away immediately with a clean cloth, leaving only the material in the pores. This step prevents surface buildup and helps achieve the smooth, flat surface necessary for a high-quality finish. After the filler dries according to the manufacturer’s instructions, lightly sand the surface with fine-grit paper. This final sanding smooths out any residual imperfections and prepares the wood for staining or sealing.
A well-applied pore fill enhances not just the appearance but also the finish durability of your oak project. By creating a uniform surface, it reduces the likelihood of dark grain lines bleeding through your topcoat, ensuring a cleaner, clearer finish. This process helps your wood resist scratches, moisture, and wear over time. Remember, patience during application and proper surface preparation are key. When done correctly, pore-filling preserves the beauty of the oak’s natural grain pattern while providing a sturdy, durable surface that showcases craftsmanship and stands the test of time. Additionally, understanding the diversity of alimony types can be important if your project involves legal considerations related to property and financial planning.

Minwax Color-Matched Wood Filler, Golden Oak, 6 oz
PROFESSIONAL WOOD FILLER – Minwax Color-Matched Wood Filler is a high-quality, no-sand solution for defects in finished wood.
As an affiliate, we earn on qualifying purchases.
As an affiliate, we earn on qualifying purchases.
Frequently Asked Questions
Can You Use the Pore-Filling Method on Other Wood Types?
You can use the pore-filling method on various wood species, but you need to take into account filler compatibility. Different woods have unique pore structures and colors, so choose a filler that matches your wood’s natural tone. Applying pore filler helps create a smooth, even surface, especially on open-grain woods. Just ensure your filler adheres well to the specific wood species you’re working with for the best results.
How Long Does Pore Filler Typically Last Before Reapplication?
Think of pore filler as a delicate coat of armor on your wood—it wears down over time. Typically, its durability lifespan depends on use and finish, but you might find yourself reapplying every few years. Heavy wear or moisture can shorten this period. To keep your project looking sharp, plan for reapplication when the filler begins to show signs of wear, ensuring your finish remains smooth and beautiful.
Are There Eco-Friendly Pore-Filling Options Available?
You’ll find several eco-friendly pore-filling options available. Natural alternatives like beeswax, plant-based oils, and homemade mixtures work effectively without harming the environment. Biodegradable options, such as certain eco-friendly fillers, break down naturally and reduce pollution. These choices not only help you achieve a smooth finish but also support sustainability. By opting for these environmentally conscious products, you contribute to eco-friendly woodworking and reduce your carbon footprint.
Does Pore Filling Affect the Natural Appearance of Oak?
Think of pore filling like a gentle brushstroke on a masterpiece—it can influence how your oak’s grain visibility appears. When done carefully with eco-friendly options, it enhances the natural finish without overly masking the wood’s character. Proper pore filling guarantees smoothness while preserving the oak’s beauty, letting its natural grain shine through. So, yes, pore filling can affect the appearance, but with the right approach, it maintains your wood’s authentic charm.
Can Pore Filler Be Applied Over Previous Finishes or Stains?
You can apply pore filler over previous finishes or stains, but it depends on your finishing techniques and stain compatibility. Make certain the surface is clean, dry, and lightly sanded to promote adhesion. Test the pore filler on a small area first to check compatibility, especially if you’re using different stains or finishes. Proper preparation guarantees a smooth, even surface, preserving the natural look of oak while achieving the desired finish.

DAP Plastic Wood Filler, Golden Oak
A high-performance, solvent-based wood Filler that hardens to give a repair that is 3X stronger than the wood…
As an affiliate, we earn on qualifying purchases.
As an affiliate, we earn on qualifying purchases.
Conclusion
By following this pore-filling guide, you’ll tame oak’s wild grain and turn it into a smooth canvas. Think of it as smoothing out the wrinkles in a well-loved shirt—preparing it for its perfect finish. With patience and the right techniques, your oak will shine without dark lines, revealing its true beauty. So, roll up your sleeves and embrace the process—your flawless finish is just a filling away from becoming a masterpiece.

Goodfilla Red Oak, 8 oz, Wood and Grain Filler, Stainable, Tintable, Sandable, Zero Waste, Non-Toxic, USA Made
⚒️ HIGH QUALITY & MONEY SAVING: Save time and money with this wood filler that does not shrink,…
As an affiliate, we earn on qualifying purchases.
As an affiliate, we earn on qualifying purchases.

Gorilla All Purpose Wood Filler Wood Repair Kit with Putty Knife and Sanding Block
Gorilla All Purpose Wood Filler is the go-to product for strong, durable repairs on cracks, gouges and holes.
As an affiliate, we earn on qualifying purchases.
As an affiliate, we earn on qualifying purchases.