
Mastering miter saw angles is your secret to flawless trim work. When you consistently measure angles using a protractor or angle finder, you’ll make precise cuts that fit perfectly without gaps. Always double-check your settings and test-fit pieces before securing them. This habit saves you time and materials, leading to higher-quality finishes. By fine-tuning your technique, you elevate your craftsmanship and avoid common mistakes. There’s more to discover about ensuring your cuts are spot-on!
Key Takeaways
- Regularly use a protractor or angle finder to ensure precise miter saw angle adjustments.
- Familiarize yourself with preset stops on your miter saw for common angles.
- Double-check all measurements before making cuts to avoid misalignments.
- Test-fit pieces before assembly to catch fitting issues early.
- Develop a habit of re-checking angles to enhance overall craftsmanship quality.
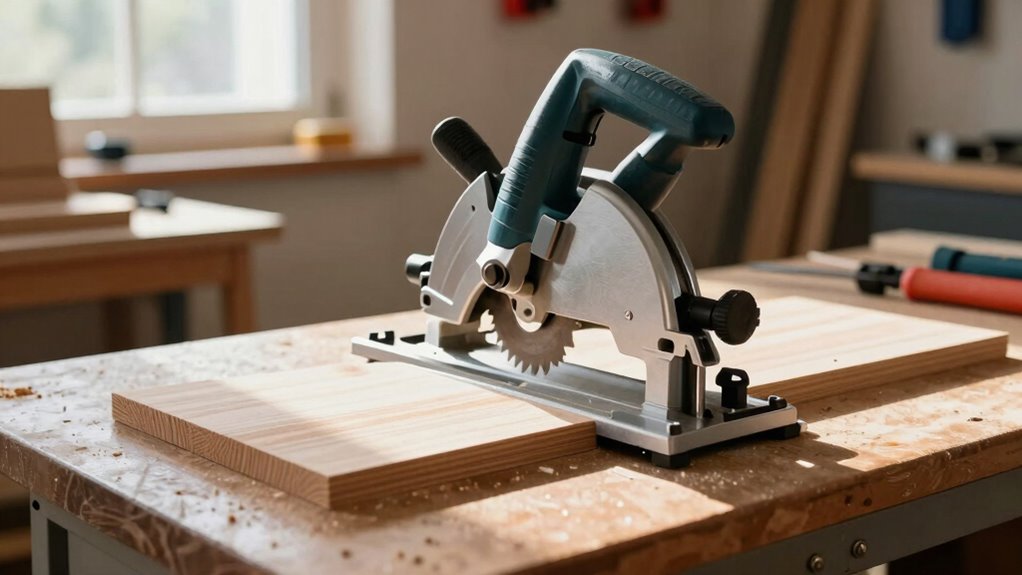
Mastering your miter saw‘s angles can transform your woodworking projects from mediocre to magnificent. When you get the hang of angle adjustments, you open up a world of possibilities for your trim styles. Whether you’re working on crown molding, baseboards, or other finishes, using the right cutting techniques can elevate your craftsmanship. Each cut demands precision measurements, and that’s where your miter saw truly shines.
When you approach a project, start by measuring your angles carefully. A common mistake is to eyeball it, which often leads to gaps and misalignments. Instead, use a protractor or an angle finder to guarantee accuracy. Once you’ve got your measurements down, input them into your miter saw. This will not only save you time but also reduce the frustration of making multiple cuts. Remember, the more precise your angles, the better your overall finish will be.
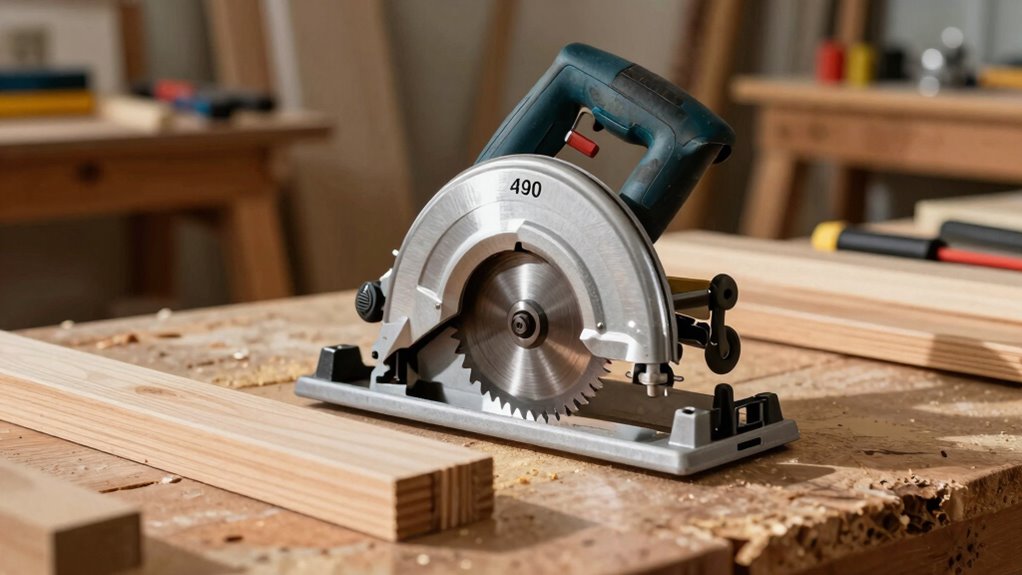
As you set up your saw, take a moment to familiarize yourself with its features. Many saws have preset stops for common angles, but don’t hesitate to fine-tune these settings. A slight miscalculation can make a significant difference in your trim styles. Adjusting your saw to the exact angle needed for your project will help guarantee that every piece fits together seamlessly. Understanding your miter saw’s features can greatly improve your cutting accuracy. Practicing with different angles can also help you develop a better sense of how your saw behaves, leading to more consistent results. Additionally, regularly maintaining your equipment ensures that your cuts remain precise over time.
When you start cutting, focus on maintaining a steady hand and a firm grip. The beauty of the miter saw lies in its ability to create clean, accurate cuts with minimal effort. If you find your cuts are consistently off, it might be time to revisit your angle adjustments. Double-check your settings and your measurements; even a minor discrepancy can lead to a major headache during installation.
After making your cuts, test-fit the pieces before final assembly. This step is fundamental for spotting any potential issues. If something doesn’t fit right, you can easily make adjustments before committing to glue or nails. This habit of testing and re-checking not only saves material but also enhances the quality of your work. Incorporating proper measuring techniques can further ensure your cuts are precise from the start.
Incorporating these practices into your routine will make a noticeable difference in your woodworking projects. With a solid understanding of angle adjustments and cutting techniques, you’ll find that your trim styles will come together much more smoothly. Mastering this habit isn’t just about improving your skills; it’s about making sure the final result looks professional and polished. Proper measurement accuracy is essential to achieving perfect fits and seamless joints. So, grab that miter saw and start transforming your projects today!
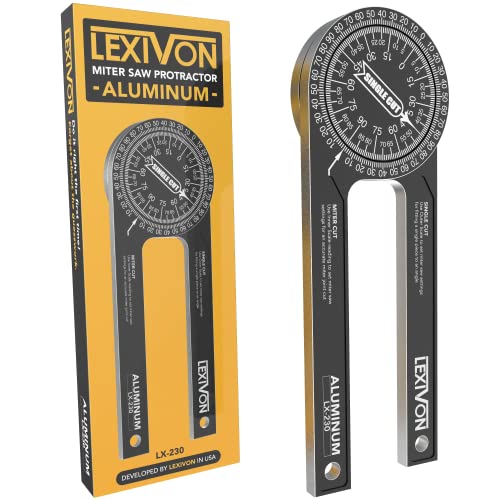
LEXIVON Aluminum Miter Saw Protractor | 7-Inch Rust Proof Angle Finder Featuring Precision Laser Engraved Scales (LX-230)
ACCURATE – Crafted from CNC-machined Anodized Aluminum Alloy Steel. Features easy-to-read precision laser engraved scales.
As an affiliate, we earn on qualifying purchases.
As an affiliate, we earn on qualifying purchases.
Frequently Asked Questions
What Is the Best Miter Saw for Beginners?
The best miter saw for beginners is one with a lightweight design and user-friendly features. Look for models with a clear blade guard, dual bevel capability, and laser guides to help you make accurate cuts. Beginner tips include practicing on scrap wood and familiarizing yourself with the settings. A reliable, budget-friendly option like a basic compound miter saw can get you started without overwhelming you with complex features.
How Do I Maintain My Miter Saw?
Maintaining your miter saw is like keeping a car tuned; a little effort goes a long way. First, regularly check the blade for wear and replace it as needed. Clean the dust collection system to guarantee it works effectively, preventing debris buildup. Lubricate moving parts to keep everything running smoothly. Finally, store the saw in a dry place to protect it from moisture. These steps will keep your miter saw in top shape!
Can I Use a Miter Saw for Non-Trim Projects?
Absolutely, you can use a miter saw for non-trim applications! Its versatility makes it perfect for cutting various materials like plywood and hardwood for furniture, framing, or even craft projects. You’ll appreciate how easy it is to achieve precise angles and clean cuts, whether you’re tackling a DIY project or making repairs. Just remember to adjust the settings as needed for different materials to get the best results!
What Safety Gear Should I Wear When Using a Miter Saw?
When you’re working with a miter saw, it’s best to play it safe. Always wear eye protection to shield your eyes from flying debris. Hearing protection is a must, too, since the noise can be deafening. A dust mask will help you avoid inhaling harmful particles, and work gloves provide a solid grip while keeping your hands safe. By gearing up, you’ll keep yourself protected and focused on the task at hand.
How Do I Choose the Right Blade for My Miter Saw?
To choose the right blade for your miter saw, consider the blade types suited for your project. For fine cuts, a high tooth count blade works best, while a lower tooth count blade is ideal for faster, rough cuts. Think about your cutting techniques, too; if you’re making crosscuts, a blade designed for that will enhance accuracy. Always match the blade to the material, whether it’s wood, laminate, or metal, for best results.

VEVOR Precision Miter Gauge, Standard Slot 3/4'' x 3/8'', Aluminum Alloy Table Saw Miter Gauge with 18 in Grating 15 Angle Stops Adjustable Spring Loaded Plunger and Removable Disc, for Woodworking
Fit for Most Table Saws: Our miter gauge is expertly designed to fit the majority of standard table…
As an affiliate, we earn on qualifying purchases.
As an affiliate, we earn on qualifying purchases.
Conclusion
By mastering this miter saw angle habit, you’re not just saving time—you’re practically turning into a woodworking superhero! Imagine breezing through trim work like it’s a walk in the park, leaving perfectly angled cuts in your wake. Your friends will marvel at your skills, and you’ll feel like a wizard casting spells with every cut. So, embrace this habit, and soon enough, you’ll be the go-to pro for all things trim, effortlessly transforming spaces with your newfound magic!
LEXIVON Aluminum Miter Saw Protractor | 7-Inch Rust Proof Angle Finder Featuring Precision Laser Engraved Scales (LX-230)
ACCURATE – Crafted from CNC-machined Anodized Aluminum Alloy Steel. Features easy-to-read precision laser engraved scales.
As an affiliate, we earn on qualifying purchases.
As an affiliate, we earn on qualifying purchases.