To fix an orange peel finish without simply spraying closer, focus on proper surface prep and spraying techniques. Make sure your surface is smooth, dust-free, and properly sanded. Adjust your spray gun distance to 6-12 inches, use steady, overlapping passes, and maintain consistent pressure and speed. Thin your paint correctly and use the right equipment. If you’re still seeing texture, gentle sanding or reapplication with better technique can help—learn how to refine your process for a flawless finish.
Key Takeaways
- Lightly sand the orange peel surface with fine-grit sandpaper to smooth out the texture.
- Reapply a thin, even coat of paint with improved spraying technique for better results.
- Ensure proper surface preparation and correct paint thinning to prevent future orange peel issues.
- Adjust spray gun distance, pressure, and speed to achieve a more uniform application.
- Use quality equipment and practice consistent spraying habits to minimize texture flaws.

Have you ever noticed a textured, bumpy surface on painted or finished furniture that resembles the skin of an orange? That’s what’s commonly called an orange peel finish. It’s a frustrating flaw that can happen even when you’re careful with your work. But before you assume it’s a disaster, know that it’s fixable, and understanding how it occurs can help you avoid it in the future. Most of the time, orange peel results from issues during paint preparation or spraying techniques. When you rush these steps or don’t set up your equipment properly, you risk creating a surface that’s uneven and textured.
Paint preparation is essential. You need to verify your surface is smooth and clean before applying any finish. Sand down the surface thoroughly to remove any old paint or imperfections, and use a tack cloth to eliminate dust. If the surface isn’t properly prepared, the paint won’t adhere smoothly, leading to uneven drying and that characteristic orange peel texture. Also, pay attention to your paint’s viscosity. If it’s too thick, it won’t spray evenly, causing drips and bumps. Thin your paint appropriately with the right reducer or thinner recommended by the manufacturer. Proper paint preparation isn’t just about the surface; it’s about adjusting your materials to work harmoniously with your spraying technique.
Proper paint prep and thinning are key to achieving a smooth finish.
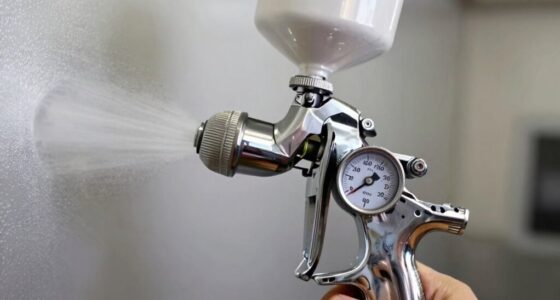
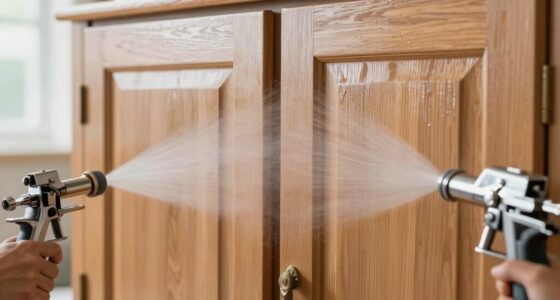
Spraying techniques play a significant role in achieving a smooth finish. When you spray, keep your gun at the right distance—usually about 6 to 12 inches from the surface—and move in steady, overlapping passes. If you hold the gun too close or move too slowly, the paint can build up, creating drips and texture. Conversely, spraying too far away or moving too quickly can result in a thin, uneven coat that dries with a textured surface. Maintain consistent speed and pressure, and don’t rush the process. Adjust your air pressure and spray pattern to suit the paint and surface you’re working on. Using a high-quality spray gun and practicing good technique will help you produce a smooth, even coat that minimizes the risk of orange peel.
Patience and attention to detail during paint preparation and spraying are your best tools. If you do end up with an orange peel finish, don’t panic. You can sand it lightly with fine-grit sandpaper, then reapply a thin, even coat of paint, paying close attention to your spray technique. The key is to understand that this finish isn’t just a flaw—it’s a sign that some aspect of your process needs adjustment. With the right approach to paint preparation and spraying techniques, you’ll be able to achieve a sleek, professional-looking finish that showcases your craftsmanship rather than hiding flaws. Additionally, understanding the role of materials such as the type of paint and additives can help you select the best products for a smooth finish.
professional spray gun for furniture finishing
As an affiliate, we earn on qualifying purchases.
As an affiliate, we earn on qualifying purchases.
Frequently Asked Questions
Can Orange Peel Finish Be Completely Removed Once Applied?
Yes, you can remove an orange peel finish, but it requires proper surface preparation and careful work. Sand the surface thoroughly to improve paint adhesion, then strip or sand down the existing finish. This process helps guarantee a smooth, even surface for a new coat of paint. Keep in mind, patience and proper techniques are key to achieving a professional look and avoiding further texture issues.
What Tools Are Best for Fixing Orange Peel Texture?
Did you know that proper spray gun adjustments can reduce orange peel by up to 80%? To fix orange peel texture, use a fine-grit sanding block or abrasive paper to smooth the surface. Then, refine your spray gun adjustments—adjust pressure and nozzle for a smoother finish. Finish with light sanding using fine-grit paper and reapply a thin coat of paint or clear coat for a flawless look.
How Long Should I Wait Before Sanding an Orange Peel Finish?
You should wait at least 24 hours before sanding an orange peel finish, allowing proper drying times. During this period, guarantee the surface is fully cured to prevent damage. Use gentle sanding techniques with fine-grit sandpaper to smooth out the texture without removing too much material. Rushing the process can cause uneven results or damage the finish, so patience is key for achieving a flawless, smooth surface.
Does Humidity Affect the Formation of Orange Peel?
Yes, humidity impact definitely affects the formation of orange peel. When humidity levels are high, the extra moisture in the air slows down the drying process, causing the paint to dry unevenly and creating that textured finish. Environmental influences like temperature and humidity can make it harder to achieve a smooth coat. To prevent this, try to paint in ideal conditions with low humidity and good airflow for the best results.
Are There Any DIY Methods to Prevent Orange Peel?
Did you know that proper spraying technique can reduce orange peel by up to 60%? Yes, you can try DIY remedies like thinning your paint, maintaining consistent pressure, and applying thin coats to prevent orange peel. Preventative techniques such as controlling humidity and ensuring proper drying times also help. These simple steps allow you to achieve a smoother finish without costly fixes, making your DIY projects look professionally done.
fine grit sanding sponge
As an affiliate, we earn on qualifying purchases.
As an affiliate, we earn on qualifying purchases.
Conclusion
To avoid orange peel finish, pay attention to your spray technique, control your pressure, and maintain proper distance. Don’t rush the process; don’t skip preparation, and don’t ignore the details. Focus on these steps, follow these tips, and stay consistent. With patience and precision, you’ll achieve a smooth, flawless surface. Remember, it’s not just about fixing the finish—it’s about mastering the process, mastering the craft, and ultimately, mastering your results.
paint thinning reducer for spray paint
As an affiliate, we earn on qualifying purchases.
As an affiliate, we earn on qualifying purchases.
air pressure regulator for spray gun
As an affiliate, we earn on qualifying purchases.
As an affiliate, we earn on qualifying purchases.