
To get clean, professional results with countersinking and counterboring, choose the right drill bits for your material. Use high-quality bits suited to your project, and verify they are sharp and well-maintained. Adjust your speed and pressure carefully to avoid rough edges or splintering. Proper technique and tool selection minimize extra work and produce smooth, precise holes. Keep learning tips and tricks to consistently improve your finish with every project.
Key Takeaways
- Select the appropriate drill bit type and tip design tailored to your material for smooth, clean holes.
- Use correct drilling techniques, including proper speed, pressure, and lubrication, to prevent rough edges and splintering.
- Maintain sharp, high-quality drill bits to ensure precise cuts and reduce material damage.
- Adjust drill speed and depth settings for countersinking and counterboring to achieve consistent, professional finishes.
- Regularly inspect and replace worn bits to maintain optimal performance and high-quality results.
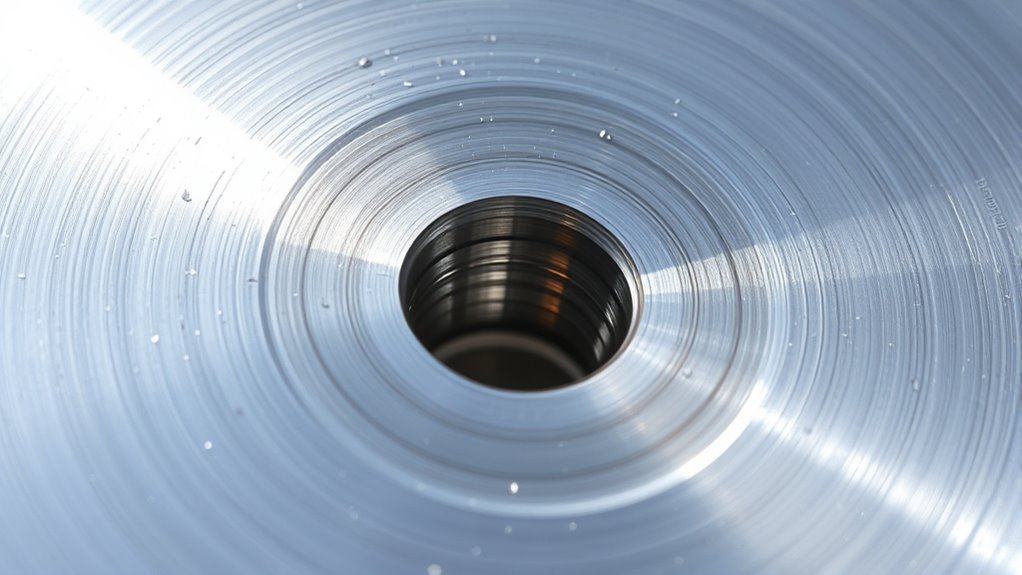
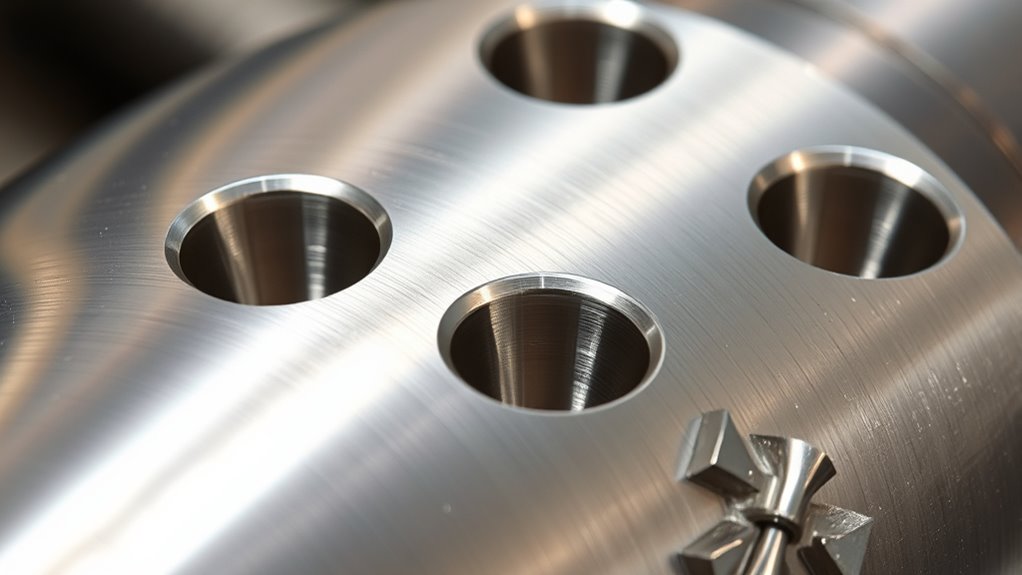
When you need to create a flush or recessed hole for fasteners, countersinking and counterboring are essential techniques in machining and woodworking. The success of these processes hinges heavily on drill bit selection, which directly influences the finish quality of your work. Choosing the right drill bits means considering material compatibility, tip design, and cutting speed. For example, high-speed steel bits work well on softer woods and plastics, while carbide-tipped bits excel in harder materials like metal or dense hardwoods. A properly selected drill bit ensures a clean, smooth hole, reducing the risk of splintering or chipping that can mar the finish.
Choosing the right drill bit ensures clean, smooth, and professional results in countersinking and counterboring.
The finish quality is critical because it impacts both the aesthetic and functional aspects of your project. When you use the right drill bit, you minimize the need for extra sanding or filling, saving you time and effort. For countersinking, specialized countersink bits with a conical shape help create a smooth, beveled entry for screw heads, ensuring they sit flush or slightly below the surface. When counterboring, a dedicated counterbore bit enlarges the hole to a specific depth, providing space for bolt heads or washers. In both cases, selecting drill bits with sharp cutting edges and proper geometry reduces burrs and rough edges, resulting in a more professional finish.
Another key factor influencing finish quality is maintaining proper drill speed and pressure. You should adjust your speed based on the material and drill bit type, avoiding excessive force that can cause uneven holes or bit deflection. Proper lubrication or cutting fluid, especially on metal, also helps achieve cleaner cuts and prolongs bit life. Always ensure your drill bits are sharp; dull bits generate heat, produce rougher holes, and damage the material surface, compromising the finish. Additionally, understanding cutting geometry helps in selecting bits that produce cleaner holes with less effort.
In addition, the quality of your drill bits impacts the precision of your countersink or counterbore. High-quality bits maintain their shape longer and produce consistent results, whereas cheap or worn bits can produce irregular holes, leading to poor seating of fasteners. When you invest in good drill bits suited to your material, you set yourself up for cleaner, more accurate holes and a superior finish overall.
Ultimately, the key to achieving a professional look with countersinking and counterboring is proactive drill bit selection combined with proper technique. By choosing the right bits and adjusting your drilling parameters accordingly, you ensure that each hole is smooth, precise, and ready for fasteners, giving your project a polished, finished appearance every time.
Frequently Asked Questions
What Materials Are Best Suited for Countersinking and Counterboring?
You should choose materials like aluminum, brass, and soft woods for countersinking and counterboring, as they offer good material compatibility and easy tool engagement. For harder materials like steel or stainless steel, select high-speed steel or carbide bits to guarantee clean surface finishes. Always consider the material’s hardness and finish requirements to prevent damage and achieve precise, smooth results in your countersinking or counterboring projects.
How Do I Choose the Right Tool Size for My Project?
You choose the right tool size by matching the bit diameter to your screw or bolt, ensuring a flush fit. Consider the hole depth too—if it’s too shallow, your countersink or counterbore won’t fully accommodate the fastener, risking a weak joint. Measure carefully, and select a bit with an appropriate diameter and depth. This balance guarantees a clean, professional finish and secure fastening every time.
Can Countersinking and Counterboring Be Done With a Handheld Drill?
Yes, you can do countersinking and counterboring with a handheld drill. Just make certain your drill’s compatibility with the tool bits you select, as not all drills handle large or specialized bits well. Choose the right size and type of countersink or counterbore bit for your project, and use steady pressure for clean, accurate results. Always clamp your workpiece securely to prevent slips and ensure safety.
What Safety Precautions Should I Take During These Processes?
You should always wear personal protective equipment like safety glasses and gloves to protect your eyes and hands. Keep your workspace clean and organized to prevent accidents, and guarantee proper drill handling to maintain control. Use clamps or a vice to stabilize your material, and follow manufacturer instructions for the tools. Staying attentive and cautious helps prevent injuries, making your countersinking and counterboring projects safe and efficient.
How Do I Maintain and Sharpen Countersinking and Counterboring Tools?
To maintain and sharpen your countersinking and counterboring tools, regularly inspect them for wear and damage. Use proper sharpening techniques like grinding or honing to restore their cutting edges, guaranteeing precise results. Keep tools clean and lubricated after each use, and store them in a dry place to prevent rust. Proper tool maintenance and sharpening techniques extend their lifespan, improve performance, and ensure clean, accurate cuts every time.
Conclusion
By mastering countersinking and counterboring, you’ll carve a path to flawless finishes every time. Think of these techniques as your trusted compass, guiding your drill bit smoothly through the wood like a hot knife through butter. With precision and care, you’ll achieve clean, professional results that stand out. Remember, patience and practice turn rough edges into polished perfection—your toolkit’s best brushstrokes on the canvas of craftsmanship.