
Did you know that more than 70% of woodworking failures stem from poor surface preparation? Achieving a professional finish requires not just skill, but also the right wood finishing techniques, including the vital step of staining before sanding. This guide will walk you through the essential methods for applying a polyurethane coat, ensuring your wood projects stand the test of time while looking stunning. You’ll learn how to effectively stain then sand your wood surfaces, providing robust protection and enhancing their overall appearance.
Key Takeaways
- Proper staining enhances the aesthetic value of your wood projects.
- Sanding after staining improves the adhesion of the polyurethane coat.
- Understanding your options in polyurethane types is crucial for optimal results.
- A clean workspace plays a significant role in achieving the best finish.
- Thin coats during application prevent runs and bubbles.
- Regularly sanding between coats ensures a smooth, durable surface.
Understanding Polyurethane: Oil-Based vs. Water-Based
When selecting polyurethane for your wood finishing project, understanding the differences between oil-based polyurethane and water-based polyurethane is crucial. Each type comes with its own set of pros and cons, making your polyurethane selection significantly influenced by the specific needs of your project.
Pros and Cons of Oil-Based Polyurethane
Oil-based polyurethane is renowned for its durability. It creates a robust, protective finish that can withstand heavy use, making it an excellent choice for kitchen tables and other frequently used surfaces. The warm amber hue enhances the wood grain beautifully. On the downside, its strong odor can be overwhelming, and it typically has a longer drying time, which might affect project timelines.
Pros and Cons of Water-Based Polyurethane
Water-based polyurethane offers a clear finish with low odor, making it ideal for light-use furniture, such as desks and end tables. It dries quickly, allowing for faster project completion, but may require additional coats for adequate coverage. Cleaning up is a breeze with just soap and water, unlike oil-based options. However, it might not provide the same level of durability and warmth in color compared to its oil-based counterpart.
Choosing the Right Polyurethane for Your Project
When choosing between oil-based and water-based polyurethane, consider what aspects are most important for your project. Determine if you prioritize durability over drying time and odor. Matching the type of polyurethane with the wood and stain will help achieve the desired finish, ensuring your project meets both aesthetic and functional needs.


Minwax PolyShades Wood Stain + Polyurethane Finish – ½ Pint, Classic Oak, Satin
POLYSHADES WOOD STAIN – Minwax PolyShades is an oil-based wood stain and poly in one. It enhances wood…
As an affiliate, we earn on qualifying purchases.
As an affiliate, we earn on qualifying purchases.
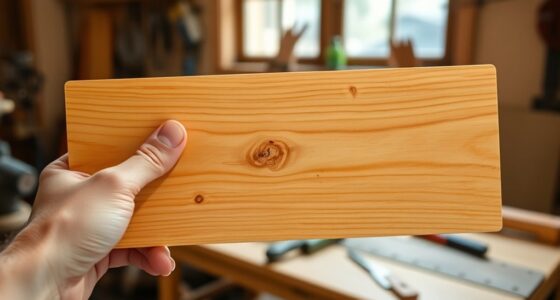
The Importance of Wood Preparation
Proper wood preparation plays a vital role when working with finishes like polyurethane. Taking the time to prepare your wood surface not only enhances aesthetics but also ensures a long-lasting and smooth finish. Key aspects of this preparation include understanding the significance of sanding and the necessity of removing old finishes to achieve the best results for your project.
Why Proper Sanding Matters
Sanding holds immense importance in the wood preparation process. It helps eliminate imperfections, such as small dents or uneven surfaces, enabling you to achieve a flat and smooth area ready for finishing. By addressing these flaws through sanding, you allow the polyurethane to adhere more effectively, contributing to a professional appearance. Pay close attention to the grit of your sandpaper; starting with a coarser grit followed by a finer one can yield the best results.
Removing Old Finishes for Better Results
Removing old finishes is essential for optimal wood preparation. When you sand down the surface, you not only smooth it out but also eliminate any previous coatings that could hinder the adhesion of new finishes. Old finishes may cause peeling or bubbling, which undermines the quality of your work. By thoroughly sanding and removing any remnants of previous applications, you set a clean foundation for the new polyurethane coat, significantly improving the overall quality of your project.


Romeda 8-Pack Sanding Sponge, Four Grits Per Pack 60/80/120/220, Washable and Reusable Handmade Sandpaper Block, Drywall Sandpaper Blocks for Wooden Drywall Sheetrock and Metal Glazing
【ASSORTED GRIT SANDING BLOCKS】 8 sand blocks, 4 sizes from coarse to ultra-fine sand, 60/80/120/220 grit, 2 blocks…
As an affiliate, we earn on qualifying purchases.
As an affiliate, we earn on qualifying purchases.
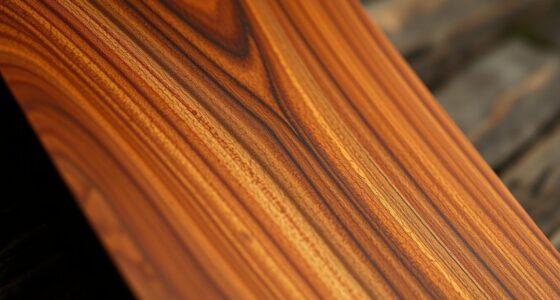
Choosing the Right Stain for Your Wood Project
When it comes to enhancing the beauty of your wood surfaces, selecting a stain plays a crucial role. The right wood stain can elevate the appearance of your project while also protecting the wood from damage. Understanding the types of wood stains available will help you make an informed choice that fits your vision and needs.
Types of Wood Stains Available
Wood stains come in various formulations, each offering unique features and finishes. Here’s a brief overview of some popular types of wood stains:
| Type of Stain | Description | Best For |
|---|---|---|
| Oil-Based Stains | These provide rich color and deep penetration into the wood. | Durable finishes for hardwoods. |
| Water-Based Stains | Quick-drying with low odor, making them easier to work with. | Projects requiring faster turnaround times. |
| Gel Stains | Thick consistency that sits on top of the wood, ideal for vertical surfaces. | Control over color application on challenging woods. |
Factors to Consider When Selecting a Stain
Several factors impact your selection when considering wood stains:
- The type of wood: Different woods absorb stains in unique ways, influencing the final appearance.
- The desired color outcome: Evaluate how each stain color complements your decor.
- Finishing techniques: Consider how the stain will interact with additional treatments like sanding.
Before committing to a stain, test it on a small area to ensure compatibility and achieve the desired results.


Minwax Fast Drying Polyurethane Protective Wood Finish, Clear Semi-Gloss, 1 Quart
PROTECT WOOD SURFACES – Minwax Polyurethane Wood Finish protects interior projects like woodwork, furniture, floors and cabinets. The…
As an affiliate, we earn on qualifying purchases.
As an affiliate, we earn on qualifying purchases.
Steps to Stain Your Wood Properly
Applying wood stain correctly is essential for achieving a rich, uniform finish on your wood project. Following proper staining techniques can significantly enhance the final appearance of your work. Here are the key steps to ensure you stain your wood properly.
Applying the Stain Evenly
Begin by preparing your workspace and gathering all necessary materials, including a high-quality brush or cloth for applying wood stain. Use long brushstrokes that overlap slightly at the edges to cover the surface evenly. This technique helps maintain uniformity and prevents streaks or uneven color. Working in sections allows for better control over stain application.
Wiping Off Excess Stain
After applying your stain, it’s crucial to wipe off any excess to avoid blotchy areas that can detract from the finish. Use a clean, dry cloth for this step, making sure to move in the direction of the wood grain. This not only enhances the surface’s aesthetics but also ensures a smoother finish when you move on to the polyurethane coat.
Drying Time for Stain Before Sanding
Stain drying times can vary depending on the type of stain used and environmental factors such as humidity and temperature. Always refer to the product label for specific recommendations. Generally, it’s best to allow up to 24 hours for the stain to dry completely before sanding. Proper stain drying times significantly influence the quality of the final finish, making this step essential in the staining process.


Varathane Water-Based Crystal-Clear Ultimate Polyurethane | Interior Wood Protection | Fast Dry Time | Easy Clean Up | Satin | Half Pint
Protects indoor wood surfaces such as furniture, windows, cabinets, trim and more
As an affiliate, we earn on qualifying purchases.
As an affiliate, we earn on qualifying purchases.
Stain Then Sand Before Polyurethane Coat
Proper surface preparation is crucial for achieving a smooth and long-lasting finish. Sanding after staining plays a significant role in this process. It helps to eliminate any raised grain and uneven texture left behind from the staining process. By doing this, you ensure that the subsequent application of polyurethane adheres correctly, leading to a flawless finish.
Why Sand After Staining?
Sanding after staining serves multiple purposes. First, it helps smooth the surface, which enhances the overall look. Additionally, this step can improve the adhesion of the polyurethane, which is vital for longevity. You want to touch the wood and feel a silky-smooth surface before moving onto the polyurethaning techniques. If the surface feels rough, take the time to sand it down appropriately.
Recommended Grit Levels for Sanding
The choice of sanding grit levels is essential for optimal results. It is recommended to use 220-grit sanding paper for this stage. This grit level is fine enough to smooth the surface without damaging the stain below. Before applying the polyurethane, ensure you wipe off any dust created during this sanding process. Taking these steps will lead to a beautifully finished piece.

Preparing for the Polyurethane Application
Getting ready for a polyurethane application involves more than just selecting the right finish. A well-prepared workspace and the right application tools can make a significant difference in the final result. Focus on creating a low-dust environment and choosing the most effective application tools to achieve a flawless finish.
Setting Up a Low-Dust Environment
To ensure the best possible results, setting up a low-dust environment is crucial. This process includes:
- Cleaning the workspace thoroughly to remove dust and debris.
- Minimizing foot traffic in the area where you will be working.
- Using vinyl curtains or similar barriers to block dust from entering the application space.
A low-dust environment allows for a smoother finish and reduces the chances of imperfections in your polyurethane application.
Choosing the Right Application Tools
Selecting the proper application tools can elevate the quality of your finish. Consider these options:
- Foam brushes: Ideal for applying thin, even coats without leaving bristles behind.
- High-quality synthetic bristle brushes: Excellent for oil-based polyurethane, offering a smooth application.
- Rollers: Useful for covering larger areas efficiently with minimal effort.
Choosing the right application tools not only aids in the application process but also contributes to a more uniform and attractive finish.

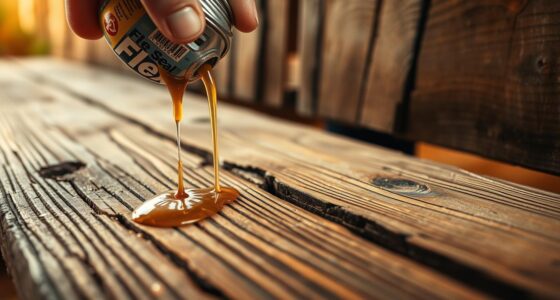
Applying Polyurethane: Best Practices
Mastering the art of applying polyurethane requires careful attention to techniques suited for different surfaces. Successful application enhances the appearance and longevity of your project. Incorporating best practices for polyurethane ensures a flawless finish while avoiding common application mistakes along the way.
Application Techniques for Different Surfaces
Different surfaces mandate specific techniques for effective application of polyurethane. When working on wood, start by using a high-quality brush or foam applicator, which ensures smooth coverage without leaving brush strokes. For larger surfaces, consider using a roller for quicker application. Always follow the manufacturer’s guidelines to achieve optimal results.
Importance of Thin Coats and Allowing for Drying
Applying polyurethane involves layering, and thin coats are critical for achieving a professional finish. Slathering on thick layers can lead to drips and an uneven surface, compromising the overall appearance. Be diligent about allowing each coat to dry completely before sanding or applying additional layers, as this prevents any issues with adhesion.
Common Mistakes to Avoid During Application
Awareness of common application mistakes can help in obtaining desired results. Over-brushing is one of the prevalent errors. This leads to bubbles and a rough texture. Another common issue is neglecting to check that the previous coat is dry before proceeding. Avoiding these pitfalls will set you up for success when applying polyurethane.

Sanding Between Coats: Ensuring a Perfect Finish
Sanding between polyurethane coats plays a crucial role in achieving a smooth finish. After applying the first coat, you should wait about 24 hours for it to dry thoroughly. At this point, using fine grit sandpaper, such as 320-grit, will help remove any dust, bubbles, or imperfections that may have formed.
When and How to Sand Between Coats
When the first coat of polyurethane has dried, it’s time to sand the surface gently. Utilize a light touch to avoid damaging the previous coat. Focus on areas that have noticeable imperfections or rough spots. After sanding, wipe down the surface with a damp cloth or tack cloth to remove any debris before applying the subsequent coat. This process significantly aids in achieving a smooth finish with each layer applied.
Benefits of Using Fine Grit Sandpaper
Fine grit sandpaper contributes to a flawless final look. By using 320-grit or finer, you create a subtle roughness that enhances the adhesion of the next layer of polyurethane. This ensures that you won’t have peeling or flaking issues later. Regular sanding between polyurethane coats will make your finish not only visually appealing but also more durable.

Conclusion
In summary, following the steps outlined in this guide will help you achieve a professional-grade finish on your wood projects. With careful selection of the right polyurethane and a solid understanding of sanding techniques, you’ll create a durable and visually appealing result. Remember, wood finishing tips are not just about the products used but also about the methodical approach you take throughout the process.
This polyurethane application summary highlights the importance of each step, from preparation to application, ensuring that your final wood finish advice is both practical and effective. Embrace the process with patience and precision, and you’ll see how your meticulous efforts lead to stunning results that showcase your skills and attention to detail.