
At WoodnBits, your day begins with safety checks and tool inspections, ensuring all equipment, including table saws with soft stop technology, is ready. You plan your project, select materials, and carefully operate machinery, mastering techniques like sawing, joinery, and shaping. As you build, you collaborate with instructors and peers, troubleshoot issues, and refine your work with finishing touches. Want to see how each step helps you craft professional-quality furniture? Keep exploring to learn more.
Key Takeaways
- Begin the day with safety checks, inspecting tools and ensuring PPE use before starting projects.
- Review project plans, select materials, and sketch blueprints aligned with skill levels and safety protocols.
- Operate machinery like table saws with safety features, focusing on precise cuts and joinery techniques.
- Shape, finish, and assemble wood components, maintaining quality through proper sanding and inspection.
- Collaborate with instructors and peers, troubleshoot issues, and refine craftsmanship for professional results.

SawStop Compact Table Saw 15A 120V 60Hz CTS 120A60
Patented SawStop Safety System instantly stops the blade on skin contact for unmatched protection
As an affiliate, we earn on qualifying purchases.
As an affiliate, we earn on qualifying purchases.
Starting the Day With Safety Checks and Tool Inspections

To start your day safely at WoodnBits, you first perform a thorough safety check of the workshop. Working with wood requires all equipment to be in top shape, so you inspect each tool carefully. You check the four table saws with soft stop technology to confirm their safety features are active. Your inspection also includes looking for hazards like loose parts or damaged equipment that could cause accidents. Before operating any power tools, you verify that safety protocols are met, including passing a safety test with at least 60%. Additionally, you ensure everyone is wearing personal protective equipment, like goggles and ear protection. This routine helps create a safe environment, so you can focus on your woodworking projects with confidence. Regular maintenance and proper tool inspection are essential to prevent malfunctions and ensure safety throughout the day. It’s also important to stay aware of your emotional readiness to prevent fatigue or distraction during work. Maintaining a clean workspace further reduces the risk of accidents and keeps tools functioning properly. Moreover, performing routine equipment checks ensures that all safety features are operational, minimizing the chance of unexpected issues. Incorporating regular equipment maintenance can also extend the lifespan of your tools and improve their performance.

HURRICANE 4 Piece Wood Chisel Set for Woodworking. CR-V Steel Beveled Edge Blades with Safety Caps. Durable PVC High Impact Handle, for Precision Carving & DIY Projects (1/4", 1/2", 3/4", 1")
Premium Blades: Drop forged CR-V steel with heat-treated edges ensures sharp precision and long-lasting durability, can be used…
As an affiliate, we earn on qualifying purchases.
As an affiliate, we earn on qualifying purchases.
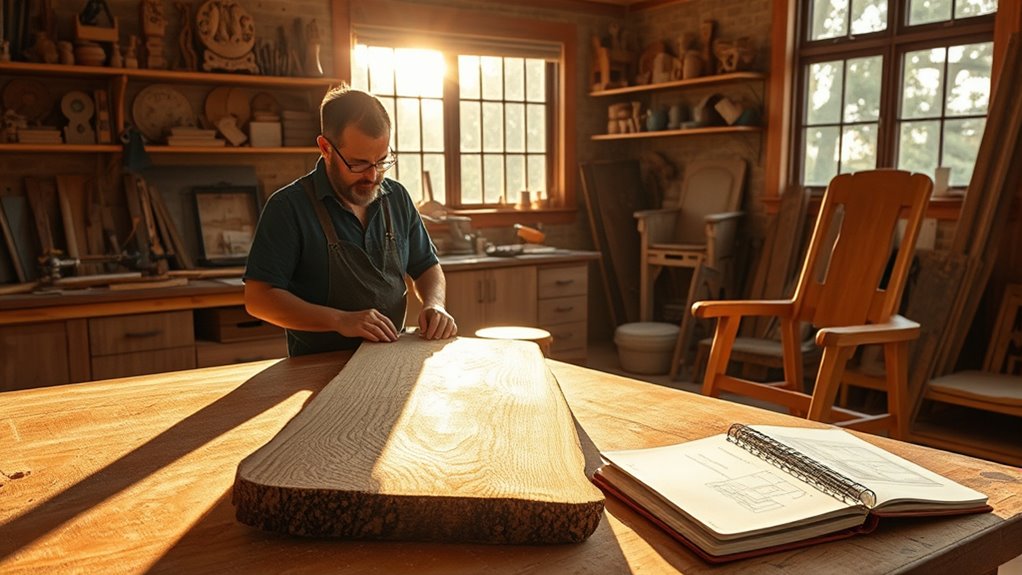
Planning and Selecting Projects for the Day

Each day, you need to choose your project ideas carefully, considering your skill level and interests. Before starting, assess what materials you’ll need and make sure safety measures are in place. Proper planning helps you stay organized, efficient, and safe throughout your work. Incorporating project planning and understanding durable, safe materials ensures that you select the right projects and optimize your workflow. Recognizing the importance of culinary traditions and cultural significance can also inspire your project choices, especially if you aim to incorporate artistic or symbolic elements into your work.
Choosing Project Ideas
Ever wonder how students at WoodnBits decide which project to work on each day? It’s a thoughtful process. You start by reviewing the available project options and considering your skill level to guarantee the task matches your experience. Instructors often guide you toward projects that align with the tools and techniques you want to practice. Planning is key—sketching blueprints, choosing the right wood, and estimating how long it’ll take help clarify your goal. You also think about the project’s complexity and safety requirements to avoid surprises. Flexibility is encouraged, so you can modify existing plans or create custom projects that match your interests and skill development. This approach keeps your work engaging and aligned with your growth. Being aware of project complexity can help you select tasks that are challenging yet manageable, while understanding design thinking principles can further enhance your planning process.
Assessing Material Needs
After selecting a project, you focus on evaluating the materials you’ll need to bring your plan to life. You review the blueprints carefully, identifying the types and quantities of wood and other materials required. Instructors help you choose the right wood species based on project needs and desired finishes. You then estimate how much raw material is necessary, aiming to minimize waste while ensuring you have enough to complete the project. Precise measuring and marking are essential steps, helping you prepare for cutting and joinery. Throughout this process, safety, quality, and material costs remain top priorities. Being aware of self watering plant pots can inspire you to incorporate versatile and efficient design elements into your woodworking projects for added functionality. Additionally, understanding building permits and inspections can help ensure your project complies with local regulations and avoids potential delays. Recognizing the importance of material storage and preservation ensures your materials stay in optimal condition before use, reducing waste and ensuring quality. Proper workspace organization also plays a crucial role in streamlining your workflow and maintaining safety standards. By thoroughly assessing your material needs, you set a solid foundation for a successful build, keeping your workflow efficient and aligned with workshop standards.
Prioritizing Safety Measures
How do you guarantee safety remains a top priority when planning and selecting projects for the day? You start by reviewing safety protocols and ensuring you understand the proper use of all tools involved. When choosing projects, pick designs that match your skill level and avoid complex cuts until you’re confident in your techniques. Passing a safety test with at least 60% is essential before operating power tools independently. Instructors guide you to select projects that promote safe techniques, using appropriate equipment and steering clear of risky procedures. Each day, a safety assessment helps maintain a hazard-free workspace. Collaborating with instructors, you identify potential risks and develop strategies to mitigate them, keeping safety at the forefront throughout your planning process. Incorporating sound vibrations into safety protocols can also enhance focus and alertness during work sessions. Additionally, understanding material properties helps in selecting the right tools and techniques, further reducing safety risks. Regularly updating your knowledge of safety equipment and ensuring it is in good condition also plays a crucial role in maintaining a safe environment. Being aware of filtering and pump protection options can prevent equipment damage and ensure consistent operation, which is vital for safety.

SakerNeo Deluxe Wood Carving Kit whittling kit, 25 Piece Wood Carving Tools with Thick Leather Storage Bag,wood carving set-Ideal Woodworking Tools and Hobbies for Beginners Enthusiasts Gift DIY
***18+ Only – Age Verification Required 25-PREMIUM WOOD CARVING TOOLS FOR EVERY PROJECT:This comprehensive wood carving kit includes…
As an affiliate, we earn on qualifying purchases.
As an affiliate, we earn on qualifying purchases.
Operating Machinery: Sawing, Joinery, and Shaping Techniques
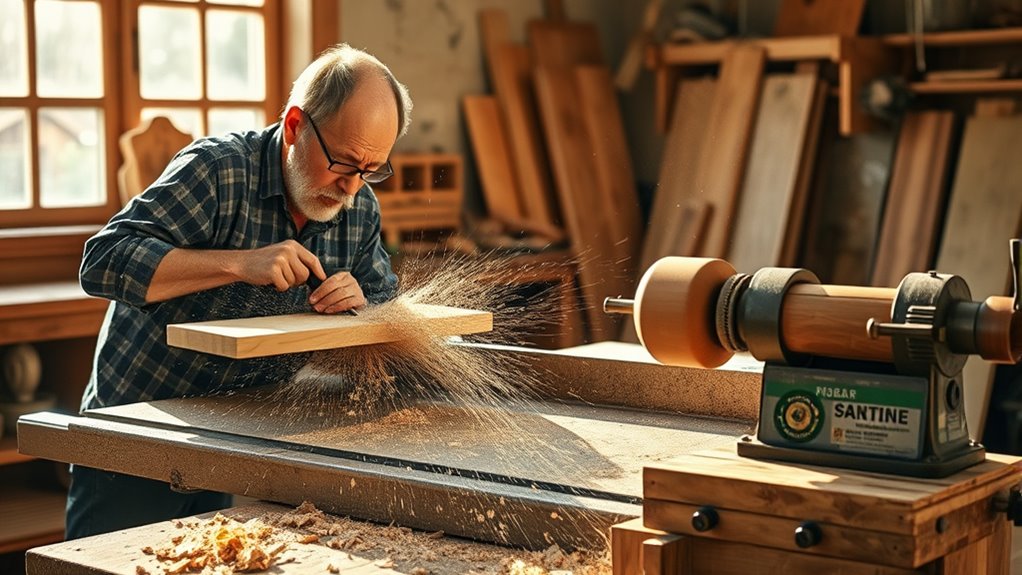
To guarantee safe and effective woodworking, you need to master proper sawing, joinery, and shaping techniques. Using the right methods reduces errors and enhances the quality of your projects. Focus on precision and safety to get the best results from your machinery and tools. Being aware of potential hazards such as injury risks and understanding how to prevent them is essential for a safe working environment. Incorporating safety protocols and proper protective equipment can further minimize the chance of accidents. Additionally, choosing the best airless paint sprayer for your projects can improve finishing quality and efficiency. Knowing the operating hours of local stores can help you plan your shopping and work schedule effectively.
Safe Saw Operation Techniques
Ensuring safety when operating saws is essential for producing quality work and preventing accidents. Before you start, pass the safety test with at least 60% to confirm you understand the protocols. Use the soft stop technology on table saws, which automatically halts the blade if moisture is detected, adding an extra layer of safety. Keep your workspace clear and adopt a proper stance to avoid slips or misalignments. Select the right blade and carefully adjust the saw’s height and fence settings for accurate, safe cuts. Follow instructor guidance on hand positioning and always use push sticks when shaping or joinery tasks. Staying attentive and following these practices helps guarantee your safety and craftsmanship during every sawing operation.
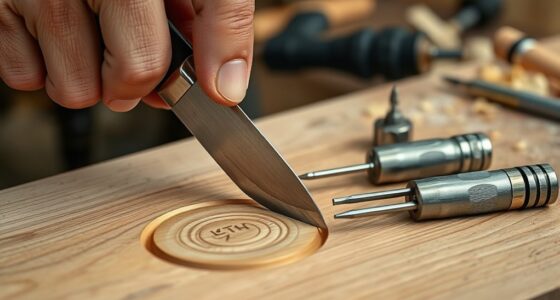
Precision Joinery Methods
Mastering precision joinery methods relies on operating machinery like table saws, shapers, and other power tools with accuracy and safety. You learn to make precise cuts for joints like dadoes, dovetails, and mortise and tenon joints, essential for strong, durable furniture. The equipment features advanced safety features, such as soft stop technology that halts blades when moisture is detected, reducing risks. During training, safety protocols are emphasized, and you pass tests with at least 60% to demonstrate proper technique. Hands-on practice under instructor supervision helps you develop skills in blade selection, setting angles, and executing perfect cuts. Proper operation guarantees your joints fit tightly, enhancing the quality and longevity of your projects. Precision in machinery use is key to professional craftsmanship.
Effective Shaping Strategies
Selecting the right blade or bit is essential for effective shaping, whether you’re making precise joinery cuts with a dado blade or smoothing edges with a rounded bit. Proper selection guarantees clean, accurate results and extends tool life. When operating machinery like table saws or shapers, always use push sticks and feather boards to maintain control and prevent kickback. Consistent feed rates and steady pressure are key to achieving smooth, precise shapes without damaging the wood or tools. Using jigs and fixtures helps guide your workpieces, ensuring uniform dimensions and accurate cuts. Regularly inspecting and maintaining your equipment keeps blades and bits sharp, resulting in cleaner cuts and safer operation. Focus on these strategies, and your shaping results will improve markedly.

qt Zinsser 854 Clear SealCoat Universal Sanding Sealer
Compatible with ALL clear wood finishes
As an affiliate, we earn on qualifying purchases.
As an affiliate, we earn on qualifying purchases.
Applying Joinery and Assembly Skills to Build Pieces

Applying joinery and assembly skills is essential for turning raw wood pieces into functional furniture. You use techniques learned in class to accurately cut and fit parts, ensuring everything aligns perfectly. Safe operation of power tools, like table saws with soft stop technology, is crucial during this process. Precision measurements and blueprint reading guide you in aligning and assembling components correctly. The workshop environment encourages hands-on practice, so you refine your skills through real projects, gaining confidence with each piece you build. Instructors offer guidance on fastening and finishing methods, helping you create durable, professional-quality furniture. This combination of technical skill, safety awareness, and practical experience transforms raw wood into polished, functional pieces you can be proud of.
Collaborating With Instructors and Peers for Guidance and Feedback
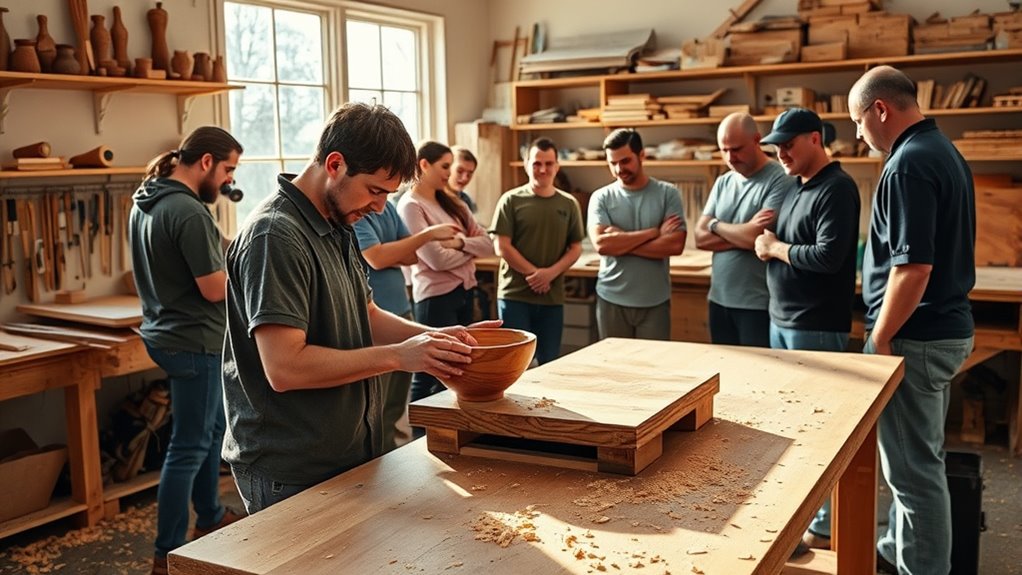
Collaborating with instructors and peers plays an essential role in developing your woodworking skills. When you seek guidance, instructors help you master tool operation and joinery techniques, ensuring safety and accuracy. Peer collaboration encourages sharing feedback, tips, and ideas that deepen your understanding and improve your craftsmanship. Open communication creates a supportive environment where questions are welcomed, and personalized advice is available. Regular feedback sessions help you track progress and identify areas for growth. To maximize your learning, consider:
- Asking instructors for demonstrations and clarifications
- Sharing your work with peers for constructive critiques
- Listening to feedback to refine techniques
- Participating in discussions to exchange tips and best practices
This active collaboration accelerates your skill development and builds confidence in your woodworking journey.
Troubleshooting and Problem-Solving During the Crafting Process

Troubleshooting and problem-solving are essential skills that keep your woodworking projects on track. When you encounter a misaligned cut, check your blade height and fence settings, then make precise adjustments. If a power tool suddenly stops working, inspect safety features like soft stop sensors and reset or repair them as needed. During joinery, if a piece doesn’t fit, test different methods such as sanding or planing to achieve a snug fit. When cracks or splits develop, assess the grain direction and reinforce with glue or additional joinery. If you face material shortages or defects, consult your instructor for alternative wood choices or design modifications. These quick, deliberate actions help you stay efficient and ensure quality results, even when unexpected problems arise during the crafting process.
Refining and Finishing Projects With Attention to Detail
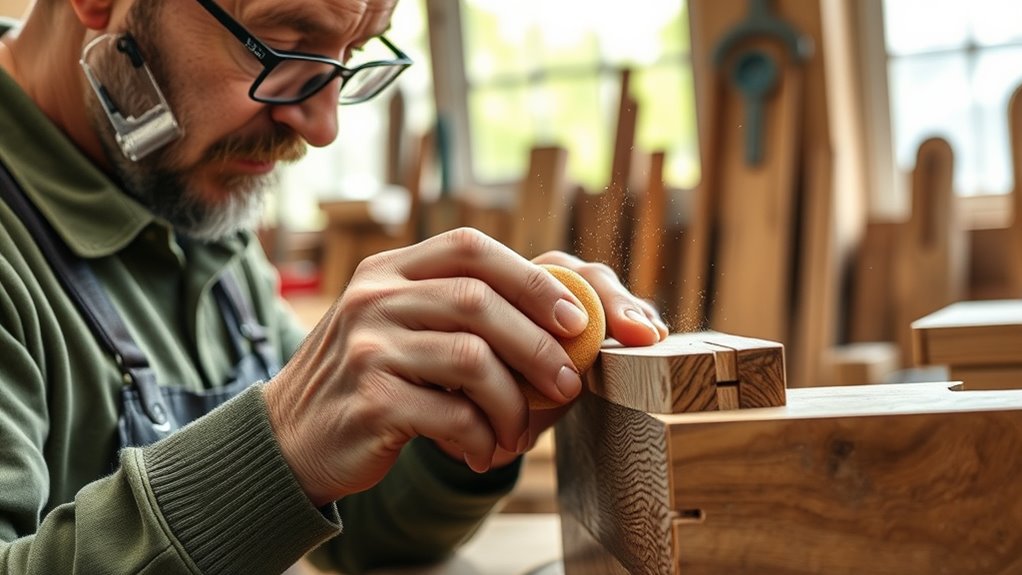
To achieve a professional finish, you need to focus on refining your project with careful sanding and smoothing. This step guarantees a polished surface free of scratches or rough spots. Attention to detail is vital; check joint fit, verify precision, and correct imperfections before moving to finishing. When applying finishes like stain, sealant, or varnish, do so consistently, respecting drying times for ideal results. Proper application enhances both durability and appearance.
Consider these key points:
- Use fine-grit sandpaper for smoothness
- Inspect joints and surfaces thoroughly
- Apply finishes in thin, even coats
- Allow adequate drying time between coats
Wrapping Up and Reflecting on Progress and Next Steps
As you wrap up your woodworking session, taking time to clean and organize your tools is essential for maintaining a safe and efficient workspace. Once your tools are tidy, review your project’s progress and seek feedback from instructors to identify areas for improvement. Reflection helps you assess your skill development, understand techniques better, and plan your next steps or new projects. Document your work by updating blueprints or jotting down notes for future reference. This process ensures you stay organized and focused. Next, prepare for upcoming projects by practicing specific joinery techniques or exploring new methods. Wrapping up thoughtfully keeps your workspace safe, sharpens your skills, and sets a clear path for continued growth in your woodworking journey.
Frequently Asked Questions
What Is a Day in the Life of a Carpenter Like?
A day in your life as a carpenter starts with safety checks and quick tests if you’re using power tools. You spend most of your time in the shop, operating equipment like table saws and following detailed blueprints. You work closely with instructors and peers to troubleshoot and improve your skills. At the end, you clean up, maintain your tools, and reflect on your progress, ready for tomorrow’s challenges.
What Is the Difference Between a Carpenter and a Woodworker?
You might think carpenters and woodworkers are the same, but they actually differ in focus. Carpenters handle large-scale projects like framing and installing structures, often working on-site with rougher materials. Woodworkers, on the other hand, craft detailed furniture and decorative pieces in workshops, emphasizing precision and fine finishing. Their skills and tools reflect these distinct roles, making each profession uniquely skilled and specialized.
What Do Woodworkers Charge per Hour?
You’re probably wondering what woodworkers charge per hour. Rates vary based on skill, location, and project complexity, typically ranging from $20 to $70. Skilled artisans may charge $50 to $100, while hobbyists or small projects might cost $20 to $30. Commercial shops usually fall between $40 and $60. Your specific rate depends on the type of work, materials, and whether it’s custom or mass-produced.
What Is a Wood Worker Job Description?
A woodworker’s job involves shaping, cutting, assembling, and finishing wood to create furniture, cabinetry, and other structures. You operate tools like saws, jointers, and sanders, ensuring safety and precision. You read blueprints, select suitable wood types, and estimate materials. Attention to detail and craftsmanship are key, as you focus on both functionality and aesthetics. Collaborating with clients or designers helps you meet project specifications and deliver quality work.
Conclusion
As your day in the woodshop draws to a close, you stand back to admire your handiwork, each piece a proof to your growing skill. Like a craftsman tending his finest creation, you’ve shaped, joined, and refined with patience and care. The scent of sawdust lingers in the air, a reminder of your journey. Tomorrow, you’ll return, enthusiastic to carve new paths and turn raw wood into works of art.