
Did you know that a DIY sliding table can increase your cutting accuracy by up to 50%? This remarkable statistic highlights the importance of integrating such a tool into your workshop. By creating your own sliding table, you not only enhance your woodworking skills but also empower yourself to take on diverse business projects with impressive precision. This article will guide you through the steps to build your very own sliding table, allowing you to expand woodworking techniques to accommodate both small and large pieces efficiently.
Key Takeaways
- Building a DIY sliding table enhances your woodworking skills significantly.
- Increased accuracy can boost the quality of your business projects.
- A sliding table allows for efficient handling of various project sizes.
- Mastering cutting techniques can transform your woodworking approach.
- Investing time in building tools improves both precision and efficiency.
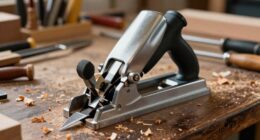
The Importance of a Sliding Table in Woodworking
A sliding table plays a vital role in woodworking, significantly enhancing your craftsmanship. This essential tool allows for highly accurate cuts that replicate the smoothness found in professional sliding table saws. The increased precision is particularly beneficial when creating intricate designs or working with small furniture frame members.
Integrating a sliding table into your woodworking projects boosts efficiency while improving overall results. Its design reflects traditional models adapted for modern table saws. This evolution in woodworking tools facilitates tasks that would otherwise be challenging, allowing woodworkers of all skill levels to produce work that looks polished and professional.

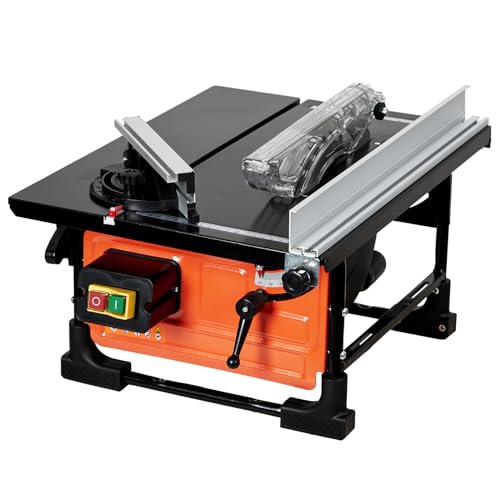
Table Saw for Jobsite, 8-inch 6.7-Amp Copper Motor, Cutting Speed up to 3576RPM, 24T Blade,Compact Portable Table Saw Kit with Sliding Miter Gauge DIY Woodworking and Furniture Making
Powerful Cutting Performance: This table saw features a robust 6.7Amps copper motor and a 24T blade, delivering high-speed…
As an affiliate, we earn on qualifying purchases.
As an affiliate, we earn on qualifying purchases.
Benefits of Using a Sliding Table
Discovering the advantages of sliding tables can transform your woodworking projects significantly. These essential tools not only enhance precision in cutting but also boost overall woodworking efficiency. The design of a sliding table stabilizes your workpiece, allowing for clean and accurate cuts even when handling larger materials.
Enhanced Precision in Cutting
The stable support provided by a sliding table is instrumental in achieving precision cuts. Unlike traditional methods, a sliding table maintains square work stops, which are crucial for creating accurate tenon shoulders and preventing misalignment. This added stability ensures that every cut resonates with the quality you desire, making it easier to produce flawless joints and edges.
Increased Efficiency and Speed
Using a sliding table can greatly enhance your woodworking efficiency. Its design allows for rapid trimming of stock, enabling you to make repeatable cuts quickly. With adjustable work stops, there’s no need to constantly recalibrate your equipment for larger projects. This streamlined approach not only speeds up your workflow but also elevates the quality of your finished products.


SKIL 10" Dual Bevel Sliding Compound Miter Saw-MS6305-00
POWERFUL 15 AMP MOTOR – Delivers 4,800 RPM for quick, detailed cuts
As an affiliate, we earn on qualifying purchases.
As an affiliate, we earn on qualifying purchases.
Understanding the Basics of DIY Sliding Tables
When embarking on the journey of building a sliding table, knowing its fundamental components can greatly enhance your success. Understanding these key components of sliding tables helps create a sturdy and effective tool for your woodworking projects. Let’s explore essential components and tools necessary for constructing your own customized sliding table.
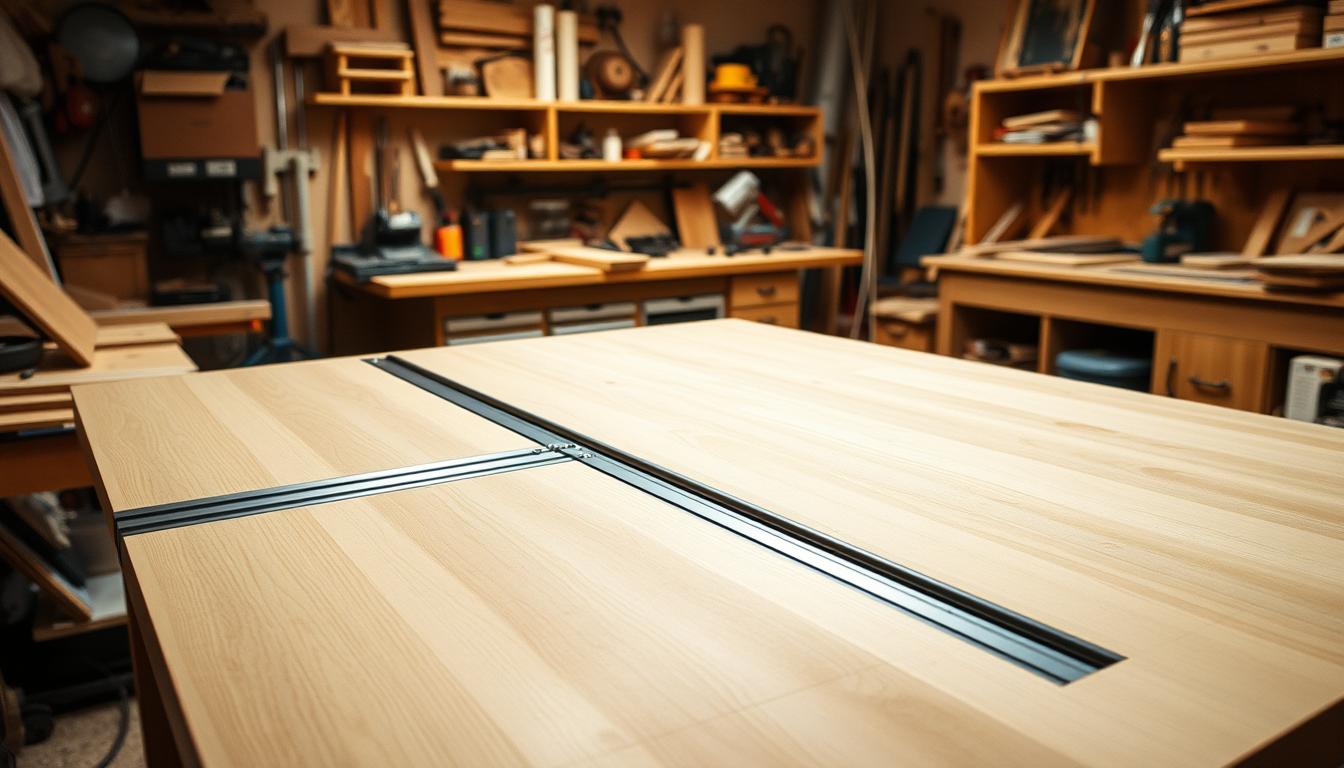
Components of a Sliding Table
The main components of sliding tables include:
- Stable Base: Provides the primary support and stability for the entire table.
- Sliding Rails: Facilitate the smooth movement of the sled, enabling precise cuts.
- Adjustable Fence: Helps in making accurate cuts and can be adjusted based on specific project needs.
- Sled Bed: Often constructed from durable materials like Baltic birch plywood, it offers the necessary support and longevity.
Tools Required for the Build
To efficiently implement various DIY techniques in building a sliding table, specific tools are essential:
- Table Saw: A fundamental tool for cutting wood accurately and cleanly.
- Router: Ideal for creating polished edges and making inlays.
- Clamps: Crucial for holding pieces together securely during assembly.
- Measuring Tools: A combination square and tape measure ensure precise cuts and measurements throughout your project.


DIY Crosscut Table Saw Sled Kit with a Specific Guide Booklet to Build Your Own Tablesaw for More Accurate and Safer Saw Working, Table Saw Accessories, Pack of 1
Cross Cut Sled for a Table Saw: The kit Greatly improves cutting accuracy, makes saw operations safer, and…
As an affiliate, we earn on qualifying purchases.
As an affiliate, we earn on qualifying purchases.
Planning Your DIY Sliding Table Build
Creating a reliable and efficient sliding table involves careful planning and thoughtful consideration of your woodworking design. The materials you select will directly impact both the functionality and longevity of the project. By evaluating your needs and the specific characteristics of your materials, you can ensure your DIY sliding table will serve you well in various woodworking projects.
Choosing the Right Materials
For your sliding table, selecting quality project materials is paramount. Baltic birch plywood stands out due to its combination of strength and stability, making it a favored choice among woodworkers. Incorporating aluminum extrusions can enhance the table’s overall structural integrity, promoting durability while maintaining a manageable weight.
Designing for Your Specific Needs
Your design should reflect the types of projects you routinely engage in. If you often work with long pieces of wood, adjusting the sliding table’s length will maximize its usability. Additionally, considering features like adjustable work stops can streamline operations, making your woodworking tasks more efficient and enjoyable.


Adjustable Angler Joinery Sled, Precision Table Saw Route Engraving Slide Table Woodworking Coping Rail Suitable for Mortise Tenon Processing fits DIY Projects, Aluminum Alloy Material
Multi-Angle Adjustment for Diverse Woodworking Needs: With an angle adjustment range of 55° to 93°, it can be…
As an affiliate, we earn on qualifying purchases.
As an affiliate, we earn on qualifying purchases.
Tips for Selecting Materials and Tools
When building a DIY sliding table, selecting the right materials and woodworking tools can significantly impact the project’s outcome. Proper material selection ensures durability, stability, and overall functionality. Pay attention to the following tips regarding materials and tools that will enhance your sliding table components.
Why Baltic Birch Plywood is Ideal
Baltic birch plywood stands out as an excellent choice for your sliding table base due to its unrivaled stability. This material minimizes warping over time, ensuring a flat and reliable surface for all woodworking tasks. The layered construction of Baltic birch creates a dense material that holds up well under pressure, making it perfect for maintaining the accuracy of your cuts.
Choosing the Right Aluminum Extrusions
Incorporating aluminum extrusions into your design brings durability and flexibility to your sliding table. Opt for extrusions featuring integrated T-slots, which allow you to attach various fixtures based on your project needs. This adaptability makes it an essential part of your woodworking tools, enabling efficient customization of your sliding table for different tasks.

Construction Steps for Your Sliding Table
Starting your DIY construction of a sliding table can be an exciting woodworking project. Begin by selecting high-quality plywood to cut the sled to size. This initial step sets the foundation for achieving precise cuts in future projects.
After cutting the sled, the next task involves positioning the sliding rails. Make sure to secure them properly, ensuring everything remains square during assembly. Having a solid base will prevent any misalignments as you progress. Using the right hardware and templates can streamline this process, simplifying the construction as much as possible.
The following is an overview of the essential sliding table steps:
| Step | Description |
|---|---|
| 1 | Cut the sled from high-quality plywood. |
| 2 | Position the sliding rails and ensure they are level. |
| 3 | Secure the rails in place, checking for squareness. |
| 4 | Utilize templates for hardware placement to avoid errors. |
| 5 | Assemble the sliding table components together. |
By following these steps, you can create a reliable sliding table that enhances your woodworking experience. This DIY construction project will not only fulfill functionality but also boost your skills in crafting high-quality wooden tools.

Expand Your Woodworking Horizons with DIY Sliding Table
Building a DIY sliding table opens up a world of possibilities for your woodworking journey. With precise adjustments available through the adjustable fence, you can achieve accurate cuts for a wide range of tasks. From furniture making to cabinetry, this enhanced control supports your ambition to expand woodworking into versatile projects.
Achieving Accurate Cuts
Your sliding table allows for exact measurements, ensuring every cut aligns perfectly with your design. Utilizing improved cutting techniques means you can transition seamlessly between various thicknesses and materials, enhancing your output quality. No more guesswork—it’s precision at your fingertips.
Working with Long and Small Pieces
The design of the sliding table excels at handling both long and small pieces effortlessly. You can cut large panels with confidence, while small components benefit from the same level of accuracy. This versatility empowers you to tackle projects of any size while maintaining the high standards of craftsmanship you aspire to achieve.

Calibrating Your Sliding Table for Accuracy
Calibrating your sliding table is an essential step in achieving woodworking precision. Proper calibration ensures that your tool accuracy aligns perfectly with the actual measurements required for your woodworking projects. This process not only enhances the quality of your cuts but also extends the life of your sliding table.
To begin with, check the alignment of the measuring tape with the blade. An inaccurate measurement may lead to frustrating mistakes, affecting both the aesthetics and structural integrity of your projects. A careful slider calibration process will prevent errors and facilitate smoother operations, yielding cleaner cuts and impressive craftsmanship.
Here is a simple guide to the calibration process:
- Start by ensuring the sliding table is securely attached and stable.
- Adjust the measuring tape to line up with the blade at various angles.
- Make test cuts and compare the results with your measurements.
- Re-calibrate as necessary until the cuts consistently meet your standards.
Regular checks on the calibration of your sliding table will keep tool accuracy at its peak, enabling you to fully explore your woodworking capabilities. By dedicating time to calibration, you invest in the longevity of your tools and the success of your projects.

| Calibration Aspect | Importance |
|---|---|
| Measuring Tape Alignment | Ensures accurate cuts |
| Blade Position Verification | Prevents material wastage |
| Test Cuts Comparison | Validates your measurements |
| Regular Maintenance | Enhances tool longevity |
Maintenance Tips for Longevity of Your Sliding Table
To ensure your sliding table serves you well for many projects to come, regular tool maintenance is essential. Start with routine cleaning; keep the sliding rails free from dust and debris, as contaminants can hinder performance. A clean surface on your sliding table enhances accuracy, promoting woodworking longevity.

Lubrication plays a vital role in sliding table upkeep. Applying a suitable lubricant to moving parts reduces friction, allowing smoother operation. Ensure you check the lubricant’s effectiveness regularly, reapplying it when necessary. This simple step not only aids performance but also extends the life of your equipment.
Don’t overlook periodic recalibration of your sliding table. This process is crucial for precision in your cuts, ensuring that as the table ages, you still achieve the accuracy you desire. With ongoing attention to these maintenance practices, the longevity of your woodworking projects can flourish.
Common Mistakes to Avoid When Building Your Sliding Table
Building a sliding table can enhance your woodworking projects, yet certain mistakes can lead to frustration and subpar outcomes. Avoiding these common pitfalls ensures a smoother construction process and a more effective final product.
Underestimating Material Needs
One of the frequent building mistakes made by DIY enthusiasts is underestimating the quantity of materials required for the project. Sufficient planning, along with a thorough material list, can help prevent shortages that may derail your progress. Failing to account for necessary components often leads to unnecessary delays and additional expenses. To avoid these sliding table errors, take the time to accurately measure and list all items needed before starting your build.
Neglecting Calibration
Proper calibration is essential for achieving accurate results when using your sliding table. Neglecting this aspect can result in poor cuts and wasted materials, a situation all too familiar to many woodworking enthusiasts. Design your setup with calibration in mind, ensuring that adjustments are easy to make as you proceed. By prioritizing calibration, you can avoid common woodworking pitfalls and achieve the best possible results in your projects.

Building Additional Features for Your Sliding Table
Enhancing your sliding table with additional features can significantly elevate your woodworking experience. By incorporating practical elements, you improve both functionality and precision. Here are two key enhancements that are worth considering.
Incorporating Flip Away Stops
Adding flip-away stops is a fantastic way to boost the functionality of your sliding table. This feature allows for quick adjustments, ensuring that you can make arbitrary measurements without the hassle of recalibrating your setup every time. Flip-away stops not only streamline your workflow but also contribute to the overall versatility of your sliding table features. You can easily switch between different tasks while maintaining accuracy in your cuts.
Adding a Sight Line Gauge for Precision Cuts
A sight line gauge is an invaluable addition for anyone looking to achieve precise cuts. This woodworking enhancement assists you in aligning your stock prior to cutting, promoting accuracy and repeatability. With a sight line gauge, you can feel confident that your results will be consistent across multiple cuts. Such added functionality transforms your sliding table into a tool that elevates your woodworking projects to a professional level.

| Feature | Description | Benefits |
|---|---|---|
| Flip Away Stops | Adjustable stops that flip out of the way when not in use. | Quick adjustments, increased versatility. |
| Sight Line Gauge | A visual guide for aligning cuts. | Improved accuracy and consistency. |
Real-Life Applications of a Sliding Table
The versatility of a sliding table opens up exciting opportunities for various woodworking applications. You can utilize this tool for a wide range of sliding table projects, significantly enhancing both the quality and precision of your work. One of the most notable practical uses includes crafting fine furniture, where intricate designs and smooth finishes are paramount.
Additionally, large cabinetry projects benefit greatly from the sliding table’s ability to handle substantial materials with ease. Whether you are constructing kitchen cabinets or custom shelving units, the sliding table allows for accurate cuts that are essential in ensuring your work is both functional and aesthetically pleasing.
Here’s a quick overview of common woodworking applications utilizing sliding tables:
| Application | Description |
|---|---|
| Fine Furniture Making | Enhances precision and quality in crafting detailed furniture pieces. |
| Cabinetry | Ideal for cutting large panels and ensuring uniformity in measurements. |
| Musical Instruments | Permits intricate designs required for high-quality sound production. |
| Custom Accents | Facilitates detailed work for decorative features in various projects. |
Incorporating a sliding table into your woodworking toolkit opens doors to these practical uses and more, enhancing your overall craftsmanship and efficiency.

Resources for Further Learning and Inspiration
As you embark on your woodworking journey, a wealth of resources awaits to guide you and spark your creativity. Online platforms offer an abundance of woodworking tutorials that cater to all skill levels, making it easy to enhance your expertise and build remarkable projects. Consider joining community forums where you can connect with fellow woodworkers to share tips and seek answers to your questions.
Various websites dedicated to woodworking provide invaluable learning resources, including detailed plans and instructional videos. These platforms can serve as your go-to references when designing and building your DIY sliding table. Finding the right inspiration for projects becomes effortless as you explore different designs and techniques shared by the woodworking community.
| Resource Type | Description | Examples |
|---|---|---|
| Woodworking Tutorials | Step-by-step guides to help you learn specific skills and techniques. | YouTube channels like Woodworking for Mere Mortals and The Wood Whisperer. |
| Community Forums | Platforms for discussion, advice, and sharing experiences with others. | Reddit’s r/woodworking and LumberJocks. |
| Project Plans | Diverse plans offering inspiration and instruction for your own projects. | Wood Magazine and Fine Woodworking. |
By tapping into these resources, you can cultivate your skills while discovering endless inspiration for projects. Whether you are a beginner or an experienced woodworker, these tools will enhance your woodworking journey.

Conclusion
Building a DIY sliding table is a significant milestone in your woodworking journey. This project not only enhances your skills but also empowers you with the ability to achieve greater efficiency and precision in your woodworking tasks. By incorporating this tool into your workspace, you transition from basic techniques to more advanced woodworking mastery.
As you reflect on your DIY sliding table summary, it’s clear that the benefits extend far beyond mere functionality. The versatility and customization options allow you to tackle various projects and improve your overall craftsmanship. Each use of your sliding table reveals new possibilities, encouraging you to explore and push the boundaries of your woodworking capabilities.
In embracing the DIY approach, you’re not just creating a tool; you’re instilling yourself with confidence and an adventurous spirit in woodworking. So gear up, keep refining your skills, and remember that each piece you create brings you closer to mastering the art of woodworking.