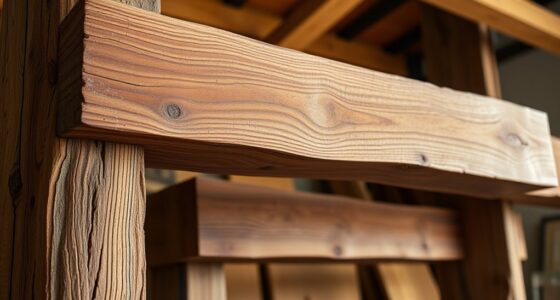

When using cauls for flat glue-ups, you should place them carefully on top of your panels, making certain they’re straight, flat, and free of defects. Apply glue evenly to avoid squeeze-out and use wax or parchment paper to prevent sticking. Gradually tighten clamps, checking for even pressure and gaps, and add additional cauls to support areas prone to flexing. Proper technique ensures a tight, flat bond—keep going to discover how to master this process.
Key Takeaways
- Place straight, smooth cauls directly on panels to distribute pressure evenly and maintain flatness during clamping.
- Use wax or parchment paper between cauls and panels to prevent sticking and simplify cleanup.
- Support flexing or bowed areas with additional cauls to ensure uniform pressure.
- Gradually tighten clamps while checking for gaps or uneven contact, adjusting as needed.
- Inspect for flushness and even pressure distribution after clamping to ensure a professional, flat glue-up.
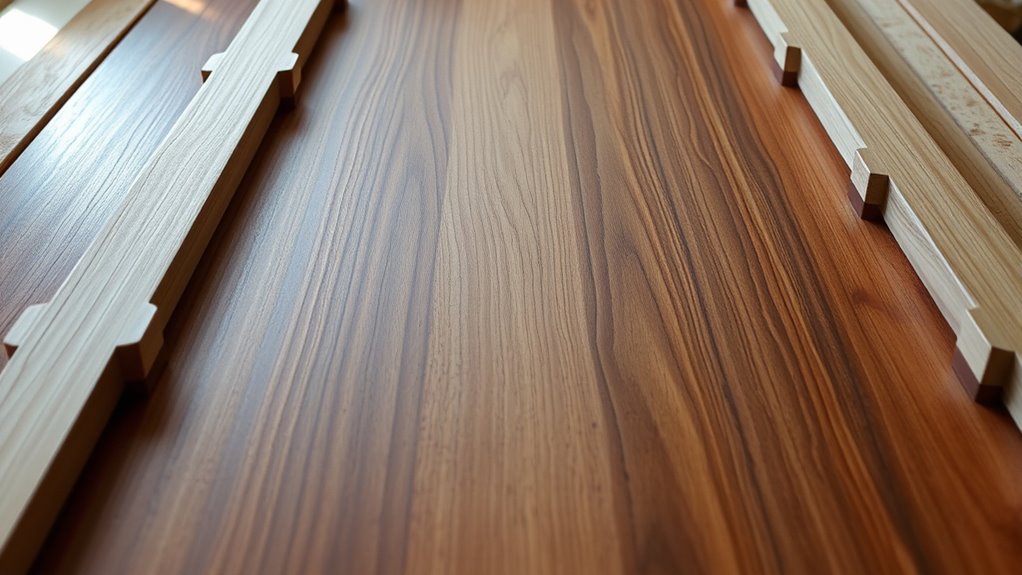
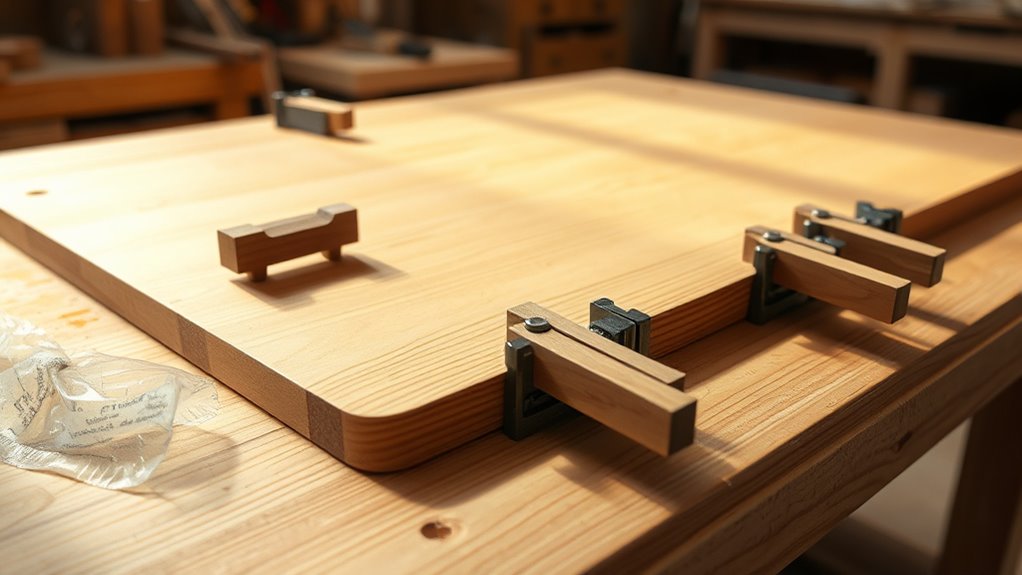
When gluing up flat panels, using cauls can make a significant difference in achieving a tight, even bond. Cauls help distribute pressure uniformly across the entire surface, guaranteeing the glue-up stays flat and prevents warping or gaps. To optimize your clamping techniques, it’s essential to understand how to position your cauls properly and apply glue effectively. Start by applying glue evenly across every board’s surface. Use a brush or roller for precise glue application, making sure you cover all areas without excess that might squeeze out and create a mess. The goal is to achieve a thin, consistent layer of glue that bonds well without squeezing out excessively during clamping.
Using cauls ensures even pressure and a flat, gap-free panel during glue-up.
Once you’ve applied glue, assemble the panels carefully. Place your first caul on top, aligning it straight and flat across the panels. The caul acts as a pressure spreader, so it’s crucial that it’s smooth and free of defects. Then, add clamps or screws around the perimeter, gradually tightening them to ensure even pressure. The key to good clamping techniques with cauls is to avoid over-tightening, which can squeeze out too much glue or create uneven pressure points. Instead, tighten clamps gradually, checking for any gaps or unevenness. If necessary, use additional cauls to support areas that tend to bow or flex, maintaining a consistent surface.
Additionally, monitoring the pressure distribution while tightening helps prevent uneven glue lines and ensures a professional finish. As you tighten the clamps, keep an eye on the pressure distribution. The cauls help prevent the panels from slipping out of alignment and reduce the risk of uneven glue lines. If you notice any gaps or areas where the glue isn’t contacting properly, loosen the clamps slightly and adjust the cauls or panels. In some cases, it’s helpful to use wax paper or parchment paper between the cauls and the panels to prevent sticking and make cleanup easier. After clamping, give the entire assembly a gentle inspection to verify that the panels are flush and the pressure is evenly distributed.
Using cauls effectively isn’t just about pressure; it’s also about control. Proper glue application combined with thoughtful clamping techniques ensures a strong, flat glue-up. Patience during tightening and careful alignment will pay off with a professional-looking result. Remember, the goal is a seamless, tight bond, and cauls are your best tool to achieve that. With experience, you’ll develop a feel for how much pressure to apply and how to position your cauls for perfect flat panels every time. Moreover, understanding the importance of setting a time limit after glue-up can help in managing your workflow and ensuring timely completion of your project.

Woodpeckers Phenolic Clamping Cauls, 2-Pack, 24 Inch Panel Clamps, Cambered Design Delivers Even Pressure for Flat Panel Glue-Ups, Non-Stick, Shop-Grade Durability – CAUL24X2-23
ENGINEERED FOR FLAT PANEL GLUE-UPS – Precisely cambered phenolic cauls deliver up to 225 lbs of uniform clamping…
As an affiliate, we earn on qualifying purchases.
As an affiliate, we earn on qualifying purchases.
Frequently Asked Questions
Can Cauls Be Reused for Different Projects?
Yes, you can reuse cauls for different projects, but their durability depends on the material and how well you maintain them. Proper cleaning and storage extend their lifespan. If a caul shows signs of wear or damage, consider alternative caul materials like hardwood or MDF, which can offer better durability. Always inspect your cauls before reuse to guarantee they provide even pressure and won’t damage your work.
What Materials Are Best for Making Cauls?
You should choose the right materials for making cauls based on your project. Rigid woods like maple or oak work best for flat, even pressure, while flexible woods such as mahogany or pine can adapt to curved surfaces. Using durable, smooth types of wood guarantees even pressure distribution and prevents damage. Select materials that match your project’s shape and require minimal warping for the best results.
How Do I Prevent Glue From Sticking to the Caul?
Think of your caul as a magnet for glue, but you want it to repel rather than attract. To prevent glue from sticking, apply a clamp alternative like wax paper, parchment, or a silicone sheet between the caul and the glue surface. For easy cleanup, use a glue release spray or a light coat of oil. This way, you’ll keep your caul clean and reuse it without a hitch.
What Size Should the Caul Be Relative to the Workpiece?
You should choose caul dimensions that comfortably cover the workpiece, with at least an inch of overhang on all sides for even pressure. Confirm the caul’s size matches your workpiece’s dimensions for ideal compatibility, preventing uneven glue distribution. A properly sized caul supports the entire surface evenly, reducing the risk of damage or bowing. Always tailor caul size to your specific project to achieve the best flat glue‑up results.
How Do I Maintain Even Pressure With Cauls?
Ever wondered how to keep pressure even with cauls? You should check the clamp alignment first, ensuring all clamps are evenly positioned. To maintain consistent pressure distribution, tighten each clamp gradually and in a crisscross pattern, rather than one side at a time. This prevents uneven stress and helps the caul apply uniform force across the workpiece, resulting in a flat, well-glued surface.
Woodpeckers Phenolic Clamping Cauls, 2-Pack, 24 Inch Panel Clamps, Cambered Design Delivers Even Pressure for Flat Panel Glue-Ups, Non-Stick, Shop-Grade Durability – CAUL24X2-23
ENGINEERED FOR FLAT PANEL GLUE-UPS – Precisely cambered phenolic cauls deliver up to 225 lbs of uniform clamping…
As an affiliate, we earn on qualifying purchases.
As an affiliate, we earn on qualifying purchases.
Conclusion
Using cauls for flat glue-ups is a game-changer that can save you hours of frustration. With proper technique, you’ll achieve perfectly aligned, rock-solid joints that feel like they were crafted by a master. Don’t underestimate their power—cauls can turn a shaky, uneven glue-up into a smooth, professional finish in no time. Once you master this simple tool, your woodworking projects will reach a whole new level of excellence, making every piece look like a work of art.

Reynolds Cut-Rite Wax Paper, 75 Square Foot Roll
WAX PAPER ROLL: Contains one roll of Reynolds Cut-Rite Wax Paper, measuring 75 feet x 12 inches
As an affiliate, we earn on qualifying purchases.
As an affiliate, we earn on qualifying purchases.
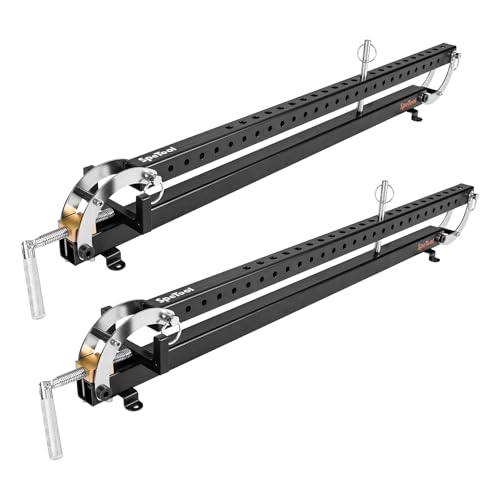
SpeTool 24 inch Panel Clamp 2 Pack, 4-Way Pressure Steel Parallel Clamp For Board Cabinet, Tabletops, Woodwork, Adjustable parallelogram Couplers, Cutting Board Clamps For Precision Projects
The 4-Way Panel Clamp:With parallelogram couplers, our 2 pack panel clamps are very convenient to use. It clamps…
As an affiliate, we earn on qualifying purchases.
As an affiliate, we earn on qualifying purchases.