
To transform beams with refined wood wraps, start by selecting the right material like hardwood flooring, faux wood, or solid lumber based on your aesthetic and budget. Measure and cut each piece accurately, then assemble the sections with precise joints and seam finishing techniques. Sand and fill gaps for a seamless look, and carefully secure and level the wraps during installation. Finish with protective coats for a polished appearance; continue below to explore detailed steps for a professional result.
Key Takeaways
- Select appropriate wood materials and prepare precise measurements for seamless wrapping.
- Cut, assemble, and secure wood pieces with proper tools and techniques for a smooth fit.
- Make notches and adjustments to accommodate features like electrical boxes safely.
- Finish joints and seams with filling, sanding, and applying protective finishes for a polished look.
- Ensure final coats are smooth, sealed, and inspected for a professional, refined beam transformation.

10" x 7" Sample – Rough Sawn Endurathane Faux Wood Beam w/Catalog (Premium Aged Finish)
- Dimensions: 10 x 7 x 1 inches
- Realistic Texture: Touch and feel wood grain
- Elegant Finish: Rich, statement-making appearance
As an affiliate, we earn on qualifying purchases.
As an affiliate, we earn on qualifying purchases.
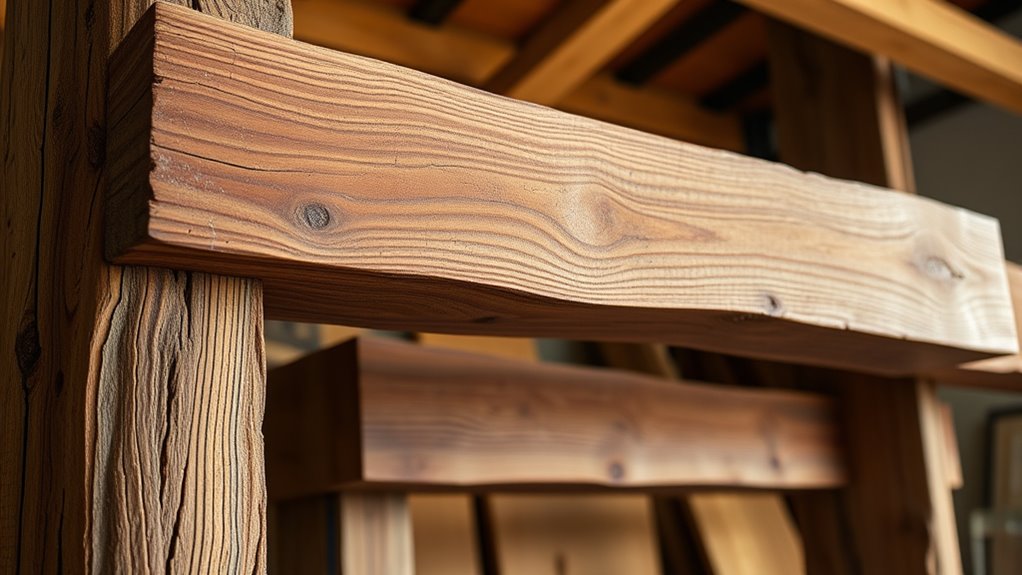
Choosing the Right Material for Your Beam Wrap
When selecting the right material for your beam wrap, it’s important to take into account both your desired look and your budget. Wood glue plays a pivotal role in ensuring a secure bond, especially when working with hardwood flooring remnants or solid lumber. If you opt for leftover flooring, use wood glue to attach the pieces firmly, creating an authentic, aged appearance. Faux wood beams are designed for easy slipping over existing beams, but applying wood glue can enhance stability if needed. Solid lumber, which you can stain to match your decor, benefits from wood glue to keep pieces tightly joined during installation. Overall, choosing the right material depends on your aesthetic goals, ease of installation, and budget, with wood glue serving as a versatile adhesive across options. Additionally, incorporating space and organization strategies can aid in planning your project and managing materials efficiently. Understanding adhesive types and their specific applications can also help ensure a durable and professional finish, especially when considering different bonding strengths required for various materials. Being aware of the different application techniques can further improve your results and ensure a seamless appearance.
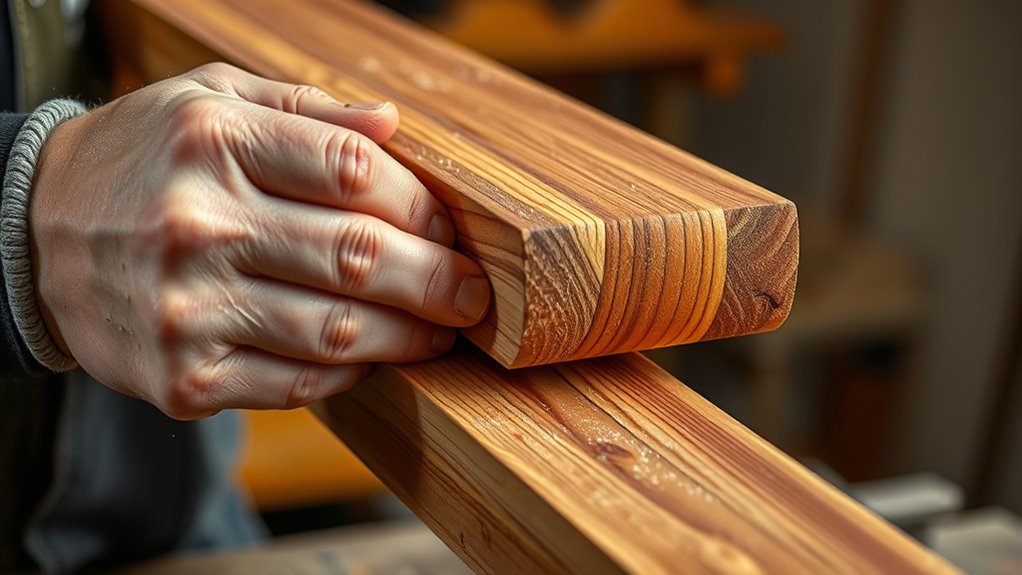
Preparing and Cutting Your Wood Pieces
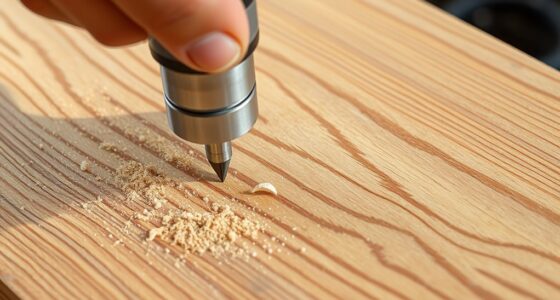
Before assembling your beams, you need to carefully prepare and cut your wood pieces to fit the existing structure. Start by measuring the length of the existing beam accurately with a tape measure, using a ladder if needed. Then, decide whether to use hardwood flooring, faux wood beams, or lumber, based on your desired wrap look. Using the appropriate cutting tools ensures precise and clean cuts, which is essential for a seamless fit. To cut your pieces: 1. Make sure to cut each piece to size using a table saw, ensuring the cuts are straight and precise. 2. When cutting, focus on one side to get a clean, smooth edge—consider creating a straight edge with a homemade track saw if necessary. 3. After cutting, let the wood dry if needed, then sand the edges smoothly before applying two coats of finish or glue. Incorporating architectural solutions can also help ensure your project aligns with professional standards for quality and durability. Additionally, selecting the right vibration control techniques can improve the accuracy and safety of your cuts during the process. Proper lighting conditions further enhance precision when working with wood. Moreover, understanding emotional support principles can help you stay patient and motivated throughout your DIY project, especially if challenges arise.
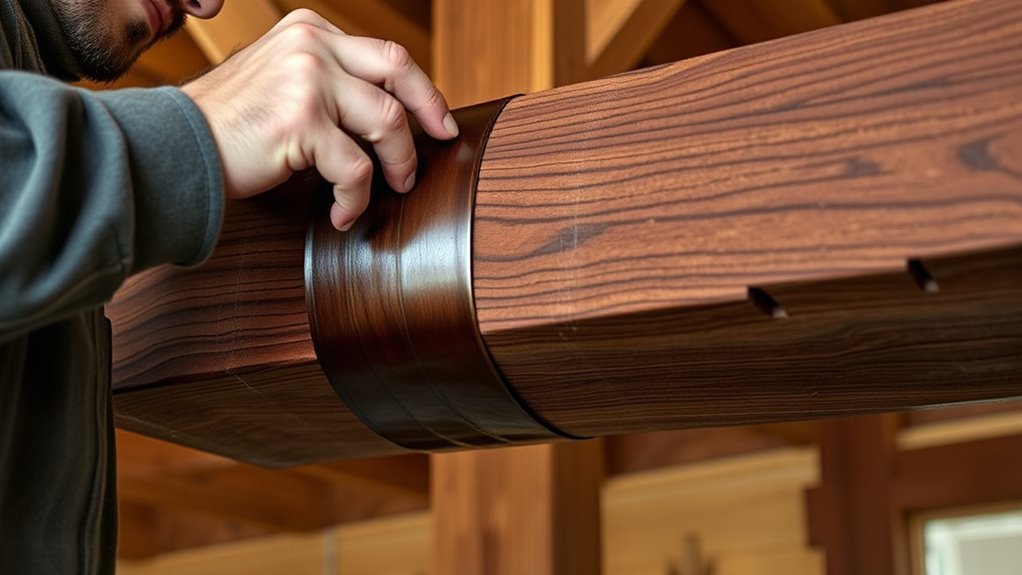
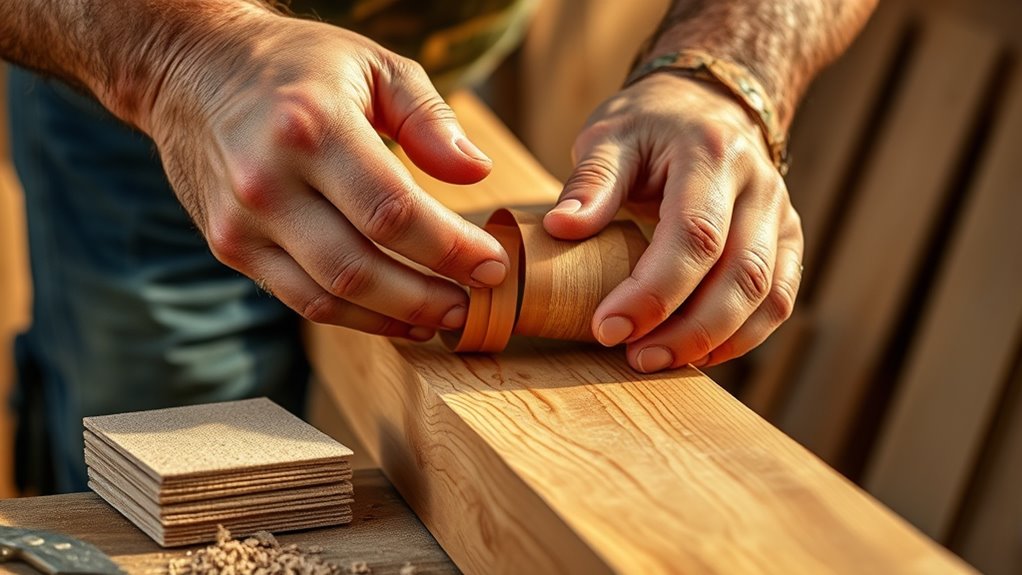
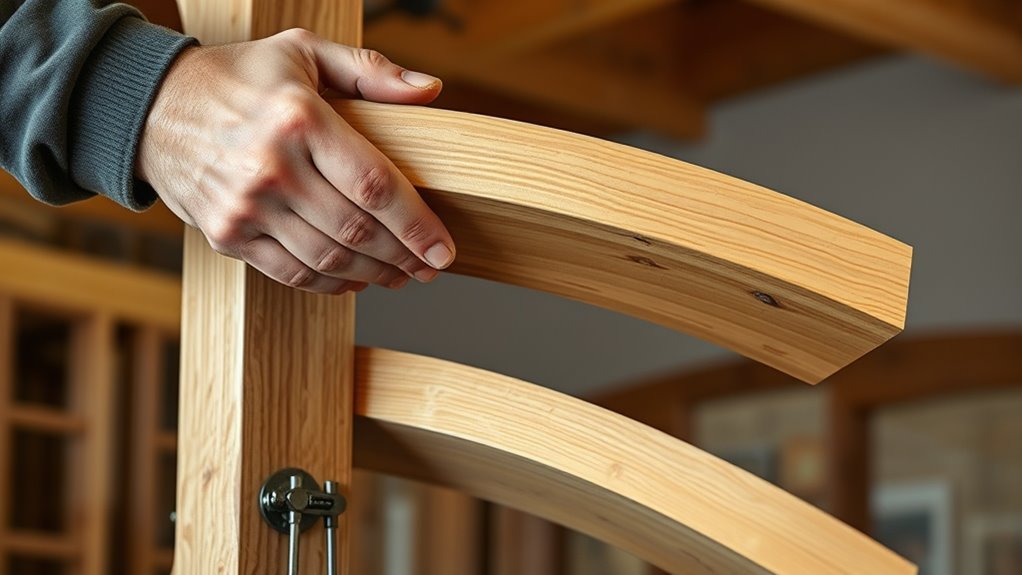
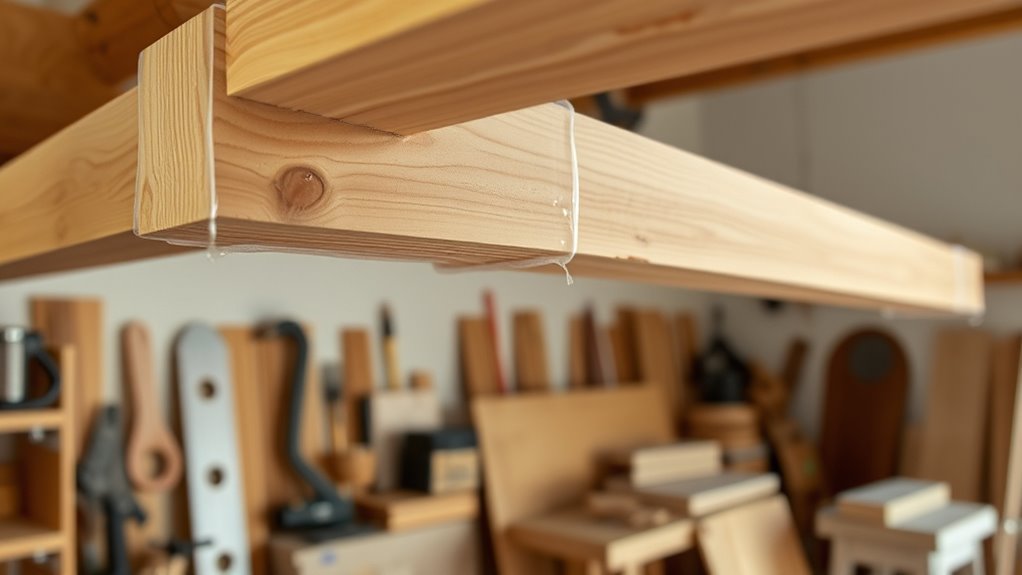
Assembling the Wrapped Sections With Precision
To guarantee your wrapped sections fit seamlessly, start by measuring and cutting each piece precisely to match the beam’s dimensions, including any notches for fixtures or conduits. Use a homemade or commercial miter saw setup to achieve accurate 45° mitered corners, ensuring seamless, realistic joints. Carefully clamp the wrapped sections together, checking alignment before nailing or screwing to maintain a tight, level fit across all sides. Pay close attention to tightness and positioning during assembly to prevent gaps. If any seams or gaps appear, fill them with matching wood glue mixed with sawdust or a specialized filler for a seamless look. Once assembled, sand the wrapped sections smoothly, making all seams flush and ready for finishing to give your project a professional, cohesive appearance. Incorporating precise measurements for each piece helps ensure a perfect fit and professional finish. Additionally, understanding the horsepower of your electric tools can help you achieve cleaner cuts and more precise assembly. Being aware of the importance of smooth, even surfaces will also contribute to a more polished final result. Moreover, utilizing sound vibrations during sanding can help achieve a finer, smoother surface finish.
Seam Finishing Techniques for a Seamless Look
Achieving a seamless appearance after assembling your wrapped sections relies heavily on effective seam finishing techniques. To do this, start by filling gaps with matching wood filler or a sawdust-glue mixture, then sand smooth to blend the joints. Next, ensure tight joints by carefully measuring and cutting each wrap, holding pieces firmly during nailing to prevent gaps. Apply wood glue along mitered edges and seams for a strong bond that minimizes visible gaps after drying. Finish by thoroughly sanding the seams with fine-grit sandpaper or a tack cloth to smooth irregularities and blend the joints into the surface. Incorporating natural materials like reclaimed wood can also enhance the rustic charm and authenticity of your project. Additionally, choosing the right textiles and accessories can elevate the overall look of your farmhouse-inspired decor, creating a cohesive and inviting atmosphere.
Sanding, Filling, and Applying Finishes
Start by sanding your wrapped beams with fine-grit sandpaper or a walnut tack cloth to create a smooth surface. Fill any seams, knots, or gaps with walnut sawdust mixed with glue, then sand them smooth once dry. Finish by applying thin coats of your chosen wood finish, sanding lightly between coats for a polished, durable look.
Smoothing Surface Finishes
Once you’ve wrapped your beams, the next step is to create a smooth, polished surface. To do this, start by sanding the wrapped beams with fine-grit sandpaper or a Walnut finishing tack cloth to remove splinters and rough spots. Then, carefully fill any gaps, seams, or knots with a mixture of wood glue and sawdust or CA glue and accelerator for a seamless look. Next, apply multiple coats of a high-quality finish like Armiseal satin using a lint-free cloth, letting each coat dry thoroughly and lightly sanding between coats. Finally, use a damp cloth to remove dust and residue after each step. This process ensures a refined, glossy finish that highlights the natural warmth and luster of your wood. Incorporating proper surface preparation techniques will further enhance the durability and appearance of your finish.
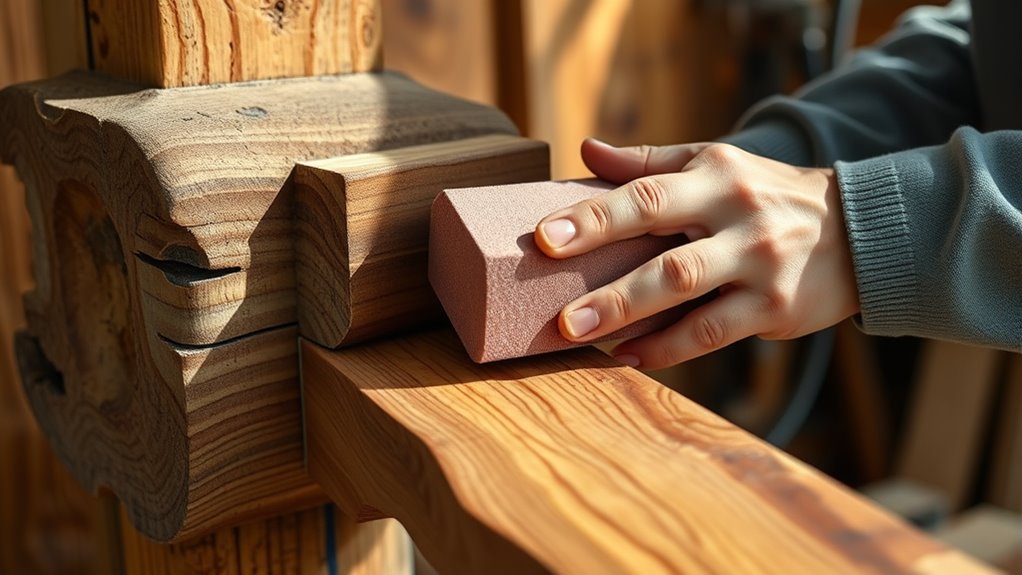
Seam and Gap Filling
Before applying the final finish, it’s essential to address seams and gaps to guarantee a smooth, professional appearance. Start by sanding the seams with fine-grit sandpaper or a sanding block until they are flush and even. Fill any gaps or seams with a matching wood filler or a mixture of sawdust and glue to create a seamless look. Be sure to wipe off excess filler immediately to prevent residue buildup. Once the filler dries, sand the filled areas smoothly to blend with the surface. Afterward, apply a final coat of finish or sealant over the repaired areas to hide imperfections and boost durability. Regularly inspect the seams during this process to verify the surface remains uniform, free of gaps, and looks polished. Proper seam and gap filling techniques are crucial for achieving a high-quality finish. Incorporating proper filtration and finishing techniques can also help achieve a more refined appearance and longevity. Additionally, paying attention to quality materials ensures that repairs will hold up over time and contribute to a professional look. Furthermore, selecting appropriate finishing products can enhance the durability and aesthetic appeal of your project. Ensuring good air quality considerations during the process helps prevent dust and contaminants from settling on the surface and affecting the final outcome.
Final Protective Coats
Achieving a smooth, professional finish on your wrapped beams requires thorough preparation and careful application of protective coats. First, make certain all surfaces are dry and dust-free. Use a walnut tack cloth to lightly sand the beams, creating an even surface. Next, fill any visible seams or gaps with walnut sawdust mixed with glue, then sand once dried to smooth out imperfections. To ensure the longevity of the finish, consider applying a sealant or protective coating, which can provide added durability against wear and environmental factors. It is also helpful to inspect your work regularly to catch any issues early. Finally, apply a thin, even coat of Armiseal satin finish with a lint-free cloth, letting it sit for 10-15 minutes before wiping off excess. For best results, add a second coat, sanding lightly between coats if needed, and allow each coat to dry overnight. This process enhances the warmth, durability, and professional look of your beams. Incorporating proper surface preparation techniques can significantly improve the overall finish and longevity of your project.
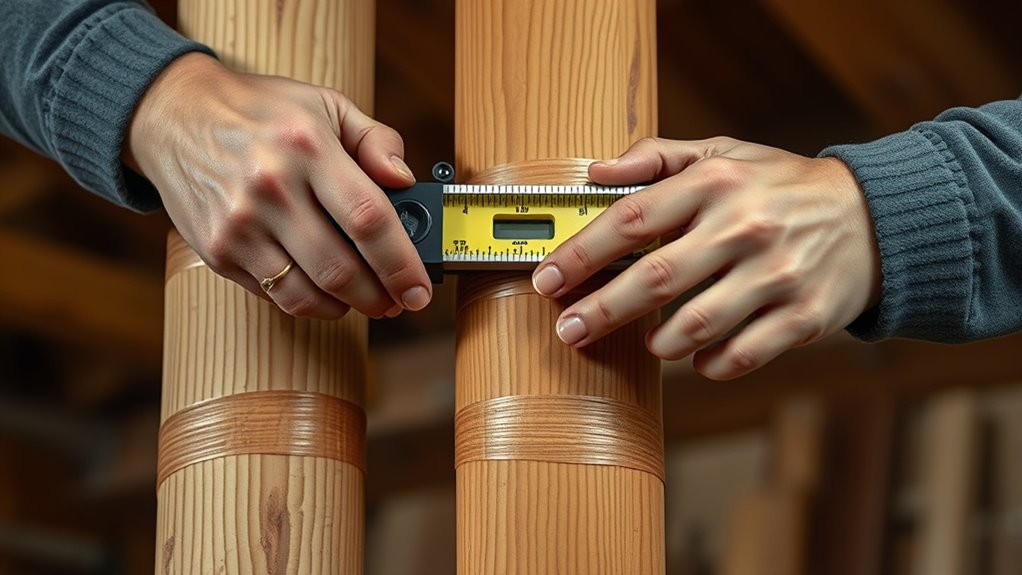
Planning and Marking for Installation
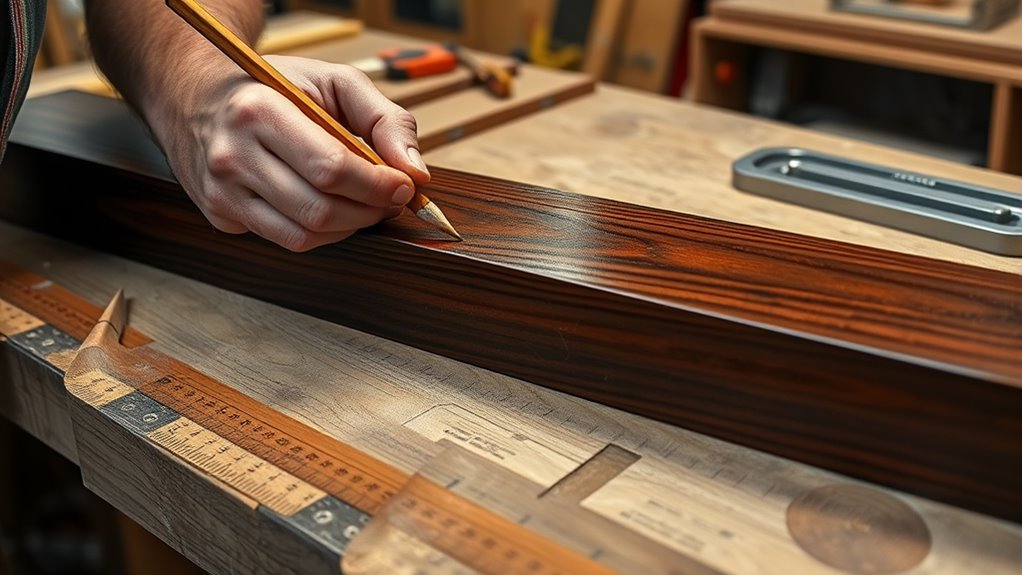
To guarantee your wood wraps fit perfectly and are aligned correctly, start by carefully measuring the length and circumference of each beam, noting any irregularities. Use a tape measure for accurate readings and mark these measurements clearly. Next, determine where you want the wraps to start and end on the wall and beam, marking these points precisely. Use a level or straight edge to draw guidelines on the wall to ensure consistent height and alignment throughout. Transfer the beam’s height and width measurements onto your wrapping material to plan your cuts accurately. If your wraps need notches or cutouts for features like electrical boxes or conduits, mark these areas before cutting. Proper planning and marking save time and ensure a clean, professional finish. Additionally, understanding the ingredients in various ice cream types can help you select the best flavor or product for your preferences and needs.
Securing the Wraps and Leveling Them Properly
Ensuring your wood wraps are properly secured and level is essential for a polished look. To do this effectively, follow these steps:
- Use clamps to hold seams tightly, preventing gaps and ensuring a seamless connection during fastening.
- Fasten the wraps every 4 to 6 inches with nails or screws, checking frequently with a level to keep everything straight.
- Make small adjustments by gently bending or shimming the wraps before final fastening to correct any unevenness or misalignment.
Remember to double-check the level after each fastener; the weight of the material can cause shifts. Taking your time with these steps guarantees a smooth, professional finish.
Making Notches and Adjustments for Fit and Safety

When making notches for existing steel conduit, it’s important to cut carefully around the conduit with a jigsaw to guarantee a snug fit without damaging the surrounding wood. Measure the conduit’s diameter precisely, then mark the notch location, adding a small clearance to prevent cracks or warping. Use a template or jig to ensure consistent notch sizes, especially when accommodating multiple conduits or irregular shapes. After cutting, sand the edges smooth to prevent splinters and achieve a clean finish. To ensure proper fit and safety, adjust the wraps’ bottom edges slightly for level installation. Keep these key points in mind:
| Step | Action | Purpose |
|---|---|---|
| Measure & Mark | Precisely measure conduit diameter | Accurate notch placement |
| Cut & Sand | Carefully cut with jigsaw, then smooth | Prevent damage and splinters |
| Adjust & Level | Slightly bend or adjust for level | Safe, stable fit |
Final Touches to Achieve a Polished, Professional Appearance
To give your wrapped beams a professional finish, focus on smoothing seams and joints with fine-grit sandpaper or a tack cloth. Fill any gaps with matching wood filler or sawdust mixed with glue, then sand flush for a seamless look. Finally, apply a clear coat or stain, buff the surface, and inspect for any imperfections to guarantee a polished, refined appearance.
Seamless Seam Finishing
Achieving a seamless, professional finish requires carefully filling and smoothing the joints between wrapped sections. First, mix walnut sawdust with glue to create a filler that nearly disappears into the wood. Apply this mixture into the seams, ensuring they’re fully filled. Next, sand the filled areas with fine-grit sandpaper or a finishing tack cloth until smooth, blending the seam into the surrounding surface. Finally, protect your work by applying a final coat of finish over the seams, which helps unify the appearance and adds sheen. To keep your work tidy, use masking tape during filling and finishing to prevent excess material from spreading. Carefully inspect and sand the seams afterward to ensure they’re flush, smooth, and virtually invisible.
Final Surface Refinement
Before applying the final finish, thoroughly inspect the entire surface and perform any necessary touch-ups or light sanding to guarantee all seams and imperfections are smooth and barely visible. Next, sand the wrapped beams with a finishing tack cloth to remove dust and create a sleek surface. Apply a thin, even layer of your chosen finish, like Armiseal satin, using a lint-free cloth. Wipe off excess after 10-15 minutes to prevent tackiness. Fill any visible gaps or seams with a walnut sawdust and glue mixture, then sand smooth once dried for a seamless appearance. Use a high-quality product to enhance the wood’s warmth and luster. Finally, add additional coats if needed, ensuring a polished, professional look that highlights your craftsmanship.
Frequently Asked Questions
What Kind of Wood Do You Use to Wrap Beams?
When thinking about what kind of wood to use for wrapping beams, you have several options. You might choose hardwood remnants or leftover pallets for an authentic, budget-friendly look. Faux wood wraps made from composite or polyurethane are great for a seamless finish. Stained lumber like oak or pine offers customization, while solid black American Walnut provides a high-end, refined appearance. Your choice depends on your aesthetic, budget, and desired authenticity.
How to Restore Old Wooden Beams?
To restore old wooden beams, start by inspecting them carefully for damage or rot, replacing or reinforcing as needed. Clean the beams thoroughly to remove dust and old finishes. Use wood filler or epoxy to repair cracks and imperfections, then sand the surface smooth. Finish with a protective coat like stain or polyurethane to enhance beauty and durability. Consider adding a wood wrap to preserve and upgrade the beams’ appearance.
How to Clad a Steel Beam With Wood?
You wonder how to clad a steel beam with wood, but the real challenge is creating a seamless, natural look that hides the metal’s coldness. Start by measuring and cutting your wood or faux beams precisely. Use a miter saw for perfect corners, then secure everything tightly with adhesive and nails. Notch around any hardware, fill seams with sawdust mixed with glue, sand smoothly, and enjoy your transformed, authentic-looking beam.
What Does It Mean to Wrap a Beam?
Wrapping a beam means covering an existing structural beam with decorative material, like wood or faux wood, to improve its look. You measure, cut, and secure the material around the beam, often mitering corners for a seamless appearance. This process can hide imperfections and add visual interest, making your space more attractive. Proper fastening guarantees the wrap stays tight, giving the beam a polished, finished look.
Conclusion
By following these steps, you’ll transform your beams into stunning focal points that could outshine even the most dazzling chandeliers. With patience and precision, your wood wraps will look so flawless, they’ll turn every room into a masterpiece. Remember, attention to detail makes all the difference—so take your time and enjoy the process. Soon, your space will be radiating warmth and charm, making visitors stare in awe at your incredible craftsmanship.