
To set up your mini lathe safely, start by organizing your workspace—remove clutter, secure the lathe on a level surface, and make certain cords are tidy. Calibrate your tools accurately, checking sharpness and alignment. Securely mount your workpiece, adjust the tailstock and carriage smoothly, and verify all components are correct. Always wear safety gear and test the machine at low speed before starting full operation. Continuing will help you master effective safety and setup techniques.
Key Takeaways
- Keep the workspace organized, free of clutter, and secure the lathe on a stable, level surface.
- Inspect and calibrate tools, ensuring proper mounting, sharpness, and alignment before operation.
- Connect power safely, tighten the workpiece securely, and set adjustable components for precise control.
- Wear safety goggles and gloves, and ensure emergency stops are accessible before starting the lathe.
- Perform a visual check, run the lathe at low speed initially, and verify all components are correctly set.
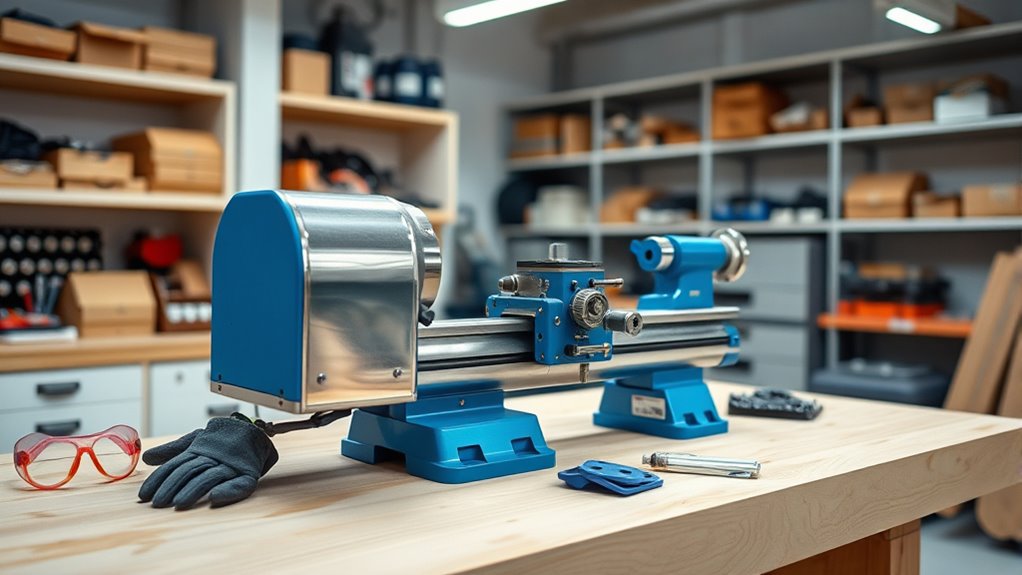
Setting up a mini lathe is a straightforward process that lays the foundation for safe and accurate machining. The first step is ensuring your workspace is well-organized and free of clutter. A tidy area not only reduces the risk of accidents but also helps you focus on your work. Clear away any unnecessary tools, cords, or debris that could interfere with your operation. Place your mini lathe on a stable, level surface, ensuring it’s secure and won’t shift during use. A solid foundation prevents vibrations, which can affect precision and safety.
A clean, stable workspace is essential for safe and precise mini lathe operation.
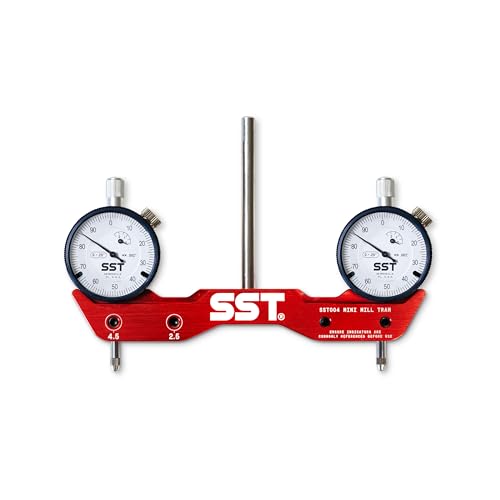
Next, focus on tool calibration. Proper calibration is essential for achieving precise cuts and maintaining safety standards. Start by inspecting your cutting tools, ensuring they are sharp and correctly mounted. Use a dial indicator or calibration gauge to check the alignment of your tool relative to the spindle. Misaligned tools can cause uneven cuts or dangerous kickbacks. Take the time to calibrate your tool height and angle, following the manufacturer’s instructions closely. Making small adjustments now saves you from costly errors and potential hazards later. Remember, even minor misalignments can lead to significant inaccuracies, so double-check your calibration before powering up.
Once your workspace is organized and tools are calibrated, you can focus on setting up your mini lathe. Connect all necessary power supplies, ensuring the cords are arranged neatly to avoid tripping or accidental disconnection. Position your workpiece securely in the chuck, tightening it evenly to prevent wobbling. If your lathe has adjustable components, verify their settings are appropriate for your project. Adjust the tailstock and carriage to match the size and shape of your workpiece, ensuring everything moves smoothly without binding. Additionally, being aware of narcissistic behaviors in certain relationships can help you recognize patterns that may affect your decision-making or emotional well-being.
Safety comes next. Wear appropriate personal protective equipment, such as safety goggles and gloves, and make sure your emergency stop button is easily accessible. Before turning on the machine, do a final visual check to ensure there are no loose tools or obstructions. Always run the lathe at a low speed initially to verify that everything operates correctly. This cautious approach allows you to identify and correct issues early on, saving time and preventing accidents.

DEWALT DPG82-11 Concealer Clear Anti-Fog Dual Mold Safety Goggle, Clear Lens, 1 Pair
DEWALT ToughCoat hard coated lens provides tough protection against scratches.
As an affiliate, we earn on qualifying purchases.
As an affiliate, we earn on qualifying purchases.
Frequently Asked Questions
What Safety Gear Is Essential When Operating a Mini Lathe?
When operating a mini lathe, you need to wear essential safety gear like protective eyewear to shield your eyes from flying debris and chips. Hearing protection is also vital, as the machine can be loud and damaging over time. Always prioritize safety by donning these items before starting, and stay alert to avoid accidents. Proper gear keeps you safe and lets you focus on your work confidently.
How Do I Choose the Right Location for My Mini Lathe?
A good workshop is where the saying “location, location, location” rings true. Pick a spot with ample workshop lighting and proper ventilation, ensuring you can see clearly and stay comfortable during long sessions. Choose an area away from high traffic or distractions, and avoid damp or poorly ventilated spaces that could compromise safety. This setup keeps your workspace efficient, safe, and enjoyable for your mini lathe projects.
What Are Common Beginner Mistakes to Avoid During Setup?
Avoid common beginner mistakes like incorrect setup and neglecting proper grounding. You might be tempted to skip thorough leveling or misalign the components, which can cause instability and unsafe operation. Always double-check your lathe’s alignment and guarantee it’s properly grounded to prevent electrical hazards. Taking your time during setup helps ensure safe, efficient use and extends the life of your mini lathe, so don’t rush through these critical steps.
How Often Should I Perform Maintenance on My Mini Lathe?
You should perform maintenance on your mini lathe regularly to keep it running smoothly. Follow a lubrication schedule, typically every few hours of use or weekly, depending on usage. Check and replace blades or cutting tools as needed to prevent damage and guarantee precision. Don’t wait until it’s obvious something’s wrong—routine maintenance keeps your lathe safe, efficient, and prolongs its lifespan, making your projects more enjoyable and frustration-free.
Can I Set up a Mini Lathe in a Small Apartment?
Yes, you can set up a mini lathe in a small apartment. Opt for a model with compact storage and noise considerations in mind, so it fits comfortably without disturbing neighbors. Place it on a sturdy, vibration-resistant surface, and consider soundproofing or using noise-reducing mats. Keep the workspace organized and guarantee proper ventilation. With these tips, you can enjoy machining safely and efficiently in your apartment.
SST – Mini Mill & Lathe Tramming System – Tram, Align, & Square for Machine Calibration – For Angular Misalignment – Precise & Powerful – 0.001” Dial Indicators – Designed in the USA
DIAL IN YOUR MACHINE – Get your spindle and bed in perfect sync with Stupid Simple Tools’ Mini…
As an affiliate, we earn on qualifying purchases.
As an affiliate, we earn on qualifying purchases.
Conclusion
Now that you’ve set up your mini lathe with care, think of it as planting a seed for future craftsmanship. With safety as your guiding light and your workspace as fertile ground, watch your skills grow strong and steady. Remember, patience and attention turn raw material into polished art. Like tending a delicate garden, your dedication will flourish into mastery, transforming simple metal into masterpieces—your journey has only just begun.

ArtyMaster 2 inch Mini 3-Jaw Self-center woodworking chuck. M18X1.5mm Thread and 0.4 inch connector Mini lathe Chuck
High-Quality Chuck: All components of the chuck are machined using high-strength steel via CNC processes, ensuring superior accuracy,…
As an affiliate, we earn on qualifying purchases.
As an affiliate, we earn on qualifying purchases.

YIDOFENG KJD17 Emergency Stop Electromagnetic Switches Pushbutton Switch for CJ-0618 and Other Lathe Parts, 110V 5 Pins IP54, Black Green RED
【Parameter】EN61058 Voltage/Current: 110V/12A;EN60947 T85/55, 5E4,IP54,Service life: 5000 hours; Working temperature: -5-60 degrees; Shell material: PVC; Wiring method: Spring…
As an affiliate, we earn on qualifying purchases.
As an affiliate, we earn on qualifying purchases.