To make a self-centering jam chuck, start by selecting a durable hardwood or plywood and turn it to about 4-6 inches in diameter with a 2-inch thickness. Drill a hole matching your spindle’s diameter and shape the outer surface into a taper or cone. Mount it on your lathe, then add a flat face for grip. When tight, the cone guides your workpiece into perfect alignment. Continue exploring to learn detailed steps and tips for a reliable build.
Key Takeaways
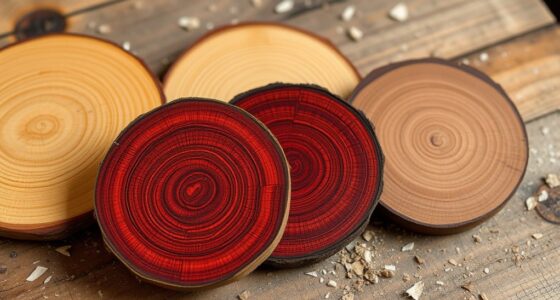
- Select a durable hardwood or dense plywood, approximately 4-6 inches in diameter and 2 inches thick.
- Turn the blank on a lathe at low speed, shape the outer surface into a taper or cone, and drill a centered hole matching the spindle diameter.
- Mark and shape the outer surface into a conical or tapered form to enable self-centering when mounted.
- Mount the chuck onto the spindle, tighten securely, ensuring the taper guides the workpiece into precise alignment.
- Regularly inspect and clean the chuck and contact surfaces to maintain safety, accuracy, and durability during use.

A self-centering jam chuck is a must-have tool for woodturners who want quick, accurate, and secure workholding. When making your own, you gain the advantage of customizing the fit to your specific projects, guaranteeing precise centering every time. Building a reliable jam chuck not only enhances your efficiency but also promotes safer woodturning practices. Proper woodturning safety starts with secure workholding, and a well-made self-centering jam chuck keeps your workpiece firmly in place, reducing the risk of slips or accidents. Additionally, taking the time to understand chuck maintenance will prolong the tool’s life and maintain its accuracy, making your investment worthwhile.
A self-centering jam chuck ensures quick, accurate, and secure workholding for safer, more efficient woodturning.
To craft your jam chuck, start by selecting a piece of hardwood or dense plywood, preferably around 4 to 6 inches in diameter and about 2 inches thick. This size offers enough grip surface and stability. Turn your lathe on a low speed and mount the blank securely. Using calipers, measure the diameter of the workpiece you plan to turn, so you can create a matching recess or cone in your chuck. Next, mark the center point on your blank, then drill a hole that matches the diameter of your spindle or drive shaft. This hole will act as the mounting point, allowing you to attach the chuck to your lathe.
Once the hole is drilled, shape the outer surface with a gouge or parting tool to form a slight taper or conical shape. This taper is essential for the self-centering feature, as it allows the workpiece to be drawn in tightly when the chuck is tightened. To guarantee consistent results, you might consider adding a small, flat face on the top of the chuck for better grip and easier alignment. When mounting the workpiece, slide the chuck onto the spindle, then tighten the nut or screw to secure it. As you tighten, the taper guides the workpiece into perfect alignment, ensuring accuracy and balance.
Maintaining your homemade jam chuck is simple but vital. Regularly inspect it for cracks or wear, especially around the cone and mounting hole. Clean the contact surfaces to prevent dust or resin buildup, which can compromise grip and safety. Proper chuck maintenance not only preserves woodturning safety but also keeps your tool functioning smoothly, preventing any wobbling or slipping during turning. With a bit of care, your self‑centering jam chuck will serve you well for countless projects, providing both confidence and precision with every use.
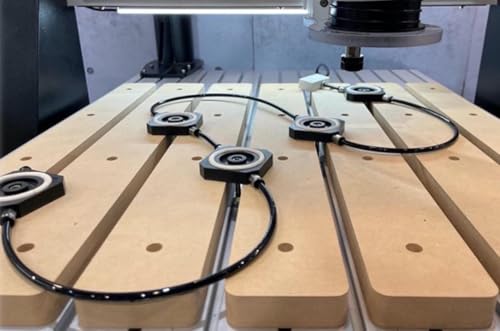
LAGUNA CNC ROUTER CREATOR VACUUM HOLD DOWN KIT
These compact Vacuum Pods are made from phenolic resin, each with its own vacuum seal. Each pod is...
As an affiliate, we earn on qualifying purchases.
Frequently Asked Questions
What Materials Are Best for Building a Self-Centering Jam Chuck?
You should consider using durable materials like hardwood, aluminum, or phenolic for building a self-centering jam chuck. Hardwood offers easy customization and a good grip, while aluminum is lightweight and strong. Phenolic is resistant to wear and provides a smooth surface. For best results, follow customization tips like shaping the material precisely and ensuring a snug fit. These options guarantee your chuck is reliable, customizable, and easy to use.
How Do I Ensure Safety During Installation and Use?
Did you know that proper safety precautions can reduce workspace accidents by up to 50%? To guarantee safety during installation and use, always wear protective gear like goggles and gloves. Follow installation tips carefully to secure the chuck firmly, preventing slips or movement. Double-check all connections before turning on your equipment. Never force or rush the process, and stay alert to avoid mishaps, keeping your workspace safe and efficient.
Can I Customize the Size for Different Projects?
Yes, you can customize the size for different projects by making custom size adjustments to your self-centering jam chuck. This allows you to create project-specific fittings that securely hold various shapes and sizes. Simply measure your workpiece carefully, then modify the chuck components accordingly. This flexibility guarantees your projects are held firmly and accurately, making the entire process smoother and safer while providing the perfect fit for each unique task.
What Tools Are Required to Modify or Make One?
To modify or make a self-centering jam chuck, you need a few essential tools. You’ll require a drill with various bits for creating holes, screwdrivers for assembling parts, and possibly a lathe to shape the wood or metal components. Confirm your clamping mechanisms are secure and compatible with your chuck to avoid damage. Additionally, check chuck compatibility to match your existing lathe or drill setup, ensuring a proper fit.
How Do I Maintain or Troubleshoot My Jam Chuck?
To maintain your jam chuck, regularly check tool maintenance by inspecting for wear or damage. Keep the material durable by cleaning it after each use and avoiding excessive force. If you notice looseness or slipping, tighten the components or replace worn parts promptly. Use appropriate lubricants sparingly to prevent rust, and store the chuck properly to prolong its lifespan. Proper care guarantees reliable performance and extends your tool’s durability.

PGFUN CNC Vacuum Chuck Fixture Plate Workpiece Clamping Table Vacuum Workholding System for Machining Center, Lathe, Milling, Engraving Machines (600 x 400mm)
Upgraded Rapid Vacuum Fixture Table: Unlike traditional vacuum fixture plates, this new vacuum fixture table eliminates the time-consuming...
As an affiliate, we earn on qualifying purchases.
Conclusion
Now that you’ve built your self-centering jam chuck, you’re ready to let your projects spin with confidence. Think of it as a dance partner, perfectly in sync, guiding your work smoothly and true. With this trusty tool, every piece will find its center, turning your woodworking into a harmonious rhythm. Embrace the process, trust your creation, and watch your projects come to life with a steady, graceful spin.

PGFUN CNC Vacuum Chuck Fixture Plate Workpiece Clamping Table Vacuum Workholding System for Machining Center, Lathe, Milling, Engraving Machines (300 x 500mm)
Upgraded Rapid Adsorption Plate: compares with most vacuum plate fixtures on the market, it does not need sealing...
As an affiliate, we earn on qualifying purchases.

PGFUN CNC Vacuum Chuck Fixture Plate Workpiece Clamping Table Vacuum Workholding System for Machining Center, Lathe, Milling, Engraving Machines (500 x 300mm)
Upgraded Rapid Vacuum Fixture Table: Unlike traditional vacuum fixture plates, this new vacuum fixture table eliminates the time-consuming...
As an affiliate, we earn on qualifying purchases.