To control cracking when turning green wood, start by understanding its high moisture content and dry it slowly with proper stacking and airflow using spacers or stickers. Monitor moisture levels regularly and avoid rushing the drying process, as rapid moisture loss causes cracks. Keep the environment stable, with moderate temperatures and good ventilation, far from direct sunlight. By practicing patience and proper techniques, you’ll improve your chances of successful drying—stay with us to discover more tips for perfect results.
Key Takeaways
- Dry green wood slowly with proper stacking and spacers to ensure even moisture loss.
- Cover the piece with breathable materials like paper or burlap to regulate drying conditions.
- Regularly monitor moisture content with a moisture-meter, aiming for 6-8% before final use.
- Turn or reposition the piece periodically to promote uniform drying and reduce internal stresses.
- Maintain a stable, moderate environment—avoid high humidity and direct sunlight—to prevent rapid drying.

Have you ever wondered why green wood is ideal for turning? The answer lies in its moisture content. Freshly cut wood, or green wood, has a high moisture level, usually between 40% and 100%, making it softer and easier to shape. When you turn green wood, it responds more readily to your tools, allowing for smoother cuts and more detailed work. But this moisture content also presents challenges during the drying process, which is essential to prevent cracking and warping. Proper drying techniques are *crucial* in controlling the moisture levels and ensuring your finished piece remains stable over time.
When you start with green wood, you’re working with wood that still contains a significant amount of water. If you attempt to dry it too quickly, the rapid moisture loss causes uneven shrinkage, leading to cracks and splits. That’s why understanding effective drying techniques is *vital*. Slow, controlled drying helps the wood gradually lose moisture, reducing internal stresses that cause cracks. This often involves stacking your turned piece properly, using spacers like stickers to allow air circulation around all surfaces. Covering the piece with a breathable material, like a paper bag or burlap, also helps regulate the drying rate, especially in the initial stages.
Another technique you should consider is the use of a kiln or moisture-meter to monitor the moisture content regularly. Ideally, you want the wood to reach a moisture level of around 6-8% before final finishing or use. This gradual drying process can take weeks or even months, depending on the size and type of wood. During this period, you need to check on your piece periodically, turning or repositioning it if necessary to promote even drying and minimize cracking. Patience is key here; rushing the process increases the risk of defects.
Additionally, controlling environmental factors like temperature and humidity can make a big difference in drying success. Keeping your workspace at a consistent, moderate temperature and avoiding high humidity prevents rapid moisture loss. Many turners also recommend drying green wood in a shaded, well-ventilated area rather than in direct sunlight, which accelerates drying unevenly. Furthermore, embracing failure and experimentation in the drying process allows for adjustments and learning, ultimately leading to better results over time.

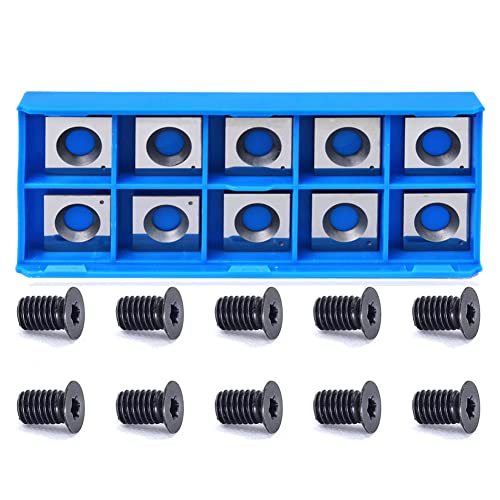
Findbuytool Carbide Inserts cutters (15x15x2.5mm-30°-R150-4R0.5) Insert for Woodworking Helical Cutter Head Tools, 10 Pcs (10)
{Product Contains}:10pcs Carbide Insert Knife 15x15x2.5mm-30°-R150-4R0.5 for Helical Cutterhead.
As an affiliate, we earn on qualifying purchases.
Frequently Asked Questions
What Are the Best Types of Wood for Green Wood Turning?
When choosing wood for green wood turning, you should consider wood density and moisture content. Denser woods like maple or cherry are better because they hold shape and resist cracking. Look for wood with moderate moisture content, ideally around 25-30%, to reduce warping. Avoid overly soft or very wet wood, as it’s more prone to cracking during drying. Selecting the right wood guarantees smoother turning and better finished pieces.
How Does Humidity Affect Green Wood Drying?
Humidity plays a big role in green wood drying, and you need to keep an eye on it because it can make or break your project. When ambient humidity is high, moisture content in the wood stays elevated, slowing drying and increasing crack risk. Conversely, low humidity speeds up drying but can cause surface cracking. You gotta find that sweet spot to keep your wood stable and avoid surprises down the line.
Can Finishing Techniques Prevent Cracking in Green Wood?
You can help prevent cracking in green wood by using proper finishing techniques. Applying finishing sealants creates a barrier that slows moisture loss, reducing stress that causes cracks. Additionally, careful sanding techniques smooth the surface, minimizing weak points. Together, these methods help control how the wood dries, keeping it stable and crack-free, especially if you start working with green wood and want to preserve its integrity during the drying process.
What Tools Are Essential for Working With Green Wood?
When working with green wood, you need essential tools like moisture meters to monitor moisture levels and prevent cracking. A band saw is crucial for precise cuts and shaping. These tools help you handle the wood carefully, ensuring it stays as stable as possible during your project. By using a moisture meter regularly and a reliable band saw, you can work efficiently and reduce the risk of damaging cracks.
How Long Does It Typically Take to Dry Green Wood Completely?
Ever wonder how long it takes to dry green wood completely? The drying time varies, but you should expect it to take anywhere from several months to a year, depending on thickness and moisture content. As you monitor the process, you’ll notice moisture content gradually dropping. Patience is key—rushing drying can cause cracks. Keep an eye on your wood’s moisture levels, and you’ll achieve perfectly dried, crack-free pieces.
Indexable Carbide Insert Knife 14.3x14.3x2.0mm-50° 2-Edge Replacement Cutter for Cutech Tool Rikon Carbatec and Most Planer Jointer Helical Cutterheads, 10 Packs
Standard Cutter Size: 14.3mm square with straight corners 2mm thick,2 indexable cutting edges, 50 degree cutting bevel. Inserts...
As an affiliate, we earn on qualifying purchases.
Conclusion
By mastering proper drying techniques, you can prevent cracks and uncover the true beauty of your green wood. Think of it as nurturing a seed—you must give it patience and care for it to flourish. Remember, rushing the process only invites cracks like unwanted scars. So, embrace the slow, deliberate journey of drying, and watch your wood transform into a resilient masterpiece—proof that with patience, even the most stubborn material can become something extraordinary.

POWERTEC 14.3mm Carbide Inserts Cutter Knives for Spiral & Helical Cutterheads - Fits Wen PL1326, JT630H & Rikon 25-130H, Tungsten Carbide Replacement Blades for Planer and Jointer (14301)
INCLUDES: (10) Carbide Insert Blades
As an affiliate, we earn on qualifying purchases.

Grizzly Industrial T25920-12" x 18" Variable-Speed Benchtop Wood Lathe
This Variable-Speed Wood Lathe provides 12" of turning radius and spindles up to 16-1/2"
As an affiliate, we earn on qualifying purchases.