To achieve a professional finish on your carvings, start by inspecting for rough spots or tool marks and use coarse grit sandpaper to smooth these out carefully. Gradually switch to finer grits, sanding along the grain to avoid scratches and guarantee a smooth surface. Wipe away dust regularly and assess your progress before moving to the next stage. Continuing with this process will reveal the essential tips for perfectly polished carvings.
Key Takeaways
- Begin with coarse grit sandpaper to remove major imperfections and shape the carving gently.
- Progressively switch to finer grits, sanding in stages to achieve a smooth, even surface.
- Always sand along the grain to prevent scratches and preserve the carving’s details.
- Use specialized tools like sanding sponges for contoured areas to ensure uniform results.
- Wipe away dust after each stage and inspect regularly to ensure a polished, professional finish.
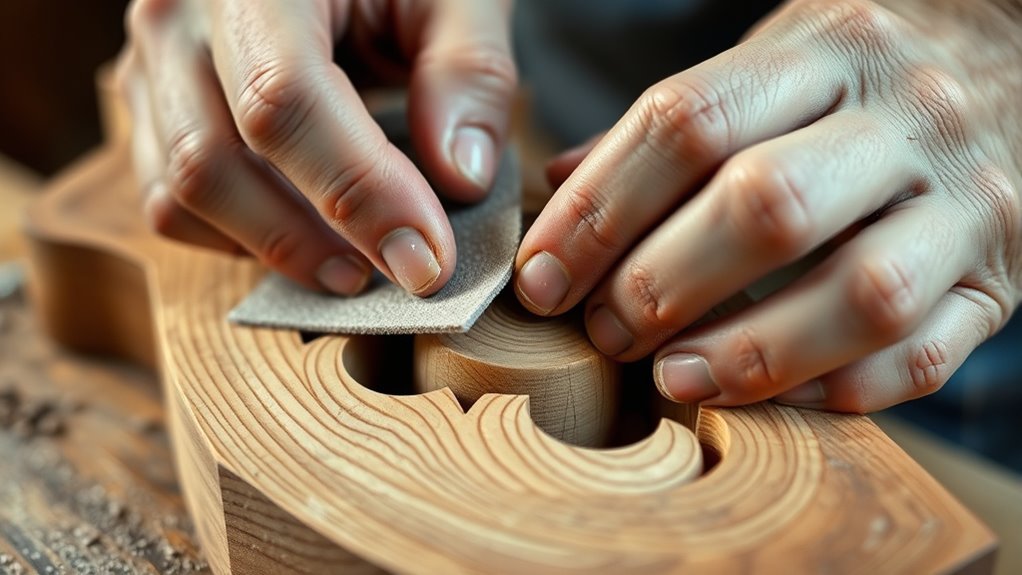
When working on carvings, smoothing and sanding are essential steps to achieve a polished, professional look. These finishing techniques give your project a refined appearance, removing rough edges and surface imperfections. To do this effectively, you need the right approach and tools to guarantee a smooth, even finish. The key lies in understanding how to use sanding tools properly and selecting the appropriate grit levels for each stage of the process.
Start by examining your carving carefully. Identify any rough spots, tool marks, or uneven surfaces that need attention. Your goal is to prepare the surface for finer sanding, which means removing larger imperfections first. Using coarse grit sandpaper or abrasive pads, you can quickly smooth out these uneven areas. Remember, it’s best to work with a light touch—pressing too hard can create new scratches or alter the shape of your carving. Instead, let the abrasive material do the work. As you progress, gradually switch to finer grit sanding tools. This step-by-step approach ensures you don’t leave behind noticeable scratches that can only be removed with more aggressive abrasives later.
Begin with careful inspection, then use coarse grit to remove imperfections before progressing to finer abrasives gradually.
Sanding tools come in various forms, including handheld sandpaper, sanding sponges, and power sanders. Handheld sandpapers are versatile and give you precise control, especially when working on detailed areas. Use a sanding sponge for contoured surfaces, as it conforms to the shape of your carving and produces an even surface. Power sanders, such as orbital or detail sanders, can speed up the process on larger, flat surfaces but require careful handling to avoid removing too much material or creating uneven spots. Whichever tools you choose, always follow the grain of the wood or material to prevent scratches that stand out after finishing. Additionally, understanding abrasive grit levels helps you select the right sandpaper for each stage, ensuring an optimal finish.
Patience is vital during the sanding process. Rushing through the stages can leave behind blemishes that ruin the overall look. After each sanding step, wipe away dust and inspect your work. If necessary, repeat the process with the next finer grit until the surface feels smooth and looks uniform. This gradual refinement not only enhances the appearance but also prepares your carving for finishing products like stains or varnishes. Proper sanding ensures these finishes will adhere better and look more even, elevating your craftsmanship.
Finally, don’t forget that clean, dust-free surfaces are critical for a professional finish. Use a tack cloth or a damp rag to remove any residual debris before applying your finish. When done correctly, your carving will boast a flawless, smooth surface that truly showcases your skill and attention to detail. Proper finishing techniques and the right sanding tools make all the difference in transforming a rough carving into a polished masterpiece.
Frequently Asked Questions
What Types of Sandpaper Are Best for Delicate Carvings?
For delicate carvings, you should use fine abrasive grit sandpaper, like 600 or higher. Choose gentle sandpaper types such as micro or ultra-fine abrasive grit to avoid damaging intricate details. These types are perfect for smoothing without scratching your work. Always start with a higher grit and work your way down if needed, ensuring a smooth, professional finish without compromising the delicate features of your carving.
How Do I Prevent Scratches During the Sanding Process?
To prevent scratches during the finishing techniques and sanding sequence, you should always use progressively finer grit sandpapers, starting with coarse and moving to ultra-fine. Keep the surface clean and lightly mist it with water to reduce friction. Avoid pressing too hard, and always sand in the direction of the grain. These steps help guarantee a smooth, professional finish without unwanted scratches.
Can Power Tools Damage Fine Carving Details?
Power tools can damage fine carving details if you’re not careful, especially if they’re not well-maintained. To preserve intricate carving details, use tools with appropriate speeds and gentle pressure. Regular power tool maintenance, like cleaning and blade sharpening, guarantees smooth operation. Always choose the right attachment and work slowly around delicate areas. This way, you prevent accidental gouges or oversanding, keeping your carvings sharp and detailed.
What Safety Gear Should I Use When Sanding Carvings?
A stitch in time saves nine, and safety comes first. When sanding your carvings, always wear safety goggles to protect your eyes from dust and debris, and don a dust mask to avoid inhaling fine particles. These precautions keep you safe from potential hazards and guarantee your work remains a rewarding experience. Never compromise on safety—your health is worth it every time.
How Do I Achieve a Matte Versus Glossy Finish?
To achieve a matte finish, you should use finishing techniques like light sanding with fine-grit sandpaper and applying a matte sealant or wax. For a glossy look, start with thorough surface preparation by sanding with progressively finer grits, then apply a high-gloss varnish or polyurethane. Always guarantee your surface is smooth and free of dust before finishing, as proper surface preparation directly impacts the final appearance.
Conclusion
Now that you know the secrets to smoothing and sanding your carvings, you’re ready to achieve a professional finish. With patience, precision, and a bit of practice, your pieces will boast a beautifully polished perfection. Remember, proper preparation produces polished perfection—so take your time, trust your tools, and transform rough carvings into refined works of art. Keep carving, sanding, and shining, and watch your woodworking skills soar sky-high!