To start chip carving with geometric patterns and layout, you first plan your design carefully, focusing on symmetry, repetition, or freeform shapes. Use pencils or fine markers to sketch your pattern directly onto the wood, ensuring even spacing and balanced composition. Choose soft woods like basswood for easier carving and always consider the grain direction to prevent splintering. Using sharp, precise tools is vital for clean cuts, and mastering layout principles helps you create harmonious, stunning designs—if you want to learn more, keep exploring these fundamentals.
Key Takeaways
- Plan your geometric pattern layout carefully, emphasizing symmetry and spacing for balanced designs.
- Use precise measurements and grid lines to ensure accuracy in pattern repetition and alignment.
- Sketch your design onto the wood surface with a fine pencil before carving to serve as a clear blueprint.
- Focus on consistent chip size and depth to maintain uniformity throughout the pattern.
- Consider the wood grain direction to prevent splintering and achieve clean, sharp geometric shapes.

Chip carving is a traditional woodworking technique that involves removing small chips of wood to create intricate patterns and designs. When you start exploring geometric patterns and layout, understanding the core concepts of design principles is essential. These principles guide how you arrange shapes, balance visual weight, and develop harmony within your carvings. Before you begin, consider the overall design you want to achieve—whether it’s symmetrical, repetitive, or freeform—and plan your layout accordingly. A well-thought-out plan ensures your chips form cohesive patterns that are both aesthetically pleasing and structurally sound.
Understanding design principles ensures your chip carving patterns are balanced, harmonious, and visually appealing.
Tool selection plays a vital role in executing precise geometric patterns. The right tools make a significant difference in how accurately you can carve, and they influence your comfort and safety during the process. Typically, you’ll want to choose a set of sharp, fine-pointed chisels or gouges specifically designed for chip carving. These tools allow you to control the depth and angle of your chips, which is crucial for creating clean, sharp lines. The blades should be comfortable to hold, with good balance to reduce fatigue during detailed work. For layout, a pencil or a fine-tip marker becomes your best friend—use it to sketch out your design directly onto the wood surface, paying attention to symmetry and spacing. This initial drawing acts as a blueprint, guiding your tool movements and helping you maintain consistency.
When selecting tools, also consider the type of wood you’re working with. Soft woods like basswood or pine are popular choices because they cut cleanly and are forgiving for beginners. Harder woods require more force and sharper tools, so ensure your chisels are high-quality and properly sharpened before you start. The sharpness of your tools directly impacts the quality of your chips; dull blades produce rough edges and can cause splintering, disrupting your pattern. Regular honing and sharpening are essential to keep your tools in top shape and achieve the best results. Remember that each tool has a specific purpose—some are better suited for outlining, while others excel at detailed chip removal—so selecting the right combination will help you execute your geometric layout with precision.
Additionally, understanding wood grain orientation is crucial, as carving against the grain can lead to splintering or uneven chips, affecting the overall appearance of your design. In essence, mastering design principles and tool selection sets the foundation for successful chip carving of geometric patterns. By planning your layout carefully and choosing the appropriate tools, you’ll find it easier to carve neat, consistent chips that form stunning, intricate designs. Your attention to these details transforms a simple piece of wood into a work of art, showcasing your skill and understanding of the craft.
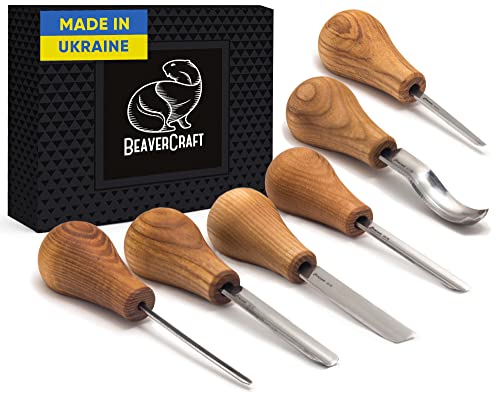
BeaverCraft Wood Carving Gouges Kit SC05 – Wood Carving Chisels Set with Palm Gouge & Flat Straight Chisel, Rounded Short Bent, V-chisels – Whittling Knives, Tools for Beginners and Profi Carvers
Wood Carving Gouges Chisels Kit Built for Comfort: Featuring lightweight Ashwood handles, these palm tools are ergonomically shaped…
As an affiliate, we earn on qualifying purchases.
As an affiliate, we earn on qualifying purchases.
Frequently Asked Questions
What Safety Equipment Is Recommended for Chip Carving?
You should always wear safety glasses to protect your eyes from flying chips and debris during chip carving. Carving gloves are also recommended to prevent cuts and provide better grip on your tools. Make sure your workspace is well-lit and free of clutter to avoid accidents. Using the proper safety equipment like safety glasses and carving gloves helps guarantee a safe and enjoyable carving experience.
How Do I Choose the Right Wood for Chip Carving?
Sure, because choosing the right wood is rocket science, right? Just pick a soft, fine-grain wood like basswood or butternut—your carving tools will thank you. Avoid knotty or coarse-grain woods that fight back. Look for a smooth, even surface with a consistent grain pattern so your tools glide effortlessly. Remember, the right wood makes your project less of a battle and more of an art.
Can Chip Carving Be Done on Curved Surfaces?
Yes, you can chip carve on curved surfaces by using curved surface techniques. You’ll need to adapt your patterns to follow the contours and maintain consistent depth. Start with gentle curves and practice adjusting your tools to follow the shape smoothly. It’s important to work slowly, keeping your cuts steady, so your design looks clean and precise on the curved surface. With patience, you’ll master adapting patterns to any shape.
What Are Common Mistakes Beginners Make in Chip Carving?
You often make mistakes in chip carving by rushing without proper design planning, leading to uneven patterns. Neglecting tool maintenance causes dull blades, resulting in less precise cuts. To improve, take your time planning your design carefully, and regularly sharpen and clean your tools. This guarantees cleaner cuts and more consistent results, helping you avoid common beginner errors like overcutting or uneven depth, and ultimately enhancing your craftsmanship.
How Do I Preserve and Finish My Chip Carvings?
You might think your beautiful chip carving is indestructible, but it’s not—so don’t skip finishing techniques. Seal your work with a clear lacquer or oil to preserve it, and gently sand the edges for a smooth finish. To keep your craftsmanship looking fresh, avoid excessive handling and store it in a dry, stable environment. Proper preservation methods guarantee your artistry stays stunning for years to come.

Nicpro Carpenter Pencil with Sharpener, Mechanical Pencils Set with 26 Refills, Deep Hole Marker for Construction, Heavy Duty Woodworking Tools for Architect (Black, Red) – With Case
Valued Carpenter Pencil Set: You will get 2 pcs solid carpenter pencils with 26 piece 2.8 mm refills,…
As an affiliate, we earn on qualifying purchases.
As an affiliate, we earn on qualifying purchases.
Conclusion
Don’t worry if you’re new to chip carving—getting the hang of geometric patterns and layout takes practice, but it’s absolutely doable. With patience and steady hands, you’ll create stunning designs that enhance any wood piece. Remember, even the pros started somewhere, and mistakes are just part of the learning process. Keep experimenting, stay inspired, and soon you’ll be confidently carving intricate patterns that showcase your unique style. Your mastery is just a few chips away!

Basswood Carving Blocks 24PCS: Whittling Wood Blocks Wood Carving Kit with 3 Different Sizes – Soft Woodworking Blanks for Crafts Beginners Kids Adults
[Versatile Sizes for Every Project] Get 24 easy-to-carve blocks in 3 sizes: 20 slim blocks (4"x1"x1") for detailed…
As an affiliate, we earn on qualifying purchases.
As an affiliate, we earn on qualifying purchases.

7 Pack Precision Mini Chisel Carving Tools for Detailed Small Crafts Such as Wood Carving, Wax Modeling, Soap Carving, and More – One Piece Construction Stainelss Steel
Set of 7 Pieces: Precision Miniature Chisel for Intricate Detailed Carving of Wood, Wax, Plastic, Soap, Leather, and…
As an affiliate, we earn on qualifying purchases.
As an affiliate, we earn on qualifying purchases.