Carving in the round involves transforming a solid block of material into a detailed 3D sculpture that can be viewed from all angles. You select materials like wood or stone based on your skill level and the desired texture and detail. Using specialized tools such as gouges, chisels, and knives, you carve carefully, adjusting your technique to the hardness of the material. Continuing will help you understand how to choose the right tools and techniques for successful sculpting.
Key Takeaways
- Selecting appropriate materials like wood, stone, or soap is crucial for achieving desired 3D effects.
- Using specialized tools such as gouges, chisels, and knives allows precise shaping of blocks into figures.
- Softer materials enable quicker carving but require careful control to preserve details; harder materials need stronger tools.
- Understanding material properties and response helps in applying suitable techniques and improving craftsmanship.
- Practice and mastery involve adapting tools and techniques to different materials and exploring collaborative learning opportunities.
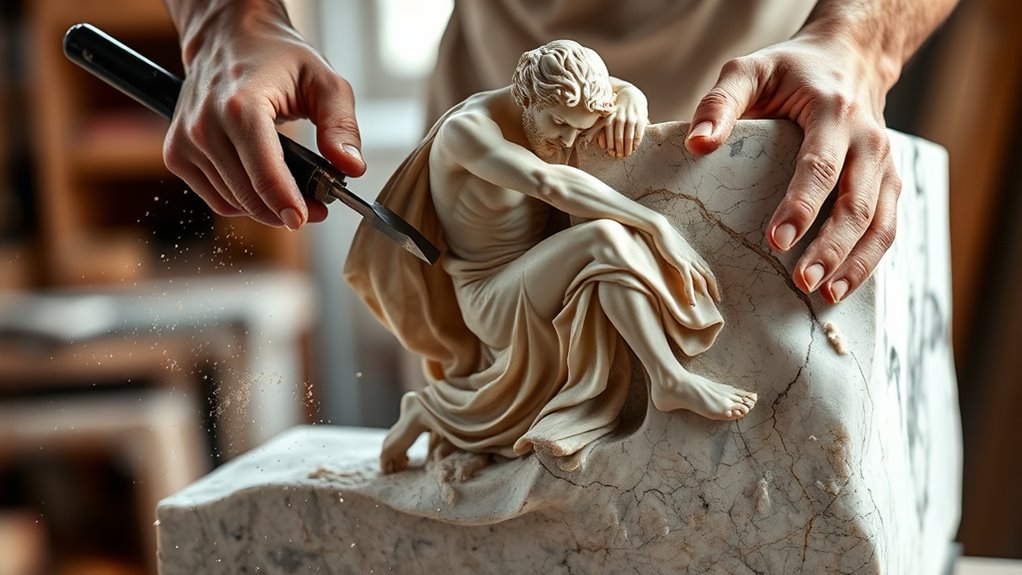
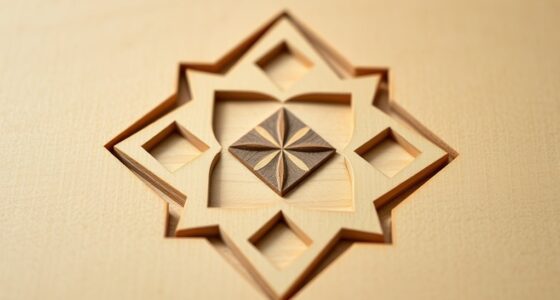
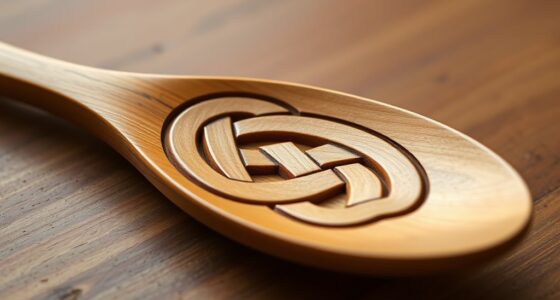
Have you ever wondered what makes carving in the round so mesmerizing? It’s the process of transforming a solid block of material into a three-dimensional sculpture that truly captures attention from every angle. To achieve this, your choice of material selection plays a vital role. Different materials—wood, stone, or even soap—each offer unique textures, hardness levels, and working characteristics. Picking the right one depends on your skill level, the detail you want to achieve, and the final look you envision. For beginners, softer woods like basswood or pine are ideal because they’re easier to carve and forgiving of mistakes. More experienced sculptors might prefer marble or alabaster for their durability and ability to hold fine detail. Your material choice influences your approach and the tools you’ll need, so it’s essential to consider your project scope and personal preferences.
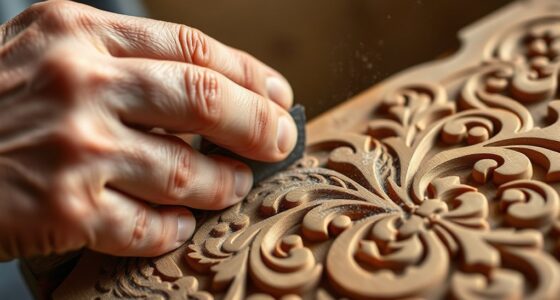
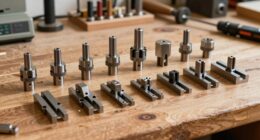
Once you’ve chosen your material, selecting the appropriate carving tools becomes equally important. Carving tools are your instruments for translating your vision into reality, and the right set can make all the difference. Basic tools include gouges, chisels, knives, rasps, and files, each designed for specific functions. For soft materials such as wood or soap, smaller gouges and carving knives work well, allowing you to make precise cuts and smooth curves. If you’re working with more challenging stone, you’ll need specialized tools like point chisels and mallets. The key is to match your tools to the material’s hardness and your technique. Properly maintained tools—sharp, clean, and suitable for your material—enable cleaner cuts, finer details, and a smoother finish. Dull tools can cause frustration, uneven cuts, and even damage your piece.
As you carve in the round, you’ll find that your material responds differently depending on its nature. Softer materials allow for quicker shaping but demand careful control to avoid accidental breaks. Harder materials require patience and stronger tools but reward you with longevity and intricate detail. The process is dynamic: as you work, you’ll adjust your grip, pressure, and angle to bring out the sculpture’s form from all sides. The interplay between material selection and carving tools determines how smoothly you can realize your artistic vision. With practice, you’ll learn which tools complement each material best and how to adapt your techniques accordingly. Remember, carving in the round is as much about understanding your materials and tools as it is about creativity—mastering these basics will elevate your craft and bring your sculptures to life. Additionally, engaging in hackathons can provide opportunities to learn new techniques, collaborate with others, and stay inspired in your artistic journey.

Wood Carving Kit, 24Pcs Wood Carving Tools with Storage Bag, Wood Whittling Knife Kit with 4pcs Templates & 6pcs Basswood Blocks for DIY Beginners
[24Pcs Complete Set] – Our wood carving kit provides everything you need to start your carving journey: 4pcs…
As an affiliate, we earn on qualifying purchases.
As an affiliate, we earn on qualifying purchases.
Frequently Asked Questions
What Tools Are Best for Detailed 3D Carving?
For detailed 3D carving, you should use a combination of power tools and hand carving tools. Rotary tools with fine burs are ideal for intricate details, while Dremel tools provide precision and control. Hand carving chisels and gouges are essential for refining details and adding texture. Using power tools for rough shaping and hand carving for fine details gives you the best control and accuracy in your sculpture.
How Do I Prevent Cracking During Carving?
Sure, because cracking during carving is just your wood’s way of telling you it’s got commitment issues. To prevent it, pay attention to wood grain—carve along it, not against it—and control moisture levels to keep the wood stable. Keep your tools sharp and work gradually. If you ignore these tips, your sculpture might just crack under pressure. Who knew patience and moisture control could be so dramatic?
What Types of Wood Are Ideal for Round Sculptures?
You should choose hardwoods like boxwood, cherry, or basswood for round sculptures, as their fine, consistent wood grain makes carving easier and reduces cracking risks. These woods respond well to detailed carving techniques, allowing smoother curves and shapes. Avoid softwoods that have irregular grain patterns, which can cause splitting. By selecting the right wood and applying proper carving techniques, you’ll achieve cleaner, more durable round sculptures.
How Do I Plan a Complex 3D Sculpture?
To plan a complex 3D sculpture, start with solid material selection that suits your design, like hardwood or stone. Gather artistic inspiration from nature, art, or personal expression to refine your concept. Sketch detailed plans and determine the best tools for your chosen medium. Break the project into manageable sections, visualize each step, and make certain you have a clear vision before starting, allowing your creativity to guide your process.
What Safety Precautions Should I Follow?
Did you know that 80% of sculpture accidents involve cuts or eye injuries? To stay safe, always wear protective gear like goggles, masks, and gloves. Keep your workspace tidy and well-ventilated to prevent dust inhalation and accidents. Use tools carefully, following proper techniques, and never rush your work. Prioritizing workspace safety and protective gear helps you carve confidently while avoiding injuries.

Kraft Tool BL414 Toothed Stone Mason's Chisel, 2-1/4-Inch
Forged from the finest tool steel, well tempered
As an affiliate, we earn on qualifying purchases.
As an affiliate, we earn on qualifying purchases.
Conclusion
As you continue to carve in the round, you’ll discover that every chip and curve brings your vision closer to life. With patience and practice, your skills will flourish, gently guiding your hands and imagination. Remember, even the most polished sculptures start with humble beginnings. Embrace the journey, and you’ll find that each piece quietly whispers its own story, inviting others to see the beauty in your quiet, dedicated work.

Wood Carving Tools, 7Pcs Wood Carving Knife Kit Carbon Steel, Wood Chisels Set for Pumpkins Soap Sculpture Carving DIY (5 Styles)
[Versatile Carving Tools]-This wood carving knife kit includes 5pcs wood chisels, each with a unique blade shape designed…
As an affiliate, we earn on qualifying purchases.
As an affiliate, we earn on qualifying purchases.

BeaverCraft Wood Carving Kit Comfort Bird DIY Kits for Adults Hobbies Whittling Knife Kit for Beginners & Kids Adult Craft Kits Wood Carving Knife Set
Wood Whittling Kit for Beginner Adults and Kids: have you ever heard about a comfort bird? These birdies…
As an affiliate, we earn on qualifying purchases.
As an affiliate, we earn on qualifying purchases.