
To master shading and texturing with pyrography pens, follow natural woodgrain patterns for a realistic look and vary your pressure to create depth and dimension. Use techniques like cross-hatching and stippling to add fine surface details, and adjust your strokes to simulate textures like bark or fur. Exaggerating grain lines can add movement, while blending tones creates smooth progressions. Keep experimenting, and you’ll discover how to bring your designs to life with enhanced organic realism.
Key Takeaways
- Vary pen pressure and speed to create depth and dimension in shading.
- Use different tip shapes and techniques like cross-hatching or stippling for textured surfaces.
- Follow natural grain flow to enhance realism and guide shading and texturing.
- Layer shading gradually to build contrast without overburning, adding richness.
- Emphasize or exaggerate grain lines with pyrography to add organic texture and movement.
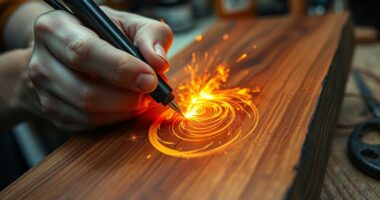
Shading and texturing with pyrography pens are fundamental techniques that bring depth and realism to your woodburning projects. When you master these skills, you can create intricate details that make your artwork stand out. One of the key elements in achieving this realism is understanding how to manipulate woodgrain patterns and apply depth shading effectively. These techniques help transform flat surfaces into dynamic, lifelike representations by emphasizing light, shadow, and texture.
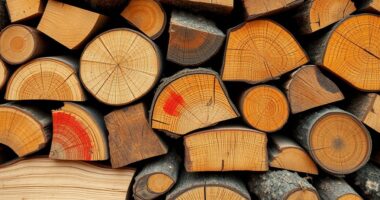
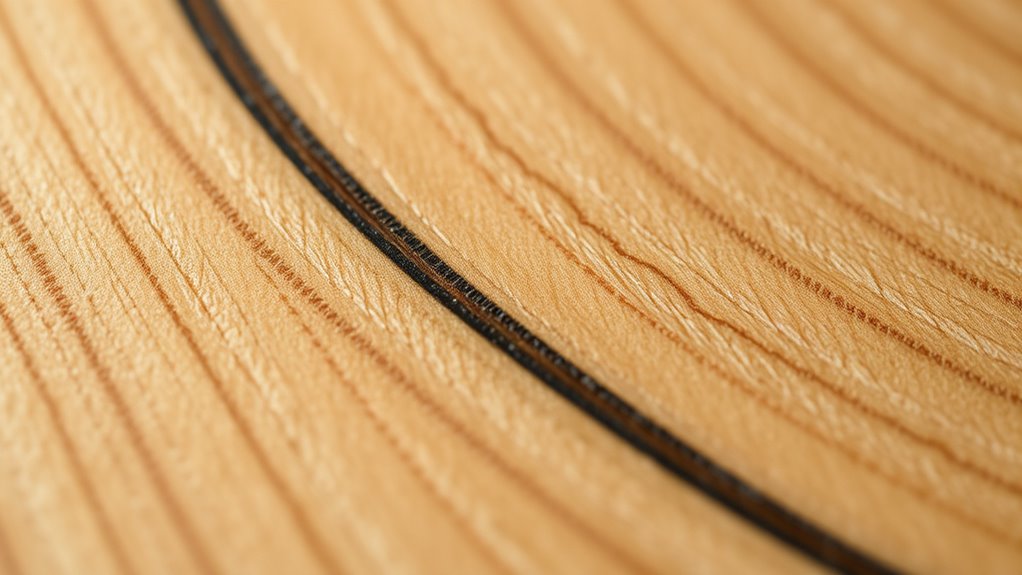
Start by paying close attention to the natural woodgrain patterns. Your goal is to follow the flow of the grain, using your pyrography pen to enhance or exaggerate these lines. For example, if you’re working on a portrait or a natural scene, accentuate the grain to add a sense of movement and organic texture. By carefully tracing or contrasting the grain, you create a foundation that guides your shading work. This approach guarantees your shading aligns with the wood’s natural characteristics, resulting in a more cohesive and realistic finish.
Pay close attention to woodgrain patterns to enhance realism and guide your shading work effectively.
Depth shading is vital when adding dimension to your design. To achieve this, vary the pressure and speed of your pen strokes. Light, gentle strokes produce softer shadows, while darker, more intense shading brings foreground elements forward or emphasizes shadows. You can also layer shading gradually, building up darker tones where needed without risking overburning the wood. This technique allows you to control the contrast and depth, giving your artwork a three-dimensional quality.
In addition to simple shading, texturing adds complexity and richness to your piece. Use different tip shapes—like rounded or beveled tips—to create varied textures, from smooth skin tones to rough bark. Cross-hatching and stippling can add fine details that mimic natural surfaces, like fur or leaves. When working on textured areas, follow the contour lines and grain directions to maintain realism. Remember, less is often more; subtle shifts in shading and texture can have a dramatic impact on the overall effect.
Finally, practice patience and observation. Constantly evaluate your work, adjusting shading intensity and texture as needed. As you develop your skills, you’ll find it easier to blend different tones seamlessly and create compelling contrasts. By mastering the interplay of woodgrain patterns and depth shading, you’ll bring a new level of realism and visual interest to your pyrography art. Additionally, understanding the materials used is crucial for achieving the best results, as different wood types and tips can influence shading and texture techniques.
Frequently Asked Questions
Can Pyrography Pens Be Used on All Types of Wood?
You can’t use pyrography pens on all types of wood, as some woods may burn unevenly or be too soft or dense. Check wood compatibility before starting your project, and choose the right pen tip varieties to suit the surface. Hardwoods like cherry or maple work well, while softer woods like pine may require gentler strokes. Experimenting with different woods helps you find the best results for your pyrography art.
What Safety Precautions Are Necessary During Shading and Texturing?
You wear protective gear, guarantee proper workspace ventilation, and keep a fire extinguisher nearby to stay safe while shading and texturing. You should also work in a well-ventilated area, wear a mask to avoid inhaling fumes, and use heat-resistant gloves to prevent burns. By taking these precautions, you protect your health, prevent accidents, and enjoy your pyrography projects with confidence and safety.
How Do I Maintain Consistent Shading With Different Pen Tips?
To maintain consistent shading with different pen tips, focus on pressure control and tip selection. Adjust your pressure so the darkness stays uniform, regardless of the tip used. Choose tips suited for your shading needs, like rounded or beveled tips, to achieve smooth progressions. Keep your hand steady, practice varying pressure gently, and switch tips thoughtfully, ensuring your shading remains even and professional-looking across your artwork.
Are There Alternative Materials Suitable for Pyrography Shading?
Yes, you can explore alternative shading materials for pyrography on non-wood substrates like leather, paper, or gourds. These materials respond well to heat and can create rich shading effects similar to wood. Just make certain you adjust your technique and temperature settings accordingly. Using these alternatives allows for more diverse projects and textures, expanding your creative options beyond traditional wood surfaces.
How Can I Fix Mistakes or Uneven Shading in Pyrography?
To fix mistakes or uneven shading, you should carefully correct mistakes by gently sanding or scraping the area, then reapply shading using blending techniques. Lightly go over the uneven spots with your pyrography pen, gradually building up color for a smooth progression. Using a blending tool or adding light layers of shading helps to even out the surface, ensuring your artwork looks consistent and polished.
Conclusion
As you master shading and texturing with your pyrography pens, you’re painting with fire, turning raw wood into a canvas of glowing shadows and intricate textures. Each stroke is like a whisper of flame, shaping depth and dimension. With patience and practice, your artistry blossoms like a fire’s glow—bright, warm, and full of life. Embrace the dance of light and shadow, and watch your creations come alive with fiery personality.