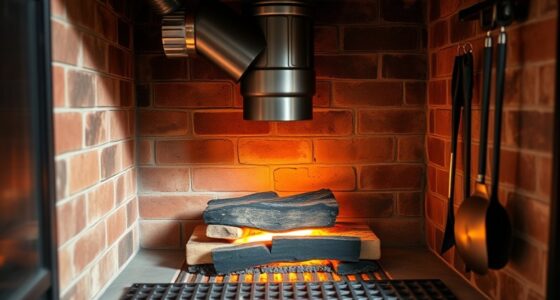

If you want to explore electrifying wood burning, this guide shows you how to combine traditional pyrography with high-voltage electrical discharges for stunning effects. You’ll learn to select the right wood, set up safe, reliable equipment, and master techniques for creating intricate lightning or fractal patterns. You’ll also discover how to add vibrant colors and finishes, develop your unique style, and choose the best tools for beginners and more advanced artists. Keep going to discover all the tips and tricks for incredible artwork.
Key Takeaways
- Learn safe electrical setup, grounding, and proper transformer wiring to prevent shocks and equipment damage.
- Select untreated, fine-grained wood for better conductivity and detailed pyrography effects.
- Use high-voltage transformers (1,000–2,000V) and appropriate tips to create intricate fractal and lightning patterns.
- Master probe placement, contact timing, and voltage adjustments for precise, detailed electrical burns.
- Incorporate coloring and finishing techniques to enhance artwork, with safety precautions maintained throughout the process.
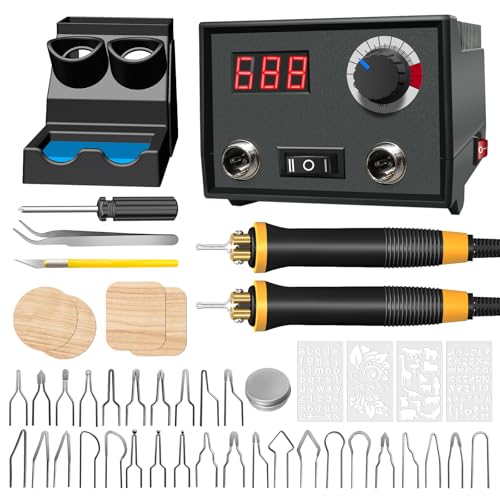
FIRElood Wood Burning Tool, Wood Burner kit Pen 25~750℃, Wood Burning kit with Digital Thermometer Temperature Adjustable Temperature, 2 pyrographic Wood Burning pens, 30 Wood Burning Pen Tips
DIGITAL ADJUSTABLE TEMPERATURE WOOD BURNING AND IRONING MACHINE: The wood burning kit is suitable for 110V voltage,The highest…
As an affiliate, we earn on qualifying purchases.
As an affiliate, we earn on qualifying purchases.
Understanding the Basics of Electric Pyrography

Electric pyrography involves using heated metal tips or wires to burn designs into wood, which is powered by tools like soldering irons or specialized pyrography devices. This technique allows you to create detailed artwork by controlling the heat applied to the wood’s surface. Precise temperature control, usually between 200°C and 450°C, is essential for achieving different shading effects and line qualities. As you work, you’ll learn that selecting the right wood—preferably untreated, natural, and fine-grained—improves both safety and results. Mastering basic techniques, such as maintaining a steady hand, applying consistent pressure, and handling the tip correctly, is key to producing clean, intricate designs. Electric pyrography offers a versatile and accessible way to transform wood into art through controlled heat. Additionally, understanding the blending elements can inspire you to incorporate decorative details that enhance your pyrography projects. Being aware of proper tool maintenance ensures your equipment remains safe and efficient for consistent results. Proper placement and air quality are also important considerations to prevent inhalation of fumes, especially when working for extended periods. Furthermore, experimenting with different tip shapes and sizes can help diversify your artistic options and achieve various effects.
FIRElood Wood Burning Tool, Wood Burner kit Pen 25~750℃, Wood Burning kit with Digital Thermometer Temperature Adjustable Temperature, 2 pyrographic Wood Burning pens, 30 Wood Burning Pen Tips
DIGITAL ADJUSTABLE TEMPERATURE WOOD BURNING AND IRONING MACHINE: The wood burning kit is suitable for 110V voltage,The highest…
As an affiliate, we earn on qualifying purchases.
As an affiliate, we earn on qualifying purchases.
Essential Safety Measures for High-Voltage Wood Burning

To guarantee your safety while working with high-voltage wood burning equipment, it’s essential to wear appropriate safety gear like rubber gloves and goggles. High-voltage electricity can cause serious shocks and burns if mishandled. Always make sure your power source is properly grounded and fully discharged before adjusting or handling the equipment to eliminate residual electrical charge. Use only professionally manufactured transformers designed for high-voltage applications; avoid homemade or modified power supplies, which increase the risk of electrical failure. Keep a safe distance from electrical components during operation, and control the power with remote switches or foot pedals to prevent direct contact. Working in a well-ventilated area is critical to avoid inhaling hazardous fumes from treated wood. Additionally, understanding the importance of WWE Raw’s financial impact can provide context for the significance of safety and professionalism in high-stakes environments. Being familiar with textile line techniques can also help in managing equipment setup and safety protocols effectively. Recognizing the benefits of remote operation can further enhance safety by minimizing direct interaction with electrical components. Practicing proper grounding procedures is essential to prevent accidental shocks and ensure safe operation. Furthermore, staying informed about Gold IRA Rollovers can help in planning secure retirement investments, emphasizing the importance of careful handling and professional guidance in complex technical environments. Following these safety measures minimizes risks associated with high-voltage electricity during pyrography.
pyrography safety gear
As an affiliate, we earn on qualifying purchases.
As an affiliate, we earn on qualifying purchases.
Selecting and Preparing the Perfect Wood Surface
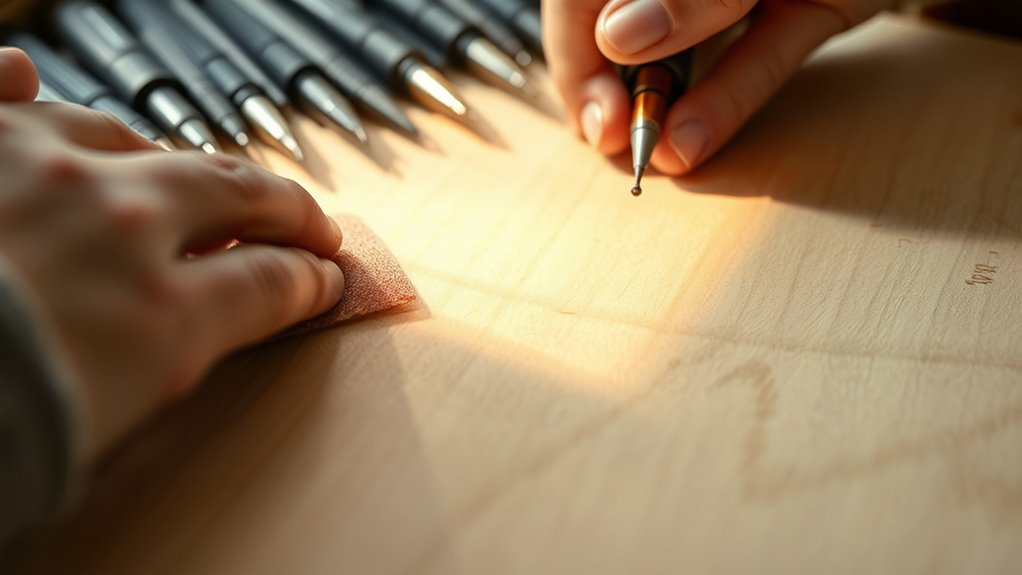
Choosing the right wood surface sets the foundation for successful pyrography. Select untreated, natural woods like beech, birch, or maple to avoid toxic fumes and guarantee safety with high voltage electricity. Use smooth, fine-grained wood for detailed, precise burns. Avoid stained, painted, or pressure-treated woods, as they can emit harmful fumes when heated. Consistent thickness prevents uneven burning and helps electrical conductivity. Also, consider grain orientation, since electricity follows the grain, affecting burn patterns and intensity. Proper wood selection enhances safety and ensures the quality of your pyrography projects, especially when working with portable power sources. Additionally, understanding AI-powered tools can help optimize your project planning and execution. Being aware of material safety data can further inform your choices and ensure a safe working environment. Recognizing the weather conditions can also assist in scheduling projects to avoid high humidity that may affect wood stability and burn quality.

FIRElood Wood Burning Kit,Wood Burning Tips Wood Burner tip,Burning Tool Wood Burning High impedance Nickel-Chromium Wire Pen tip Wood Burning Tool Pen tip nibs for Writing Instruments Pen nibs
QUALITY OF USE EXPERIENCE AND SERVICE LIFE GUARANTEE:Each pen tip is carefully selected materials, cutting, molding, grinding, polishing,…
As an affiliate, we earn on qualifying purchases.
As an affiliate, we earn on qualifying purchases.
Setting Up Your Electric Pyrography Equipment
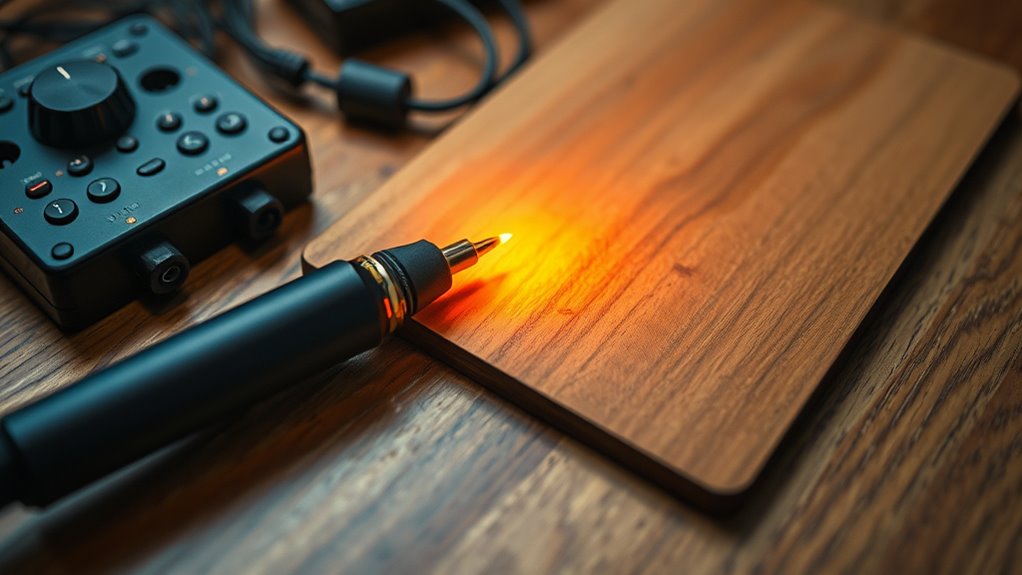
To set up your electric pyrography equipment, start by choosing a high-voltage transformer like a microwave oven transformer and guarantee it’s wired correctly with proper grounding. Make secure connections with contact wires or nails, and always prioritize safety by discharging any residual charge before handling. Additionally, understanding the input lag of your equipment can help you better control your pyrography process and improve precision. Monitoring energy efficiency ratings of your setup can also ensure you are operating safely and effectively. Ensuring your workspace complies with local electrical codes can further reduce risks and promote safe operation.
Choosing the Right Transformer
Selecting the right transformer is essential for a safe and effective electric pyrography setup. You need a high-voltage transformer, like a microwave oven transformer, rated between 1,000 and 2,000 volts, to handle the power required for fractal burning. Decide whether to wire transformers in series for higher voltage or in parallel for more current, based on your project’s needs. Properly connect the transformer’s high-voltage output to contact wires or probes, and ground the transformer housing to ensure safety. Always verify the transformer’s specifications, including voltage and current ratings, to match your woodburning technique and prevent overloads. Using insulated leads, grounding, and remote switches will help minimize electrical hazards during operation. Additionally, understanding electrical safety principles is crucial to prevent accidents and ensure a secure workspace. A thorough knowledge of electrical safety can significantly reduce risks during your pyrography projects. Incorporating proper insulation techniques also enhances safety by preventing accidental contact with live components. Ensuring that your transformer is compatible with your tools and setup can also prevent equipment failure and improve project reliability. Furthermore, selecting a transformer with appropriate power ratings guarantees consistent performance for your specific pyrography techniques.
Wiring and Safety Measures
Proper wiring is essential for a safe and effective electric pyrography setup. You need to connect the high-voltage transformer’s output to contact points using nails or clips, confirming the transformer is properly grounded to protect against electrical hazards. Always use insulated wires and avoid exposed connections—these can cause accidental shocks during setup or operation. Before powering your system, discharge any capacitors and double-check all connections to minimize risks. When wiring transformers in series or parallel, follow manufacturer guidelines and precise diagrams to prevent overloads or short circuits. Incorporate safety features like grounding, remote switches, and protective gear to further reduce the risk of electrical shock or fire. Prioritize safety at every step to ensure a secure, efficient pyrography experience. Additionally, understanding wiring configurations helps prevent common electrical issues and enhances overall safety. For optimal safety, consult the knowledge on proper grounding and electrical standards to ensure your setup adheres to best practices.
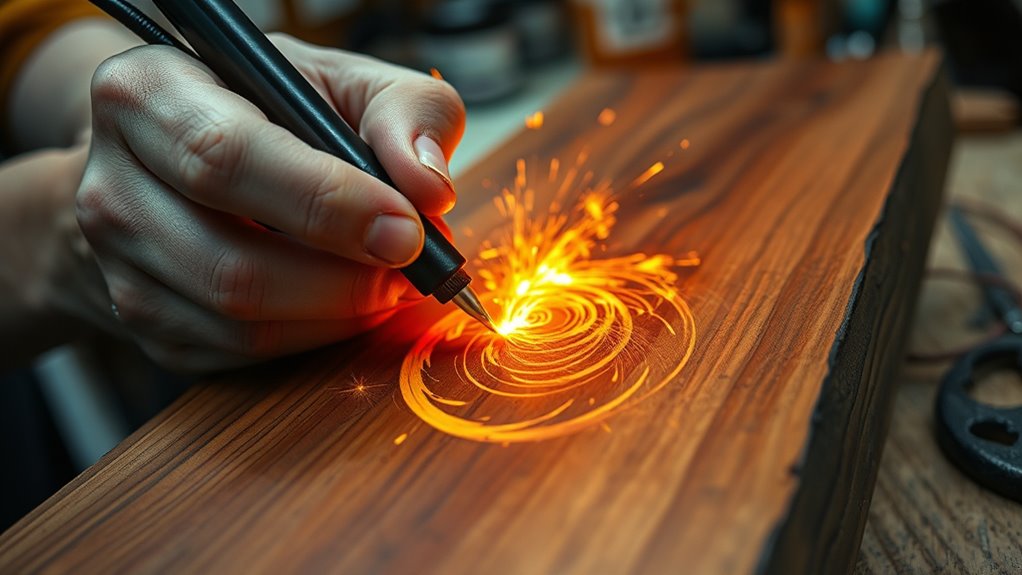
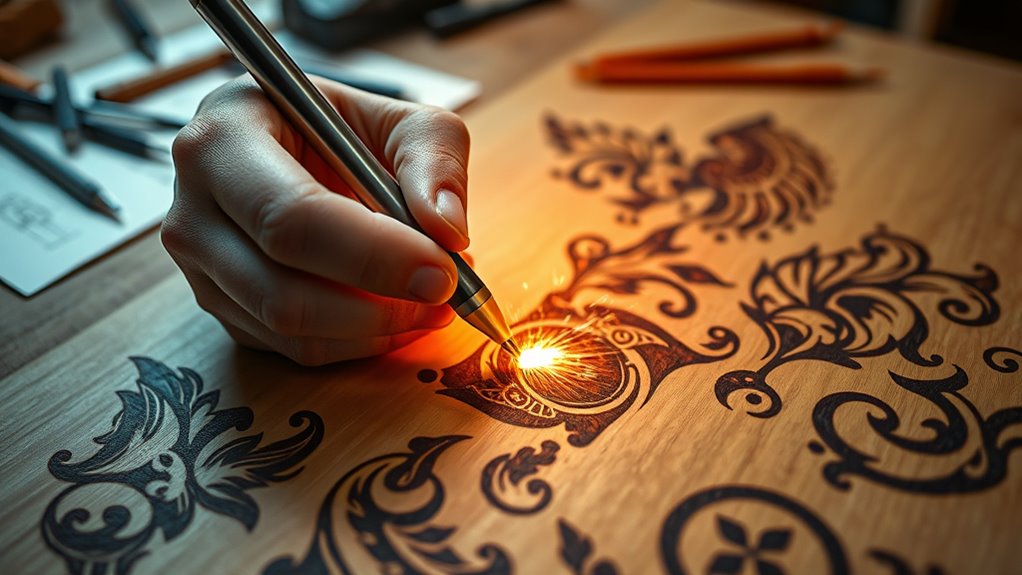
Techniques for Creating Stunning Fractal and Lightning Patterns
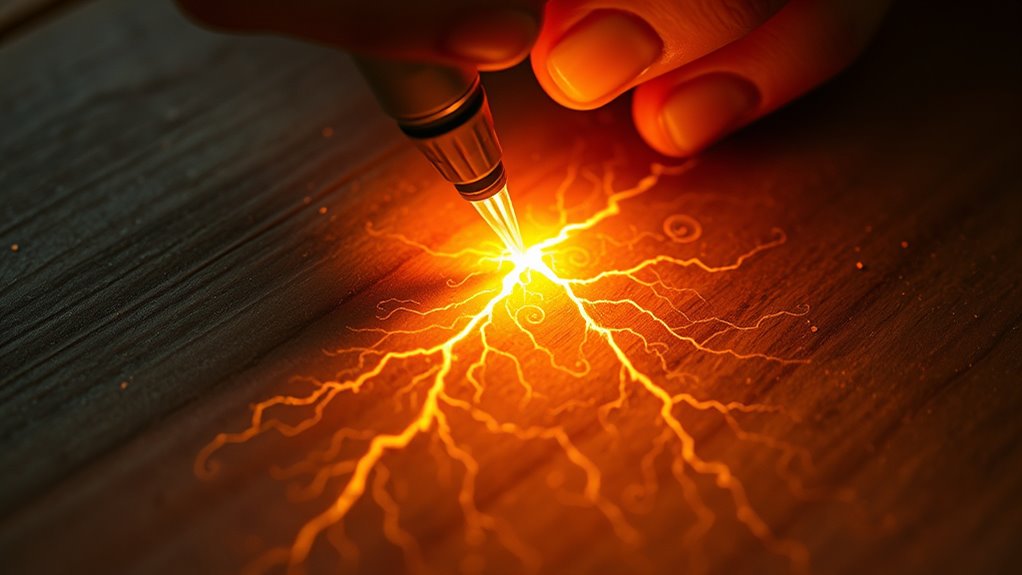
Creating stunning fractal and lightning patterns in pyrography with electricity requires precise control over the electrical discharges. For Fractal Wood Burning, you’ll want to carefully position your probe and move it strategically to produce intricate lightning-like patterns. Variations in electrical current, contact timing, and electrode spacing generate branching effects that mimic natural lightning and fractal structures. Applying water or conductive solutions to the wood surface reduces resistance, allowing more consistent discharges and finer details. Moving the contact points during the arc creates dynamic, branching lightning patterns that resemble tree branches or fractal lightning. Adjusting polarity and voltage levels helps you manipulate pattern density and complexity, giving you the tools to craft visually stunning pyrography designs with intricate, natural-looking lightning effects.
Exploring Different Tools and Tips for Fine Details
Choosing the right fine tip is essential for sharp, detailed work, so experiment with needle-point or fine wire options. Using adjustable temperature controls helps you burn gently and create smooth shading or crisp lines. Practice steady hand movements and quick tip swaps to enhance your control and achieve clearer, more precise details.
Fine Tip Selection
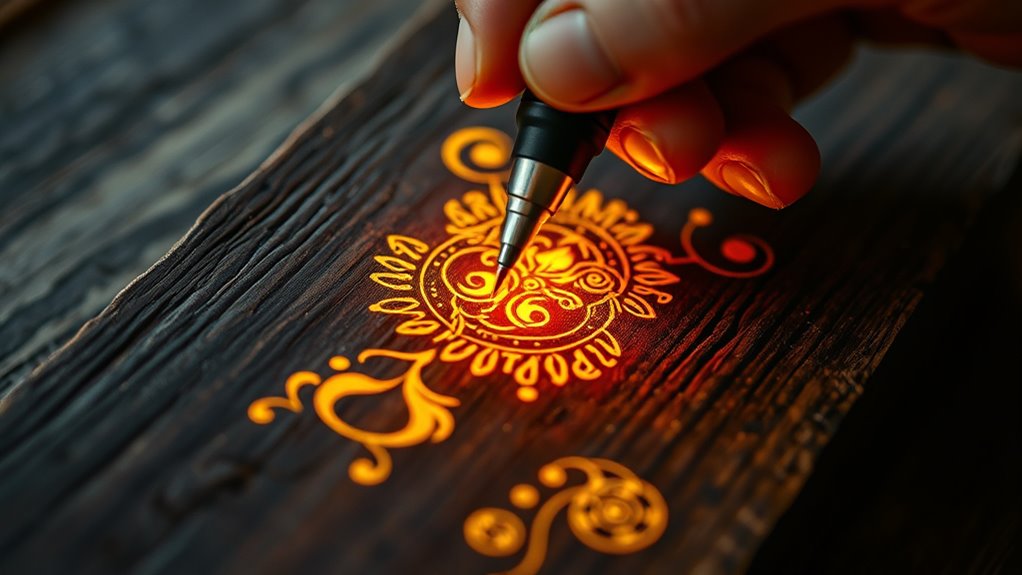
Have you ever wondered which tools deliver the finest details in pyrography? The answer lies in choosing the right fine tip tools. Pointed metal pens, wire tips, or needle-like attachments excel at creating intricate lines, stippling, and shading. Look for tips made from heat-resistant materials like brass or steel, ensuring durability and precise control during delicate work. Adjustable temperature settings are essential; they help prevent burning through thin or detailed areas of the wood. Fine tips with sharp points allow for crisp, clean lines essential for detailed artwork. Regular cleaning and maintenance keep your tips free of char buildup, maintaining consistency and accuracy in your designs. Selecting the perfect fine tip tools is key to mastering detailed pyrography.
Precise Control Techniques
To achieve fine details in electrical pyrography, controlling the electrical discharge with precision is essential. Precise control techniques involve using specialized needle-nose probes or fine wire tips to focus the electrical arc into small, accurate points. Adjusting the distance between the probes and the wood surface helps regulate the discharge’s intensity and width, allowing for delicate line work. Varying voltage, current, and contact duration enables subtle shading and intricate patterns. Many artists switch between interchangeable tips with different shapes and sizes—like sharp needles or fine brushes—to create textures and minute details. Mastering probe placement, maintaining consistent movement, and controlling contact time are *vital* techniques for achieving crisp, detailed effects with high-voltage electrical wood burning.
Enhancing Detail Clarity
Enhancing detail clarity in electric pyrography relies heavily on selecting the right tools and tips designed for fine, precise work. Using specialized, thin, needle-like tips helps you achieve sharp, clear lines, perfect for intricate patterns. Adjust your temperature controls to lower settings, which allows for subtle shading and delicate textures without smudging. Smaller, sharper tips like pointed or scriber tips improve accuracy when rendering fine detail, lettering, or complex designs. The material of your tip and the electrical current’s frequency influence line clarity, so choose tips designed specifically for detailed work.
- Use needle-like tips for precision
- Lower temperature for delicate shading
- Opt for pointed or scriber tips
- Maintain steady hand movement and pressure
Enhancing Your Artwork With Coloring and Finishing Touches

Adding color and finishing touches can transform your pyrography into a striking piece of art. After burning, use high-quality wood stains, dyes, or colored inks to add vibrant hues and create depth. Applying these coloring agents over burnished areas enhances the visual impact and highlights intricate details. For fine shading, incorporate colored pencils, alcohol-based markers, or watercolor pencils before sealing your work. Strategic use of contrasting colors can emphasize lightning patterns or fractal designs, making your piece stand out. To guarantee a professional finish, sand the surface smoothly beforehand so coloring agents absorb evenly. Finish with a clear sealant or varnish to protect your artwork and preserve the colors, giving your pyrography a polished, durable appearance.
Finding Inspiration and Developing Your Unique Style

Finding inspiration for your pyrography often begins with exploring different artistic genres, such as landscapes, animals, abstract designs, or personal motifs. This helps you discover what truly resonates with you and sparks your creativity. To develop your unique style, study works by renowned pyrographers and fractal artists, paying attention to patterns and techniques that catch your eye.
Consider experimenting with various electrical discharges, probe placements, and wood types to create distinctive lightning or fractal effects. Incorporate mixed media like ink transfer or coloring to add depth and personal flair. Keep a journal or portfolio of your burns to track which techniques and patterns evoke your inspiration, refining your style over time.
- Find recurring themes that inspire emotional connections
- Embrace experimentation to discover new techniques
- Observe others’ work to identify what sparks your creativity
- Document your progress to see your evolution
Recommended Kits and Resources for Beginners and Enthusiasts
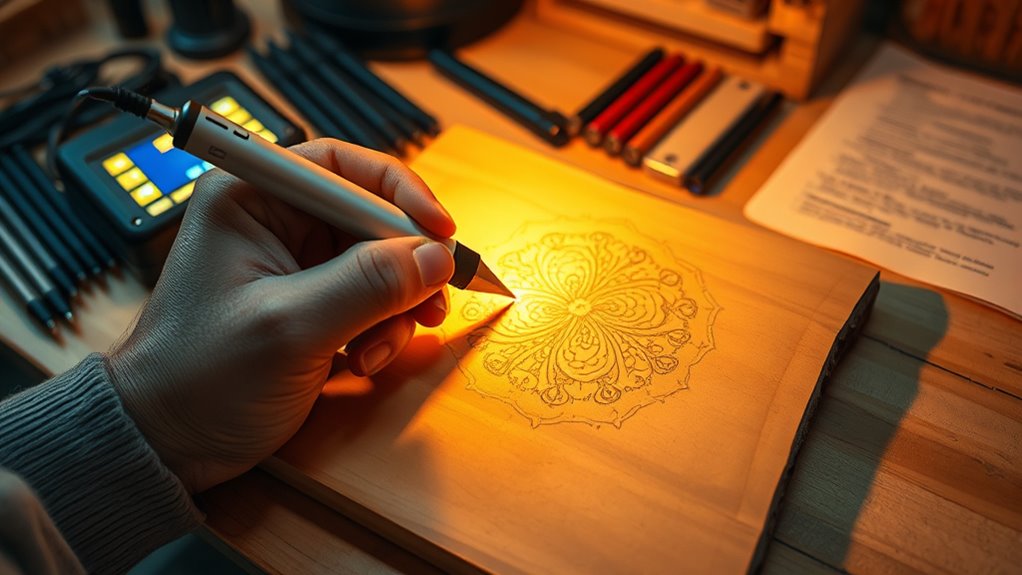
For beginners and enthusiasts looking to plunge into pyrography with electricity, the Powza corded electric wood burning kit offers an excellent starting point. It includes 72 pieces, such as a 60W adjustable pyrography pen with temperature control from 200°C to 450°C, suitable for all skill levels. The kit features rapid 30-second heat-up, multiple tips, molds, color pencils, carbon papers, and storage, enhancing versatility. Its ceramic heating technology ensures efficient, safe, and durable operation during extended projects. Customer reviews praise its affordability, comprehensive accessories, and adaptability to various pyrography styles.
Tips for Practicing and Advancing Your Pyrography Skills
Practicing regularly on scrap wood that mimics your final project’s grain and hardness is essential for developing control and consistency in your pyrography. Focus on mastering your burning technique, paying attention to how different tips and pressure affect your lines. Experiment with various tip types, temperatures, and pressure levels to see how they influence shading and line quality. Use light pencil sketches as guides to improve precision and reduce mistakes during burning, gradually increasing complexity as your skills grow. Record and analyze your work to identify areas for improvement, such as uneven lines or inconsistent shading, then adjust your technique accordingly. Challenging yourself with new designs and textures will help you advance and develop your own unique style in pyrography.
- Understand how tip choice impacts burning results
- Keep a record of your progress for continuous improvement
- Push your boundaries with new techniques and designs
- Use sketches to build confidence and accuracy
Frequently Asked Questions
How Do You Burn Wood to Create Electricity?
To burn wood for electricity, you need to start by igniting the wood to produce heat. This heat can then be harnessed using a thermoelectric generator, which converts temperature differences into electricity. Alternatively, burning wood creates steam that drives turbines connected to generators. Remember, your goal is to efficiently convert the thermal energy from burning wood into electrical power, using suitable devices and methods to maximize output.
What Is the Difference Between Woodburning and Pyrography?
You might wonder what sets woodburning apart from pyrography. Woodburning typically involves using simple heated tools or branding irons to create basic designs or marks on wood. Pyrography, however, focuses on artistic expression, detailed work, and decoration. It uses specialized tools, precise temperature control, and various tip shapes to produce intricate, decorative designs. Fundamentally, pyrography emphasizes craftsmanship, while woodburning is more about basic marking or burning.
What Liquid Is Used in Fractal Wood Burning?
You might wonder what liquid is used in fractal wood burning. Typically, you use a mixture of water and baking soda, about 1/3 cup of baking soda per 2 quarts of water. This mixture increases the wood’s conductivity, allowing electrical discharges to create intricate lightning-like patterns. Some experiment with saltwater, but baking soda is safer and more effective, helping you achieve consistent, controlled burns with fascinating fractal designs.
What Is the Japanese Method of Wood Burning?
You’re asking about the Japanese method of wood burning, which is known as “Shibori” or “Kebori.” In this technique, artisans combine intricate hand-carved designs with subtle shading, often using heated metal tools or sharpened sticks. The approach emphasizes precision, harmony, and natural beauty, creating fine lines and gentle gradations. Modern practitioners blend traditional hand techniques with electric tools to achieve detailed, layered artwork that reflects the minimalist Japanese aesthetic.
Conclusion
Now that you’re armed with the basics of electric pyrography, you’re ready to ignite your creativity. Think of your tools as a magic wand, turning plain wood into stunning art with just a spark. With safety, practice, and passion, your projects will blossom like a firework display. So, immerse yourself, experiment, and let your imagination burn brightly—your masterpiece is waiting to be awakened by your electric touch.