To guarantee consistent stain coverage across veneered surfaces, first examine the grain pattern carefully and apply stain along the natural flow to hide discrepancies. Test your stain on a scrap or hidden area to match color uniformly. Work in small sections, applying thin coats and blending edges softly to avoid blotchiness. Take your time, build up the color gradually, and pay attention to grain direction. Keep practicing these steps to achieve a seamless finish—more tips await to help you master this.
Key Takeaways
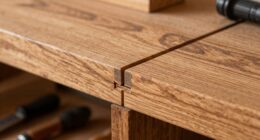
- Examine veneer grain carefully and align stain application with natural flow to ensure uniform color and pattern consistency.
- Test stain on scrap or hidden area to achieve a uniform application method and prevent blotchiness across patches.
- Work in small sections, applying thin, even coats with attention to grain direction for seamless blending.
- Gradually build up color, using feathering and blending techniques to create smooth transitions between patches.
- Take your time, patiently blending edges and allowing stain to fully absorb for a professional, consistent finish.
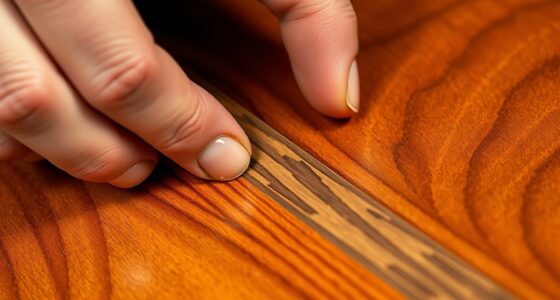
Staining veneered surfaces can dramatically enhance their appearance, but it requires careful preparation and technique. When working with veneer, achieving a uniform, professional look across all patches depends heavily on your ability to match the grain and blend colors seamlessly. Veneer’s thin layers make it especially sensitive to uneven staining, so your goal is to create consistency without obvious progression. The first step is to examine the grain pattern carefully. Grain matching involves aligning the stain application with the natural flow of the veneer’s grain, which helps mask any discrepancies between patches. If you notice variations in grain direction, adjust your staining technique accordingly—stain with the grain for a natural look, and be mindful of how the grain’s pattern might affect the way color absorbs.
Color blending is equally important. Even if you’re using the same stain, slight differences in application or the veneer’s porosity can cause color discrepancies. To counter this, start by testing your stain on a scrap piece or an inconspicuous area. This allows you to gauge how the color interacts with the veneer’s surface and helps you develop a consistent application method. When applying stain, work in thin, even coats, and use a brush or cloth to spread it uniformly. Pay attention to the direction of the grain as you work, ensuring that each patch receives a similar amount of stain to prevent blotchiness or uneven coloration.
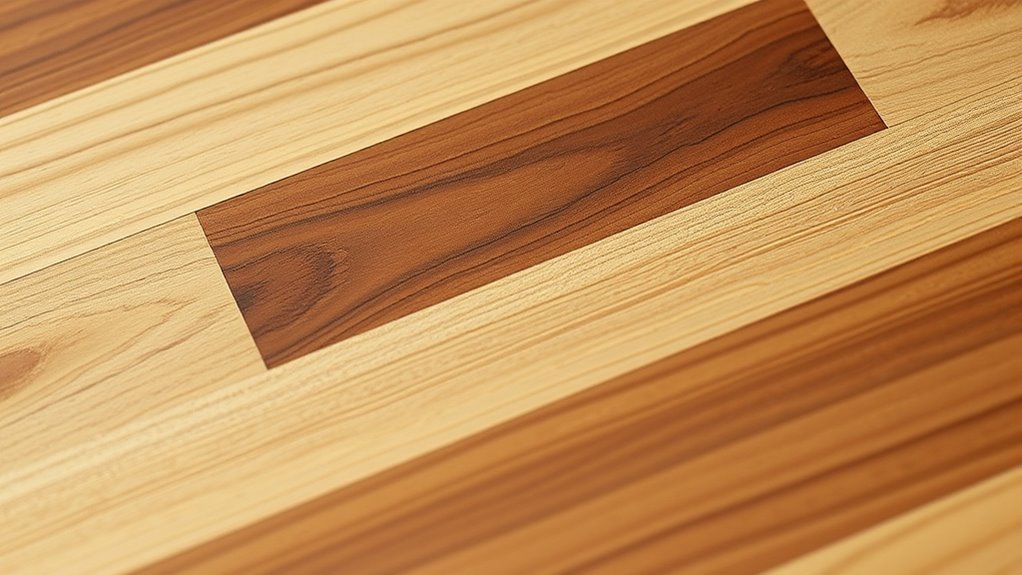
Additionally, the use of automation and technology in finishing processes can assist in achieving more consistent results across multiple patches. If you notice a patch is lighter or darker than desired, don’t panic. Instead, use a technique called color blending—carefully feathering the stain into adjacent areas. Lightly wipe or dab the stain where needed, blending the edges to create a smooth changeover. This process helps eliminate stark borders and ensures the entire veneered surface appears cohesive. It’s often helpful to work on small sections at a time, gradually building up the color until you reach the desired shade. Patience is key; rushing can lead to uneven absorption and noticeable inconsistencies.

Pro Grade Paint Brushes, 5-Piece Paint Brush Set: Flat & Angle Brushes for Latex and Oil Paints, Stains, Interior & Exterior Home Improvement
Ideal for Interior Painting & Furniture Projects – Designed for walls, trim, cabinets, wood furniture, and staining projects…
As an affiliate, we earn on qualifying purchases.
As an affiliate, we earn on qualifying purchases.
Frequently Asked Questions
How Do I Prevent Color Mismatch Between Veneer Patches?
To prevent color mismatch between veneer patches, you should focus on matching veneer patches carefully and use effective color blending techniques. Start by selecting veneer pieces with similar grain and color. Apply stain gradually, blending edges seamlessly with a sponge or brush. Test on scrap first, then adjust stain color as needed. Consistent application and blending help achieve uniformity, making patches less noticeable and ensuring a smooth, cohesive finish.
What Tools Are Best for Applying Veneer Stains Evenly?
You should use high-quality brushes and spray application for even veneer stain application. With brush techniques, work in light, consistent strokes to avoid streaks and uneven color. For larger areas, spray application offers a smooth, uniform finish, especially if you use a controlled spray gun. Always practice on scrap or hidden sections first, and keep your tools clean to prevent blotches or mismatched patches.
Can Staining Veneer Surfaces Be Done Without Prior Sanding?
Think of staining veneer surfaces as painting a delicate canvas; skipping sanding is like trying to color over a rough sketch. While you can stain without sanding, poor veneer adhesion and uneven stain penetration often follow. Sanding creates a smooth surface, allowing the stain to settle evenly and deepen the wood’s natural beauty. Without it, you risk blotches and uneven color, diminishing the veneer’s elegant finish.
How Long Should Stained Veneer Surfaces Dry Before Handling?
You should wait at least 24 hours for stained veneer surfaces to dry before handling. Drying time varies based on environmental factors like humidity, temperature, and airflow, so make certain the area is well-ventilated. Avoid touching or placing heavy objects on the surface during this period to prevent smudges or uneven finish. Patience ensures the stain fully cures, resulting in a smooth, consistent appearance across your veneer surface.
Are There Eco-Friendly Stain Options for Veneered Surfaces?
Are you searching for eco-friendly stains for your veneered surfaces? Natural dyes and water-based stains are excellent options because they’re less toxic and more sustainable. These stains penetrate the veneer beautifully, offering vibrant color without harmful chemicals. Isn’t it rewarding to enhance your furniture’s beauty while protecting the environment? You’ll love how natural dyes and water-based stains create a stunning, eco-conscious finish that’s safe for your home and planet.

SEISSO Wood Repair Kit Touch up Paint Restore Any Wooden Furniture Stain, 12 Colors Cover Surface Scratch for Wooden Floor Table, Filler Furniture Paint Oak, Cabinet, Door, Veneer, Walnut
RICH INCLUSIONS: This wooden filler set comprises 12 unique colors of resin repair fillers, offering a hassle-free solution…
As an affiliate, we earn on qualifying purchases.
As an affiliate, we earn on qualifying purchases.
Conclusion
When staining veneered surfaces, maintaining consistency across patches is key to achieving a flawless finish. Did you know that irregular staining can result in color variations of up to 30%? By following proper techniques and paying close attention to color matching, you guarantee a smooth, uniform appearance. Remember, a little extra care now saves you from costly touch-ups later. Keep practicing, and your veneered surfaces will look professional and polished every time.
Goodfilla White Oak, 8 oz, Wood and Grain Filler, Stainable, Tintable, Sandable, Zero Waste, Non-Toxic, USA Made
⚒️ HIGH QUALITY & MONEY SAVING: Save time and money with this wood filler that does not shrink,…
As an affiliate, we earn on qualifying purchases.
As an affiliate, we earn on qualifying purchases.

400pcs Hardware Nails Double Head Skirting Nails with 4 Tools – Invisible Seamless Baseboard Screws for Solid Wood Trim, Double-Sided Installation
🔹Invisible Professional Finish– Double-headed design hides nails completely within joints, eliminating visible holes for seamless skirting boards and…
As an affiliate, we earn on qualifying purchases.
As an affiliate, we earn on qualifying purchases.