Yes, you can refinish veneer wood, but it requires careful assessment of its thickness and condition. Gentle cleaning, light sanding, and appropriate stains or sealers help preserve its delicate surface. If the veneer is damaged or too thin, painting might be a better choice. To avoid causing harm, understanding your veneer’s state is key. To learn more about suitable techniques and tips, keep exploring how to properly restore veneer furniture.
Key Takeaways
- Veneer can be refinished if it’s thick enough and structurally sound, but thin or damaged veneer may require alternative treatments.
- Gentle surface preparation, such as light sanding and cleaning, is essential to avoid damaging the delicate veneer layer.
- Removing old finishes with careful sanding or chemical stripping allows for new stain or finish application.
- Painting or veneering over existing veneer can be effective if refinishing risks damaging the surface.
- Assessing veneer condition and thickness guides whether to proceed with refinishing, covering, or replacing the surface.

SEISSO Wood Repair Kit Touch up Paint Restore Any Wooden Furniture Stain, 12 Colors Cover Surface Scratch for Wooden Floor Table, Filler Furniture Paint Oak, Cabinet, Door, Veneer, Walnut
RICH INCLUSIONS: This wooden filler set comprises 12 unique colors of resin repair fillers, offering a hassle-free solution…
As an affiliate, we earn on qualifying purchases.
As an affiliate, we earn on qualifying purchases.
Understanding the Nature of Veneer and Its Composition

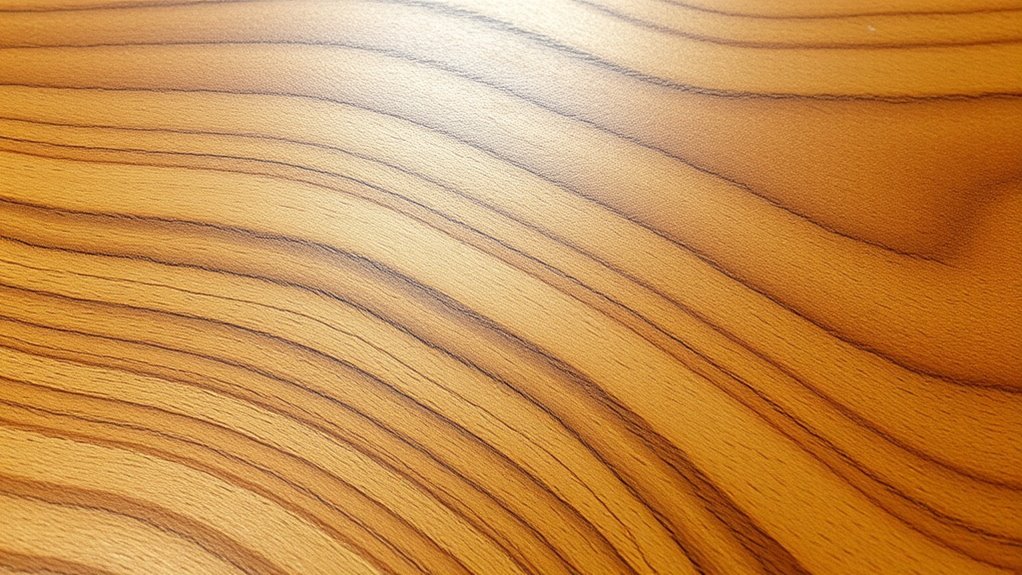
Veneer is a thin layer of real hardwood, usually less than 1/8 inch thick, glued onto a core material like plywood, particleboard, or MDF. This veneer showcases the natural grain and texture of wood, giving you the appearance of solid wood without the high cost or weight. Its thin profile makes it a versatile choice for furniture and cabinetry, allowing you to enjoy authentic wood aesthetics in a more economical way. Because of its delicate nature, the grain runs consistently across the surface, resembling solid wood but with less material. Understanding that veneer is fundamentally a delicate, thin sheet of wood helps you appreciate its beauty and limitations. This knowledge guides you in caring for and refinishing veneer surfaces properly. Additionally, knowing the best methods for refinishing can help preserve the integrity of the veneer over time. Proper techniques minimize impact on the thin surface, ensuring longevity and maintaining its visual appeal. Being aware of the potential for damage enables you to approach refinishing with care and precision.

Sanding Sponge, 60 80 120 220 Coarse Medium Fine Grit Sanding Block, Sander Sponges for Drywall Metal, Sandpaper Sponge Sanding Blocks for Wood 4 Pcs by S&F STEAD & FAST
Premium european high density foam – robust and durable foam sanding blocks for hand sanding
As an affiliate, we earn on qualifying purchases.
As an affiliate, we earn on qualifying purchases.
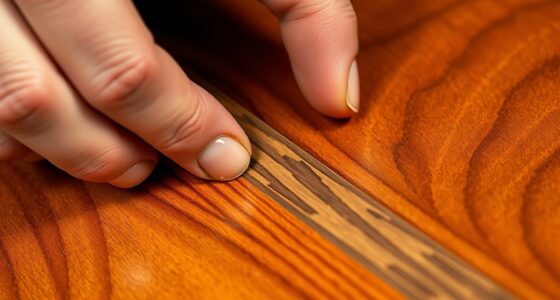
Assessing the Thickness and Condition of the Veneer Surface

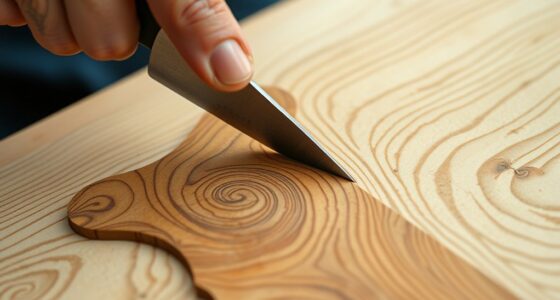
Start by gently testing the veneer with fine-grit sandpaper in an inconspicuous area to gauge its thickness; if it sands easily without exposing the core, it’s likely thin. Examine the edges and corners—if the veneer feels flush and stable, it’s probably suitable for refinishing. Carefully lift a small corner with a razor blade to check for underlying layers or damage that could affect your work. Additionally, inspecting the wood grain pattern can help determine if the veneer is in good condition and properly adhered. Understanding the durability of materials used can also provide insight into whether the veneer can withstand refinishing processes, especially considering the best beaches and their diverse environments that influence material wear and longevity.
Checking Veneer Thickness
Ever wonder how to determine if your veneer surface is thick enough for refinishing? The key is to check the thickness carefully. Examine edges and corners where the veneer is exposed; a small chip or scratch revealing a visible layer indicates the veneer’s thinness. You can also lightly sand a hidden area to check the thickness—if the wood grain remains visible and the layer feels firm, it’s likely suitable for sanding and refinishing. Be cautious with thin layers, especially those under 0.6mm, since they can be easily damaged. Using a magnifying glass or a flashlight can help you assess the surface’s condition and identify any thin spots. Properly checking the veneer thickness ensures you don’t sand through the veneer and damage the substrate underneath. Veneer thickness assessment is a crucial step in determining whether your surface can be safely refinished. Additionally, understanding the types of veneer can help you better evaluate its thickness and potential for refinishing. Knowing the properties of veneer can also guide you in selecting the appropriate refinishing techniques to preserve the integrity of your furniture. To ensure a successful refinishing project, consider consulting with a professional veneer expert who can provide valuable insights. Recognizing the different veneer applications can further assist in choosing the right approach for your specific project.
Evaluating Surface Integrity
Evaluating the surface integrity of your veneer involves closely inspecting its condition and thickness to determine if it can withstand refinishing. Start by checking the veneer thickness—gently sand a small, hidden area; if it wears away quickly, the veneer is likely thin and delicate. Look at edges and corners for a visible wood layer, indicating a thicker veneer that’s more suitable for refinishing. Watch for damage indicators such as peeling, bubbling, or water swelling, which suggest compromised surface integrity and may reduce refinishability. Consider whether the veneer can handle light sanding without exposing or damaging the substrate beneath. A sound surface integrity means the veneer can likely endure refinishing, but if damage indicators are present, it’s best to proceed cautiously or reconsider refinishing altogether. Additionally, assessing the surface durability of the veneer can help determine its ability to withstand the refinishing process. Conducting a comprehensive assessment of the veneer’s condition—such as checking for cracks or delamination—can further inform your decision. Incorporating advanced inspection techniques like magnification or ultrasonic testing can provide more detailed insights into the veneer’s internal condition.
SEISSO Wood Repair Kit Touch up Paint Restore Any Wooden Furniture Stain, 12 Colors Cover Surface Scratch for Wooden Floor Table, Filler Furniture Paint Oak, Cabinet, Door, Veneer, Walnut
RICH INCLUSIONS: This wooden filler set comprises 12 unique colors of resin repair fillers, offering a hassle-free solution…
As an affiliate, we earn on qualifying purchases.
As an affiliate, we earn on qualifying purchases.
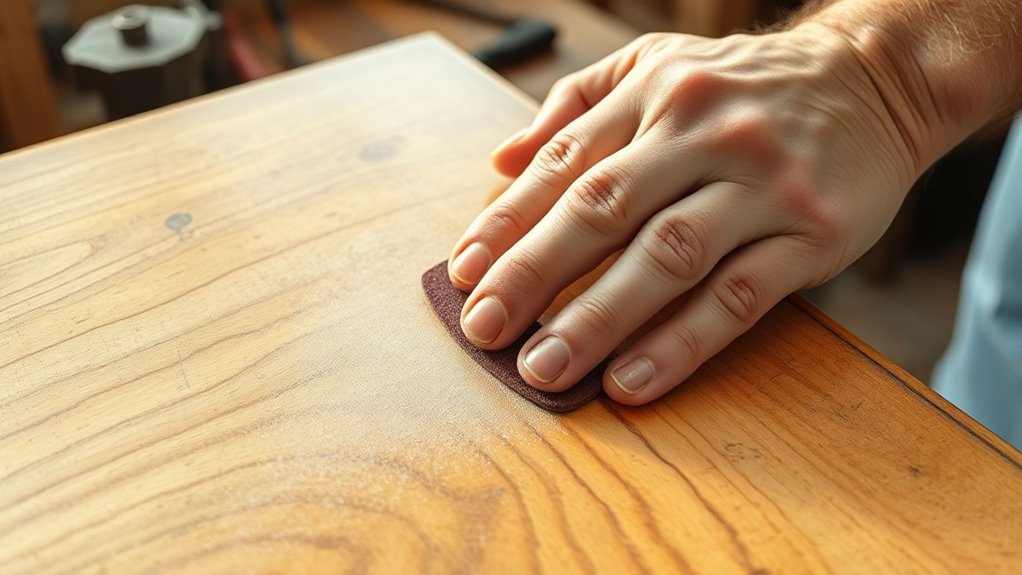
Techniques for Properly Preparing Veneer for Refinishing
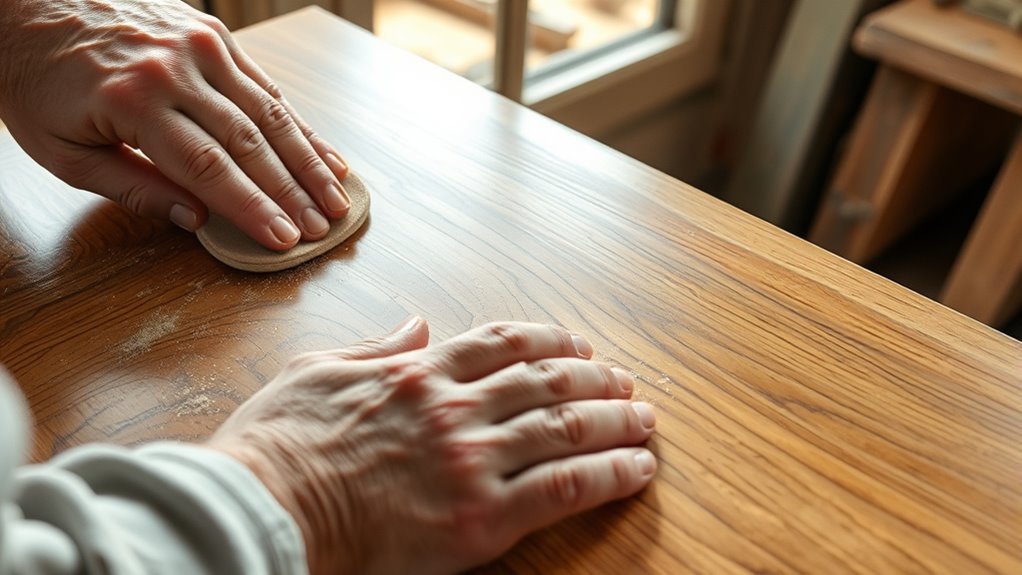
Preparing veneer for refinishing begins with gently sanding the surface with 220-grit sandpaper along the grain, which helps remove the existing sheen and promotes better primer adhesion without damaging the delicate veneer layer. Sand carefully to avoid gouging or scratching the thin veneer. After sanding, use a soft cloth or vacuum to thoroughly remove all dust and debris, ensuring a smooth, clean surface for painting or staining. For stubborn stains or glossy areas, gently wipe the surface with denatured alcohol and let it dry completely. Fill any small gaps or holes with compatible wood filler and sand smooth. Before applying primer, test it on a small, inconspicuous area to ensure proper adhesion and a consistent finish. Proper preparation is key to achieving a beautiful, durable refinished veneer. Additionally, considering the use of electric tools like orbital sanders can help achieve more uniform results and reduce hand fatigue during the process. Using the right sanding techniques can further protect the veneer surface from damage and ensure a professional finish. Incorporating proper surface cleaning techniques can also enhance the adhesion and longevity of the refinished veneer. Ensuring the use of appropriate filtration and pump protection can prevent debris from contaminating the finish and prolong the life of your spray equipment. Moreover, understanding personal finance management can help you budget effectively for refinishing projects and avoid overspending.
chemical stripper for veneer
As an affiliate, we earn on qualifying purchases.
As an affiliate, we earn on qualifying purchases.
Methods for Removing or Covering Old Finish on Veneer
You can remove old finish from veneer using gentle sanding with 220-grit sandpaper, which preserves the thin surface. Chemical stripping agents like Citristrip are effective but require careful application to avoid damaging the veneer. Alternatively, covering the old finish with paint or new veneer offers a quick update if removal seems too risky. For a more thorough refresh, consider water-based refinishing products designed specifically for veneer to ensure a smooth and durable finish. Proper cleaning and preparation techniques can also help achieve the best results when refinishing veneer surfaces. Additionally, understanding the material properties of veneer can guide you in selecting the most suitable refinishing method, as research into sound healing science suggests that gentle techniques can promote healthier outcomes. Recognizing the importance of cultural narratives in craftsmanship can also influence your choice of finishing methods to preserve the aesthetic integrity.
Chemical Stripping Options
Chemical stripping offers an effective way to remove old finishes from veneer surfaces without extensive sanding. Using solvents like Citristrip or lye-based products, you can dissolve varnishes, paints, or polyurethanes, making finish removal easier. These chemical agents penetrate the old coatings, softening them for simple scraping or wiping away. Safety precautions are essential—wear gloves, respirators, and guarantee proper ventilation to avoid fumes and skin contact. After stripping, it’s vital to thoroughly clean the surface to remove all residue, preventing any interference with sanding or refinishing. Proper cleaning ensures a smooth, clean surface for the next steps. Chemical stripping works especially well on heavily varnished or glued finishes that are tough to remove with sanding alone, saving time and effort.
Gentle Sanding Techniques
Gentle sanding is an effective way to remove or cover old finishes on veneer without risking damage to the delicate surface. Use fine sanding, such as 220-grit sandpaper or a fine sanding sponge, to lightly abrade the veneer surface. Always sand along the natural wood grain to prevent scratches and ensure even removal of the finish. For fragile veneer, hand sanding is preferable over power tools, giving you better control and reducing the risk of gouging. Before proceeding, test a small, hidden area to determine how much finish can be safely removed. Keep the surface clean by regularly vacuuming or wiping away dust during sanding. Additionally, understanding automation in business can help you identify the most efficient methods for refinishing projects. Following these sanding techniques helps preserve the veneer’s integrity while preparing it for refinishing.
Covering With Paint or Veneer
When covering veneer with paint or veneer, proper surface preparation is key to achieving a durable, smooth finish. Lightly sand the surface with 220-grit sandpaper to help the primer adhere without damaging the thin veneer layer. Applying a specialized bonding primer for laminate or veneer ensures the paint sticks well and prevents peeling over time. If you want a seamless look, consider removing the existing veneer or finish by sanding or using chemical strippers before applying new veneer or paint.
| Method | Required Tools | Tips |
|---|---|---|
| Painting | Sandpaper, primer, paint, sealant | Seal with polyurethane for durability |
| Veneer Covering | Veneer, contact cement, roller | Press firmly to avoid bubbles |
| Removing Finish | Chemical stripper, scraper | Work in well-ventilated area |
| Refinish | Sandpaper, primer, paint or veneer | Ensure surface is clean and dry |
Staining and Applying a New Finish to Veneered Surfaces
Staining a veneered surface requires proper preparation to achieve a smooth, even finish. First, lightly sand the veneer with fine-grit sandpaper (220 or higher) to remove any existing finish and open the wood grain for better stain absorption. Choose an oil-based, water-based, or gel stain, and test it on a hidden area to ensure you’re satisfied with the color. Once you’re ready, apply the stain evenly, following the grain, and allow sufficient drying time—usually 24 to 48 hours—per manufacturer instructions. To protect your work, apply a clear protective coat like polyurethane or polycrylic after the stain has dried. This sealing step enhances durability and gives your veneer a polished, professional look.
Common Challenges and How to Avoid Damaging Thin Veneer Layers

While staining and finishing veneer surfaces can enhance their appearance, working with thin veneer layers presents unique challenges. Veneer is extremely delicate, often thinner than 1/8 inch, making it prone to damage from aggressive sanding or scraping. Using coarse grit sandpaper or applying too much pressure can wear through the veneer, exposing or damaging the underlying substrate. Water or chemical stripping agents can cause the veneer to swell, lift, or delaminate if not carefully tested and applied. Over-sanding high-gloss or heavily varnished veneer can create uneven finishes or penetrate the thin layer. When repairing veneer damage, stick to gentle techniques like light hand sanding or patching, as aggressive methods risk causing irreversible damage. Proper caution helps preserve the veneer’s integrity during refinishing.
When to Consider Painting as an Alternative to Staining

If your veneer surface is heavily damaged, stained, or covered with an existing finish that’s difficult to remove, painting can be a better choice than staining. This approach allows you to update your piece without risking damage from aggressive sanding. Painting veneer provides bold color options and a modern look that staining can’t match. Proper surface preparation, including light sanding and priming, is crucial for a durable finish and good adhesion. When stains or imperfections resist traditional refinishing, painting veneer effectively hides these flaws. Consider painting when the existing finish is problematic or the veneer is too delicate for extensive sanding.
| Condition | Suitable Action |
|---|---|
| Heavy damage or stain | Painting veneer |
| Difficult to sand finish | Painting veneer |
| Desire for bold color | Painting veneer |
| Risk of veneer wear | Painting veneer |
| Imperfections that stain can’t hide | Painting veneer |
Tips for Achieving a Professional-Looking Result on Veneer Wood
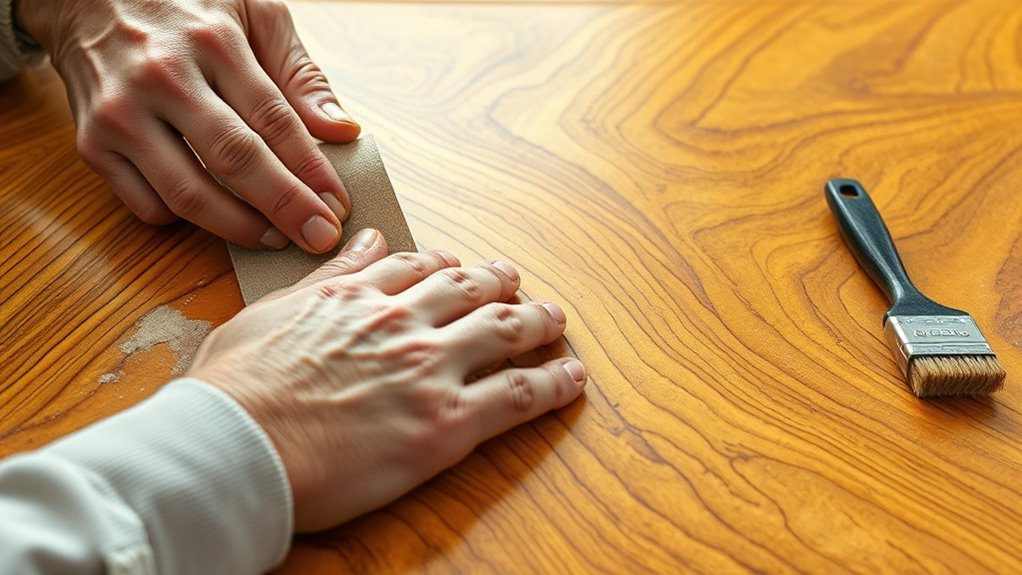
Achieving a professional-looking finish on veneer wood starts with proper surface preparation. First, lightly sand the veneer with 220-grit sandpaper along the grain to remove gloss and improve primer adhesion without damaging the thin layer. Use a high-quality, grain-friendly primer formulated specifically for veneer or laminate surfaces to guarantee strong bonding and prevent peeling. Apply multiple thin coats of paint or stain, allowing each layer to dry thoroughly before adding the next, which results in a smooth, even finish. Once the desired look is achieved, seal the surface with a durable clear topcoat like polyurethane or polycrylic to protect against water, scratches, and daily wear. Always test your products on a hidden area first, confirming compatibility and a flawless final result.
Frequently Asked Questions
Can Wood Veneer Be Refinished?
Yes, you can refinish wood veneer, but you need to be careful. Lightly sand the surface with 120-220 grit to remove old finishes without damaging the thin veneer. Afterward, you can stain, seal, or even paint if sanding isn’t suitable. Always test a small area first to avoid exposing the substrate or causing damage. Proper preparation and gentle techniques help restore your veneer furniture’s appearance effectively.
How Can I Make My Old Veneer Look Better?
Think of your old veneer as a worn tapestry waiting for revival. To make it look better, start by lightly sanding with fine-grit paper to smooth out scratches. Then, apply a clear stain or tinted polyurethane to deepen its richness. Fill chips with matching wood filler, and consider a veneer enhancer to boost the grain’s shine. If needed, replace damaged sections to restore the surface’s overall beauty and vibrancy.
Should You Strip or Sand Veneer?
When deciding whether to strip or sand veneer, consider its condition. If the surface has thick coatings or significant damage, stripping with a putty knife or chemical stripper is best. For minor issues or light refinishing, gentle sanding can work, but you must be careful not to go through the thin veneer layer. Always test in a small area first to avoid damaging the veneer, ensuring you choose the safest method.
What Happens if You Sand Wood Veneer?
When you sand wood veneer, you risk damaging its delicate surface. Light, careful sanding with fine-grit paper can smooth out minor imperfections, but aggressive sanding may wear through the thin layer, exposing the substrate like plywood or particleboard. You might also cause the veneer to lift or bubble if the adhesive weakens. Always test on a small area first to prevent irreversible damage and guarantee a successful refinishing process.
Conclusion
Refinishing veneer wood can refresh your furniture and extend its life, but it requires careful preparation and technique. Did you know that veneer typically measures just 0.6 to 3 millimeters thick? This delicate layer demands patience to avoid damage. With the right approach, you can achieve a professional look and preserve your piece’s beauty. Just remember, taking your time and understanding the veneer’s nature is key to successful refinishing.