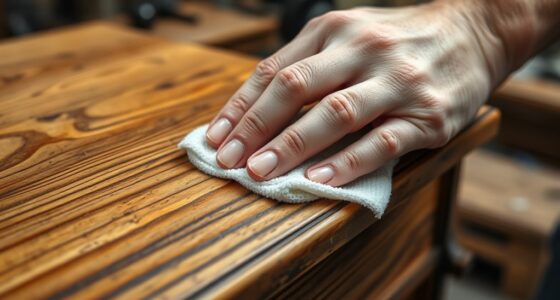
To refinish a veneer tabletop without sanding through, gently clean the surface with a soft cloth and mild cleaner to remove dirt and residues. Lightly apply a wood conditioner or primer designed for veneer, using a soft brush or spray to seal the surface and even out absorption. Use thin coats of a compatible finish like polyurethane or lacquer, applying gently and allowing proper drying time. For more tips on achieving a smooth, durable finish without damaging the veneer, continue exploring the process.
Key Takeaways
- Use a gentle cleaning method to remove dirt without damaging the veneer surface.
- Apply a very fine grit (around 220) sanding sponge lightly to smooth imperfections without penetrating the veneer.
- Seal the surface with a compatible wood conditioner or primer to even out absorption without aggressive sanding.
- Opt for thin, multiple coats of finish like polyurethane or lacquer, lightly sanding between coats to maintain veneer integrity.
- Focus on spot repairs for scratches or stains, avoiding extensive sanding to preserve the veneer layer.
Refinishing veneer tabletops can breathe new life into your furniture, but it requires careful preparation and technique to achieve a smooth, professional look. The key is preserving the integrity of the veneer while enhancing the appearance and durability of the finish. When working on veneer, you need to pay close attention to the wood grain and avoid damaging the thin layer of wood that covers the substrate. If you’re not cautious, aggressive sanding can expose the core material or create unsightly gouges, weakening the finish durability over time.
To start, you should clean the surface thoroughly to remove dirt, grease, or old finish residues. Lightly sanding the veneer with very fine grit sandpaper—around 220 grit—is essential, but you must do so gently. The goal is to smooth out minor imperfections and create a receptive surface for the new finish without penetrating through the veneer. When sanding, follow the direction of the wood grain to prevent scratches that could be visible after finishing. This approach helps maintain the natural look of the wood grain, which is vital for a seamless, high-quality result. Be attentive to soft spots or areas where the veneer may be lifting; these spots require special care to prevent further damage.
Clean and lightly sand veneer with fine grit, following the grain to preserve its natural look.
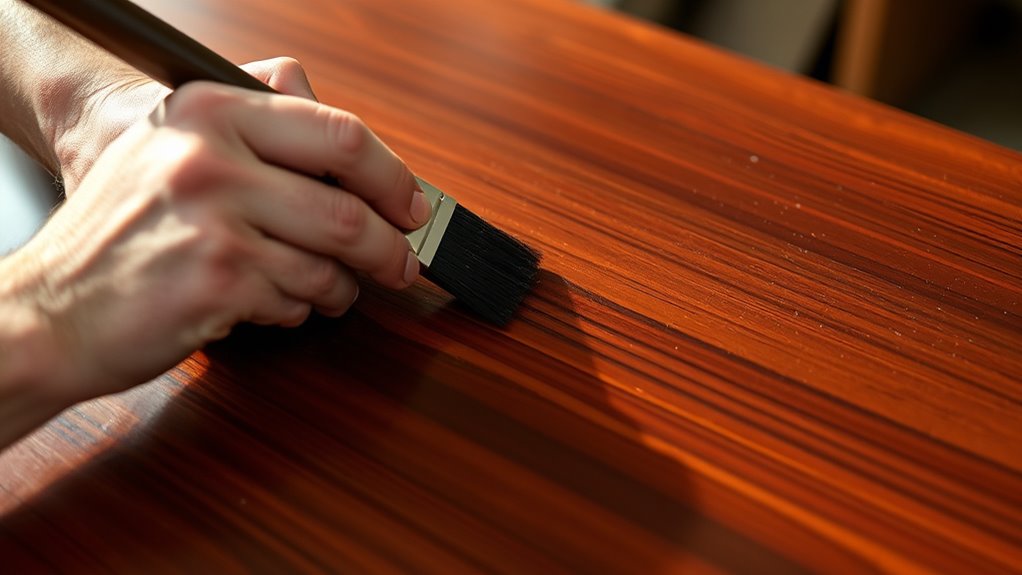
Once the surface is prepped, consider using a wood conditioner or primer designed for veneer. These products help seal the wood grain, reducing the risk of uneven absorption, which can cause blotchiness or an inconsistent appearance. Applying a thin, even coat with a brush or spray ensures a smooth base that enhances finish durability. When selecting your topcoat—be it polyurethane, lacquer, or varnish—opt for a product suited for veneer surfaces. These finishes are formulated to provide a protective layer that resists scratches, moisture, and general wear, all vital to maintaining the veneer’s appearance over time. Additionally, understanding the contrast ratio of your finish can help you select a product that provides deep blacks and bright whites, further elevating the appearance of your refinished piece.
Applying the finish in multiple thin coats rather than one thick layer results in a more durable and even surface. Allow each coat to dry thoroughly before lightly sanding with very fine grit paper to remove any imperfections or dust particles. This step also helps to build a stronger, more resilient finish. Throughout the process, keep in mind that the beauty of the wood grain is what makes veneer furniture special. By working carefully and patiently, you’ll preserve this natural pattern and achieve a sleek, long-lasting look that enhances your furniture’s value and appearance. With the right approach, you can refinish your veneer tabletop without sacrificing its integrity or aesthetic appeal.

Emery Cloth Roll Sandpaper Rolls – Boxed Multi-Roll Abrasive Dispenser for Woodturning, Metal, Automotive Body Work & Lathe Accessories – Includes 150, 240, 320, 400, 600 Grit J-Weight Cloth
CONVENIENT TEAR-OFF DISPENSER – Boxed multi-roll design lets you pull and tear the exact length of sand paper...
As an affiliate, we earn on qualifying purchases.
Frequently Asked Questions
How Do I Identify if My Veneer Is Genuine or Fake?
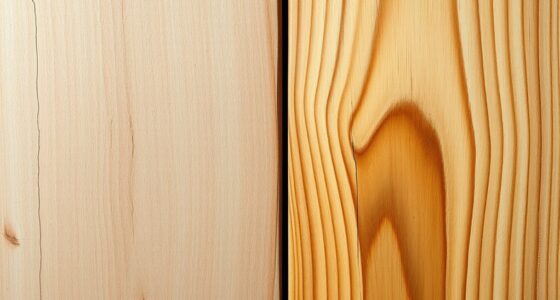
To identify if your veneer is genuine or fake, start by examining its appearance and feel. Genuine veneer ages naturally, showing subtle color changes and tiny cracks over time. Fake veneer often looks uniform, plasticky, or overly shiny. Check for fake veneer indicators like peeling edges, inconsistent grain patterns, or signs of glue underneath. Feeling the surface can also reveal if it’s lightweight or overly smooth, which hints at fake material.
Can I Refinish Veneer Without Removing the Old Finish?
Yes, you can refinish veneer without removing the old finish by carefully cleaning and prepping the surface. Use a gentle cleaner to remove dirt and grease, then lightly sand to improve adhesion. Apply a suitable veneer adhesive or primer for DIY refinishing, ensuring the old finish remains intact. This approach helps you preserve the veneer while achieving a fresh look, avoiding the risk of sanding through or damaging the surface.
What Are the Best Protective Finishes for Veneer Surfaces?
Think of your veneer surface as a delicate masterpiece needing a gentle touch. For protection, you want a finish that’s both durable and preserves the beauty. Veneer sealing and protective coatings like polyurethane or lacquer work well—they shield without adding bulk. These finishes resist scratches and moisture, keeping your surface looking fresh. Choose a high-quality protective coating to guarantee long-lasting beauty without compromising the veneer’s natural elegance.
How Long Does a Veneer Refinishing Process Typically Take?
The veneer process duration varies depending on the project’s complexity, but typically, refinishing takes about 1 to 3 days. You’ll need time for surface preparation, applying the finish, and drying between coats. The refinishing timeline can be shorter if you’re only applying a protective topcoat, but more extensive work like repairing and staining may extend the veneer process duration. Planning ahead helps guarantee a smooth, successful finish.
Are There Specific Cleaning Methods to Preserve Veneer Quality?
Imagine gently wiping a delicate leaf—your cleaning techniques should mirror that care to preserve veneer quality. You should use soft cloths and mild cleaners, avoiding harsh chemicals that could damage the surface. Regular dusting and immediate cleanup of spills help maintain the veneer’s integrity. By adopting these gentle cleaning methods, you guarantee veneer preservation, keeping your tabletop beautiful and durable for years while preventing unnecessary wear or damage.

RUITOOL Bowl Sander Tool Kit with Dual Bearing Head - Lathe Tools with 1" - 3" Hook & Loop Sanding Discs, 75 Piece Sandpaper (60 to 320 Grit), Backing Pads with Foam Interface & Metal Handle
【Dual bearings for smoother sanding】Our RUITOOL bowl sander uses a dual-bearing assembly designed for long life. The dual...
As an affiliate, we earn on qualifying purchases.
Conclusion
Now, picture your tabletops gleaming with a fresh, smooth surface, the rich veneer restored to its original beauty. With careful refinishing, you can enjoy the warm glow of your furniture without the worry of sanding through delicate layers. Imagine running your hand across the flawless finish, feeling the smoothness beneath your fingertips. By following these simple steps, you’ll bring new life to your tabletops, creating a stunning centerpiece that’s both durable and breathtaking.

Peachtree Woodworking Supply Bowl Sander Tool Kit - Dual Bearing Head & Hardwood Handle, 85 Piece Wood Sander Kit, 1" & 2" Hook & Loop Sanding Disc Sandpaper, 1/4 Mandrel
BOWL SANDER FOR WOODTURNING - Finishing the inside of a wood turned bowl can be tricky, as scuff...
As an affiliate, we earn on qualifying purchases.

Dura-Gold Woodturning Bowl Sander Tool Kit - 1" & 2" Hook & Loop Backing Pads, 50 Sanding Discs (60 to 320 Grit), Dual Bearing, Hardwood Handle, 1/4" Mandrel, Sandpaper Woodworking
Complete Dura-Gold Bowl Sander Kit: Wood lathe sanding tool includes 1" & 2" hook & loop backing pads...
As an affiliate, we earn on qualifying purchases.