
To repair sun-faded veneer, start by cleaning the surface thoroughly to remove dirt and debris. Assess the damage; if fading is light, gently sand with fine-grit paper, then test a matching stain in an inconspicuous spot. Apply the stain carefully to blend the color, adding coats as needed for uniformity. Finish with a clear sealant for protection. With patience and attention to detail, you can restore your veneer’s vibrant appearance—learn more about each step below.
Key Takeaways
- Assess the extent of sun damage to determine if staining or stripping is needed.
- Clean and lightly sand the veneer surface to ensure proper stain adhesion.
- Test stain color on a hidden area to match the original hue before full application.
- Apply multiple coats of stain to achieve a uniform, vibrant color that blends seamlessly.
- Seal the restored surface with a clear finish for durability and long-lasting appearance.

Sun-faded veneer can quickly diminish the beauty of your furniture or cabinetry, but with the right techniques, you can restore its vibrant appearance. One of the most effective methods for addressing sun damage involves carefully applying a wood stain designed specifically for veneer restoration. This process allows you to rejuvenate the color and bring back the original luster of your piece.
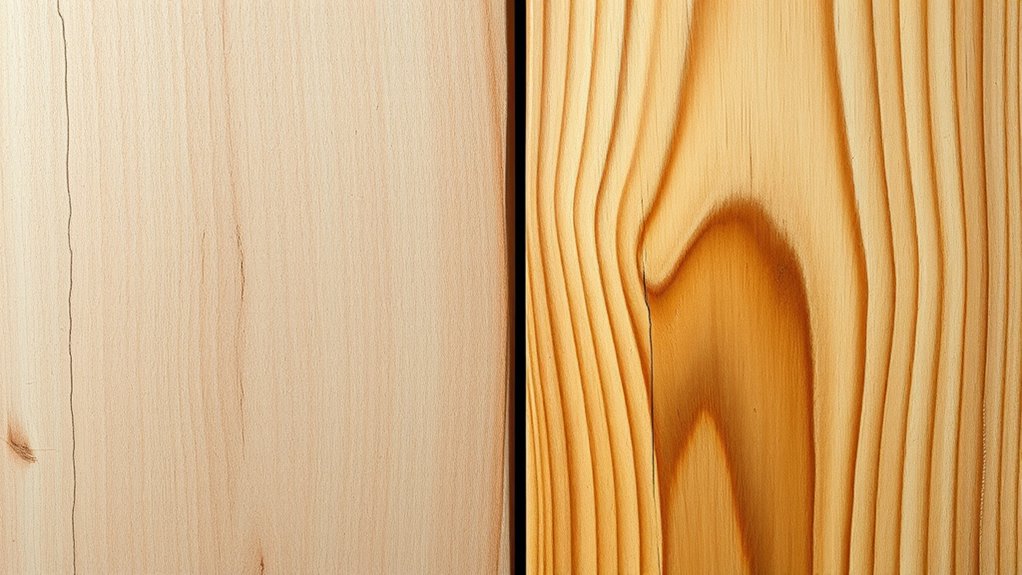
To begin, assess the extent of the sun damage. If the veneer has only light fading, a simple application of a matching wood stain can do wonders. For more severe discoloration, you may need to strip the existing finish and prepare the surface for a fresh coat of stain. Always start by cleaning the surface thoroughly with a mild cleaner to remove dirt, grease, or any loose debris that could interfere with adhesion.
Assess sun damage; light fading may only need stain, severe damage might require stripping and cleaning first.
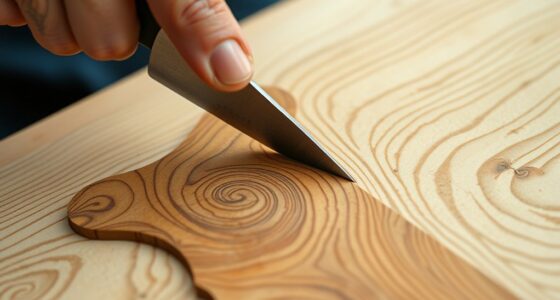
Once cleaned, lightly sand the surface using fine-grit sandpaper. This step smooths out any rough patches and opens the pores of the veneer, allowing the stain to penetrate evenly. Be careful not to sand too aggressively, as veneer is thin and can be easily damaged. After sanding, remove any dust with a tack cloth or a damp rag, ensuring the surface is dust-free for the best results.
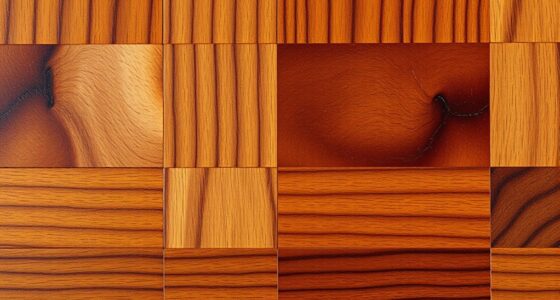
When choosing a wood stain, look for one that closely matches the original color of your furniture or cabinetry. Test a small, inconspicuous area first to see how the stain reacts with the veneer. Apply the stain with a brush or cloth, working in the direction of the grain for a uniform finish. Wipe off excess stain promptly to avoid blotches and uneven coloring.
If the color still isn’t quite right after the first application, wait for the stain to dry completely, then add a second coat if necessary. Multiple coats can deepen the hue and help achieve a more consistent color. Once satisfied, seal the veneer with a clear finish, such as a polyurethane or lacquer, to protect your work and ensure durability.
Veneer restoration through careful staining can breathe new life into sun-faded surfaces. It’s a cost-effective way to restore vibrancy without replacing the entire piece. Patience and attention to detail are key—you want the color to blend seamlessly with the rest of the furniture or cabinetry, preserving its natural beauty. With a bit of effort, you’ll be amazed at how quickly you can turn back the clock on sun damage and enjoy a renewed, stunning finish.
Frequently Asked Questions
How Long Does a Color Repair Typically Last?
A color repair on sun-faded veneer typically lasts around 1 to 3 years, depending on your furniture’s exposure to sunlight and wear. To maximize furniture longevity and repair durability, protect your piece from direct sunlight and use proper finishing techniques. Regular maintenance can extend the repair’s lifespan, helping your furniture look good longer. Keep in mind that proper care is key to maintaining the results over time.
Can I Use DIY Methods on Antique Veneer?
Absolutely, you can attempt DIY methods on antique veneer, but tread thoughtfully. Tiny techniques like touch-up tints or transparent topcoats can tackle superficial scratches. Yet, for authentic antique preservation, trust veneer restoration techniques that respect the piece’s history. Be cautious; improper DIY repairs might worsen wear. When in doubt, consult a professional to ensure your treasured antique stays timeless and true.
What Safety Precautions Should I Take During Repair?
You should wear protective gear like gloves, goggles, and a mask to safeguard your skin, eyes, and lungs during the repair process. Make certain good ventilation safety by working in a well-ventilated area or using fans to disperse fumes from paints or adhesives. Always follow product instructions carefully, and keep any hazardous materials out of reach of children or pets. Taking these precautions helps prevent health issues and ensures a safer repair experience.
Are There Eco-Friendly Color Repair Options?
Think of eco-friendly pigments as a breath of fresh air for your project. You can choose natural dyes and sustainable finishing options that minimize environmental impact while restoring your veneer’s beauty. These eco-conscious choices act like gentle whispers of nature, blending seamlessly without harmful chemicals. By opting for sustainable finishing, you guarantee your repair is both beautiful and kind to the planet, making your space greener and more vibrant.
Will Color Repair Affect the Furniture’s Value?
Color repair can impact your furniture’s resale value, especially if it’s antique or collectible, as it might affect authenticity and original craftsmanship. However, if done carefully, it can preserve or even enhance its appearance, making it more attractive for resale. Consider professional restoration for antique preservation. Doing so guarantees your furniture remains appealing while maintaining its value, which is vital for future resale prospects.
Conclusion
Now that you know how to restore your sun-faded veneer, don’t be afraid to roll up your sleeves and give it a try. With patience and the right techniques, you can breathe new life into your furniture and make it look as good as new. Remember, every cloud has a silver lining—your effort will pay off, and you’ll be proud of the transformation. So go ahead, turn back the clock and enjoy your refreshed masterpiece.