To set your saw for crown molding cuts, start by understanding the proper angles for inside and outside corners—usually 45°, but sometimes adjustments are needed. Position the molding upside down and backwards to match the wall’s angle. Use a protractor or crown gauge to fine-tune the miter and bevel settings. Double-check your measurements before cutting, and secure the molding firmly. Keep practicing these steps to master perfect joints—continue on to discover even more tips and tricks.
Key Takeaways
- Always set the miter saw to 45° for outside corners and adjust for inside corners as needed.
- Use a crown molding angle gauge or protractor to determine precise cut angles.
- Position molding upside down and backwards before cutting to ensure proper fit.
- Double-check and measure all angles before cutting to prevent errors.
- Dry-fit pieces first to confirm accurate angles and fit before final installation.
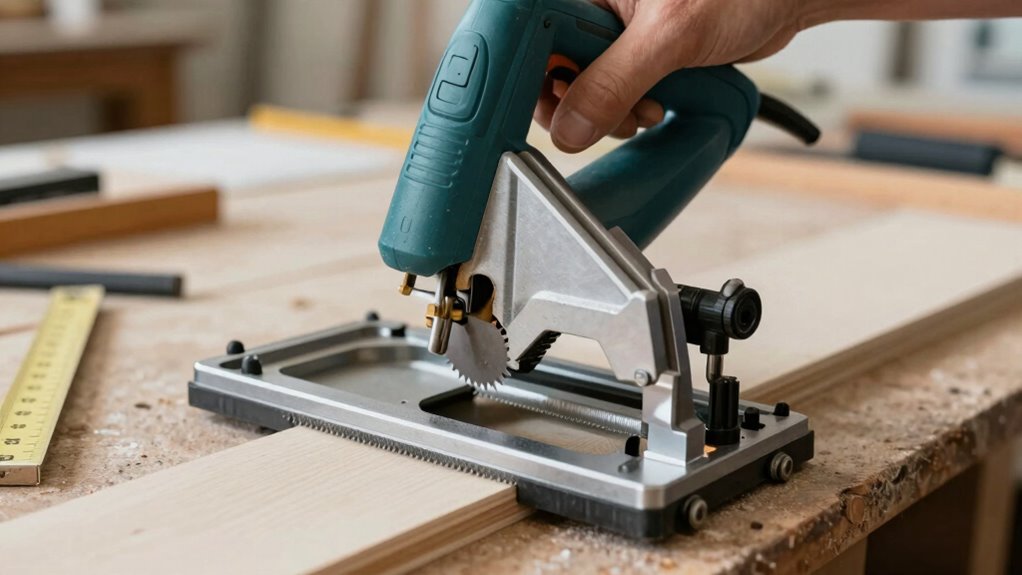
Have you ever wondered how to make precise cuts for crown molding? The key lies in mastering the right miter saw techniques and understanding the proper angle setup. Crown molding cuts can seem tricky at first, but once you grasp the fundamentals, you’ll find the process becomes straightforward and even enjoyable. The most common mistake is misaligning the saw or misunderstanding the angles needed for inside and outside corners. To avoid this, start by setting your miter saw to the correct angle, which depends on whether you’re making an inside or outside corner cut. For outside corners, you’ll typically set the saw to a 45-degree angle, but sometimes you’ll need to adjust slightly depending on the molding profile. Inside corners may require a different approach, often involving compound cuts with both miter and bevel adjustments.
When working on crown molding, your miter saw techniques should include properly positioning the molding. Position the piece upside down and backwards compared to how it will sit on the wall. This way, your cuts will fit correctly when installed. Always double-check your measurements and angles before making the cut. Use a protractor or a specialized crown molding angle gauge to determine the precise angle needed for your specific project. This guarantees your cuts are accurate, reducing gaps and misalignments during installation.
Installation tips also play a pivotal role in achieving a professional finish. For example, use painter’s tape to mark your cut lines, so they don’t slip or shift while cutting. Clamp your molding securely to prevent movement, which can lead to uneven cuts. When making compound cuts, remember that both miter and bevel angles are involved, so take your time setting up your saw. Don’t rely solely on guesswork—measure twice, cut once. If your saw has a bevel feature, learn how to adjust it confidently. Many miter saws allow you to lock in specific angles, so familiarize yourself with your saw’s settings to streamline your workflow.
Additionally, understanding the angle setup process is crucial for achieving perfect joints. Lastly, after making your cuts, dry-fit the pieces before applying any adhesive or nails. This way, you can verify the angles and fit. Small adjustments might be necessary to guarantee tight joints and a seamless look. With patience and attention to detail, your crown molding will look sharp and professional. Remember, mastering these techniques and tips will save you time and frustration, transforming what once seemed complex into a manageable, satisfying task.
LEXIVON Aluminum Miter Saw Protractor | 7-Inch Rust Proof Angle Finder Featuring Precision Laser Engraved Scales (LX-230)
ACCURATE – Crafted from CNC-machined Anodized Aluminum Alloy Steel. Features easy-to-read precision laser engraved scales.
As an affiliate, we earn on qualifying purchases.
As an affiliate, we earn on qualifying purchases.
Frequently Asked Questions
What Tools Are Best for Cutting Crown Molding Accurately?
You should use a miter box and a measuring tape for accurate crown molding cuts. The miter box helps you make precise angle cuts, ensuring your pieces fit perfectly, while the measuring tape confirms the length before cutting. Together, these tools simplify the process, reduce errors, and give your project a professional look. Make sure to double-check your measurements and angles to achieve the best results.
How Do I Measure Angles for Custom Crown Molding Cuts?
Did you know that improper angle measurement causes 70% of crown molding miscuts? To measure angles accurately, use a protractor or a digital angle finder for precise angle measurement. Custom molding templates can help you replicate angles consistently, especially for complex cuts. Position your moldings, mark the angles, and double-check your measurements before cutting. This method guarantees perfect fits and professional-looking results every time.
Can I Cut Crown Molding Without a Specialized Saw?
Yes, you can cut crown molding without a specialized saw. Use a standard miter saw, adjusting the angle to match your crown molding design, often 45 degrees for typical styles. For historical styles with complex profiles, consider a jigsaw or coping saw for detailed cuts. Always measure carefully, mark your angles precisely, and test on scrap pieces to guarantee your cuts fit perfectly, capturing the elegance of traditional or vintage moldings.
How Do I Troubleshoot Uneven or Jagged Cuts?
If your cuts are uneven or jagged, start by checking your miter box for stability and proper blade alignment. Make certain you’re cutting at the correct angle and apply steady pressure. Use a fine saw blade for cleaner cuts. Afterward, fill any gaps or imperfections with joint compound, then sand smooth. Practicing on scrap pieces helps refine your technique before working on your actual crown molding.
What Safety Precautions Should I Follow During Cutting?
Think of your workspace as a fortress, and safety gear as your shields. Always wear protective gear like goggles, ear protection, and gloves to guard against flying debris and loud noise. Keep your workspace clean and well-lit, and make certain tools are in good condition. Never bypass safety features, and stay focused on your task. These precautions create a barrier between you and potential hazards, keeping your cutting experience safe and secure.

Metabo HPT 10-Inch Single Bevel Compound Miter Saw, 15-Amp Power Saw with Xact Cut Shadow Line, Precision Miter Angles, Single Bevel 0-45°, 40T TCT Miter Saw Blade, Lightweight Design, C10FCG2
POWERFUL AND PRECISE: This 10-inch single bevel compound miter saw features a 15-Amp motor delivering high power for…
As an affiliate, we earn on qualifying purchases.
As an affiliate, we earn on qualifying purchases.
Conclusion
Knowing how to set your angles correctly can save you time and frustration, especially since over 70% of DIYers struggle with crown molding cuts. Once you master the proper setup, you’ll find the process much smoother and more accurate. Don’t let confusing angles hold you back—practice makes perfect. With a little patience, you’ll be making flawless cuts that elevate any room. Trust the process, and you’ll be proud of your perfect crown molding every time.

Kreg KMA2800 Crown-Pro Crown Molding Tool
The Right Cut: Beautiful, seamless-fitting crown molding takes the guesswork out of crown molding
As an affiliate, we earn on qualifying purchases.
As an affiliate, we earn on qualifying purchases.

Snwoygr 7 Inch Aluminum Miter Saw Protractor, Professional Angle Measuring Tool, Comes with Two Extra Straightedge Protractors for Woodworkers, Builders, Plumbers, Home DIY
Ergonomic O-Shape Design: Featuring a precision O-shaped frame that sits flush against surfaces for enhanced stability, delivering accurate…
As an affiliate, we earn on qualifying purchases.
As an affiliate, we earn on qualifying purchases.