
TL;DR
Woodworking tool sets are groups of tools assembled for particular work, and there is no single standard kit for every woodworker. Start with accurate measuring and marking tools, a suitable saw, a few chisels, clamps, sharpening equipment, and safety gear; add specialty tools when a real project calls for them.
A box stamped with 52-piece woodworking tool set sounds like a workshop in one purchase. Then you open it and find tools you do not know how to use, a square that may be out of alignment, and no sharpening gear for the chisels. A smaller, well-chosen kit can get you making cleaner cuts sooner.

Get business pricing on tools and workshop supplies
- Business-only prices and quantity discounts
- Tax-exempt purchasing
- Multiple users, one account, clear invoices
A woodworking tool set is a group of tools assembled for a particular kind of work, such as hand-tool joinery, furniture making, carving, or general DIY. There is no universal standard set. Your best choices depend on what you want to build, how much space you have, and whether you prefer hand tools, power tools, or a mix.
This guide explains what a useful starter kit contains, how to compare buying a set with choosing tools individually, and what safety and upkeep belong in your budget. You will leave with a practical way to build a kit around your next project, instead of paying for a tool count.
Choose a tool set based on projects you expect to make, since set contents are not standardized.
Start with reliable measuring and marking tools, a suitable saw, a few chisels, clamps, sharpening equipment, and safety gear.
Compare a set with buying individual tools by checking quality and usefulness, not the advertised piece count.
Add power tools or specialty tools when your projects, available space, and repeated tasks justify them.
Keep cutting tools sharp, measuring tools accurate, and tools dry and protected between uses.
Choose Tools for Your First Projects, Not the Box Count
Woodworking tool sets are groups of tools assembled for particular work, so the right set depends on what you plan to make. A shelf, a small box, and a dining table demand different cuts and levels of precision. Start with the project; let the tool list follow.
Say you want to build a simple pine bookshelf. You need to measure boards, mark square lines, cut accurately, fasten parts, and smooth rough edges. A carving gouge set probably adds little value to that job. If your first project is a carved spoon, the bookshelf kit’s clamps and circular saw may sit unused while a carving knife becomes your most important purchase.
Tool makers increasingly offer modular, project-specific kits, cordless tools on shared battery platforms, and compact options for small workshops. Online lessons and woodworking communities also make it easier to compare setups. These are broad trends, though; models, prices, and availability change, so check current specifications before buying a named product.
Think of a set as packaging, not proof that its tools work well together. A large bundle can include redundant or low-quality pieces. A focused group of tools that fits your particular kind of work gives you more control over your budget and your bench.
Buy for the next few projects you can name. Add a specialty tool when a real task shows you why you need it.
Products Worth Considering

Roborock Qrevo S Pro Robot Vacuum and Mop with Multifunctional Dock

DREAME D30 Ultra CE Robot Vacuum and Mop, 25,000Pa Suction

Ring Alarm 5-Piece Home Security Kit
As an affiliate, we earn on qualifying purchases.
Build a Starter Kit That Can Handle Real Projects
A practical beginner’s kit covers measuring, marking, cutting, holding, and sharpening before it grows into a wall of specialty tools. These jobs form a chain: layout determines where a cut belongs, a stable setup keeps the material from moving, and a sharp edge makes it easier to follow the line with control. If one part is unreliable, the others cannot fully compensate. A precise saw cut will not fix a crooked layout, and a well-marked board can still shift under an unsecured tool. This is why a modest, balanced kit often produces better results than an assortment with gaps. You can build that foundation gradually; you do not need a complete cabinet shop to make useful work.
Imagine making a small storage box from boards cut at a local lumberyard. A reliable square helps your layout meet at clean corners, a suitable saw makes controlled cuts, and clamps keep parts from slipping during assembly. Chisels and a plane can refine joints and edges, while sharpening gear keeps those cutters working predictably. If the boards arrive already dimensioned, you can postpone buying a large saw or planer and save both money and space. The tradeoff is less control over the lumber: you may need to accept the supplier’s dimensions or make another trip if a cut is wrong. Buying rough stock later may justify more tools, but only if you are ready to take on the extra space, setup, and learning involved.
- Measure: Choose a tape measure or steel rule suited to your project size. A long tape is convenient for larger boards, while a steel rule can be easier to read for short, precise layouts.
- Mark: Add a combination or try square, a sharp pencil or marking knife, and a marking gauge if you need consistent offsets. Finer marks can reduce uncertainty at a joint, but only if you can make and see them reliably.
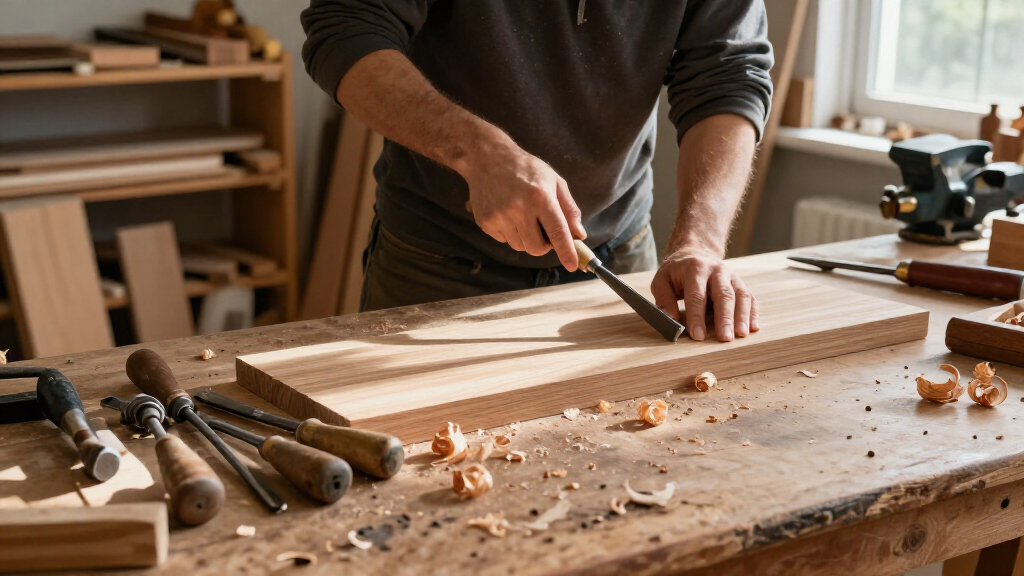
- Cut and shape: Pick a backsaw or other saw that suits your cuts, a few bench chisels, and a block or bench plane if you plan to use hand tools. A tool suited to one operation is easier to control than a versatile tool forced into every job.
- Hold and maintain: Add clamps, secure workholding, and sharpening equipment. Clamps stabilize parts during assembly; a stable bench or other safe support is still needed while cutting or shaping.
- Protect yourself: Include eye protection and dust protection suited to your work. Choose protection based on the tool and material, since sanding hardwood and making a few hand-sawn cuts do not create the same exposure.
The right balance depends on the work. A marking knife can leave a fine reference line that helps a chisel register at a shoulder, but it takes practice and care; a pencil is quicker for rough layout and easier to see on some wood. Clamps help prevent parts from shifting, but they cannot replace a stable bench or a safe way to support long stock. Buying the basic tools is only part of the kit: consider the surfaces and setup that let you use them accurately.
You may discover that a narrow chisel gets used every weekend while a wider one rarely leaves its rack. That is useful evidence about your projects, not a reason to buy a large matching set. Start with a small range of widths that fits your joints, keep them sharp, and add sizes when you meet a task the existing tools cannot handle comfortably. The result is a kit that grows in response to actual work instead of occupying space in anticipation of it.
Decide Whether a Set or Individual Tools Fits You Better
A ready-made set can save shopping time, while individual tools let you choose each piece for its accuracy, fit, and quality. Either route can work. What matters is whether the tools suit your projects and feel dependable in your hands.
Suppose you find a beginner kit with a rule, square, saw, and several chisels. If its square gives repeatable right angles and the chisels have comfortable handles, the bundle may be a convenient start. But if half the contents are tools you will not use, compare the price with buying only the pieces you need. The bigger box is not automatically the better bargain.
| Choice | Works well when | Watch for |
|---|---|---|
| Buy a set | The contents match your planned work and the quality is consistent. | Extra tools, poor fit, or measuring tools that need checking. |
| Buy individually | You know which tools your projects require and want to choose each one carefully. | Shopping takes longer, and early choices may leave a gap in your kit. |
For instance, a new maker setting up a small apartment bench might buy a square, a backsaw, clamps, and a few chisels one at a time. A hobbyist starting a group of similar shelves might prefer a coordinated power-tool package. Compare what each option lets you build, not just how many pieces the label lists.
Spend Attention on Accuracy, Comfort, and Sharp Edges
Accurate measuring and marking tools help prevent errors that are hard to fix after a cut. Secure handles and blades that sharpen well improve control. Weight and price alone cannot tell you how a tool will perform in your hands.
Picture marking two matching shelf supports with a square that shifts slightly as you draw the line. The saw may follow your pencil marks perfectly, yet the supports still differ. A simple check before starting can save a board: mark a line against the square, flip it, and see whether the second line coincides. If they separate, investigate before trusting the tool.
Cutting tools need care. Chisels and plane irons that lose their edge often need more force, which can make the cut less controlled. A basic sharpening setup may do more for your work than adding another cutter to the drawer. If your first chisel catches on the wood grain and leaves a ragged edge, sharpening it and practicing on scrap may teach you more than buying a five-piece expansion kit.
- Check that handles feel secure and comfortable to hold.
- Test squares and rules for reliable, repeatable measurements.
- Learn to sharpen the cutting tools you own.
- Protect sharp edges and store precision tools where they will not get knocked around.
Good fit is personal. A heavier plane may suit one woodworker and tire another. Where possible, handle tools before committing, and judge them by the work they help you do.
Choose Hand Tools or Power Tools for Your Space and Pace
Hand tools give you quiet, controlled work and can suit a small shop; power tools remove material quickly and help with repeated cuts. Neither approach is automatically best for beginners. Your space, project type, and comfort with setup all matter.
Consider a neighbor building a few picture frames at a compact bench. A hand saw, chisels, and a plane can handle much of the work without a large machine or much noise. Someone building several cabinets may value a drill/driver, circular saw or track saw, and random-orbit sander to speed repeated tasks. Those tools still need careful workholding, dust control, and safe operation.
A table saw, router, bandsaw, or planer can become useful as your projects grow, but each takes money and space. Before buying one, ask whether your planned work needs repeated cuts, a particular edge, or stock preparation that another method cannot handle comfortably. A shared cordless battery platform may cut down on chargers and spare batteries, though you should compare the available tools and battery costs first.
More speed does not remove the need for judgment. Follow the manufacturer’s instructions, secure the workpiece, keep hands clear of cutters, and use push sticks where appropriate. Do not wear gloves near rotating machinery, where they can catch. If a setup feels awkward, stop and secure the work differently before making the cut.
Make Safety and Upkeep Part of the Kit
A useful tool kit includes eye protection, workholding, and dust control, alongside its saws and chisels. Add hearing protection when the work is loud and a suitable respirator when dust control needs more support. Safety gear belongs in your plan from the first project because exposure and accidents can build up during ordinary work, not only during dramatic mistakes.
Imagine sanding a dry pine panel in a closed garage: pale dust settles on the bench, hangs in the light, and gets into your nose. A random-orbit sander may finish the board quickly, but the fine dust can remain in the air after the visible cloud settles. Use dust collection where practical and respiratory protection suited to the material and task; a mask does not replace keeping dust from spreading. Follow the tool instructions and keep the space as clean as practical.
Storage and upkeep protect your investment and keep tools predictable. Dry tools after use, keep precision squares where they will not take knocks, cover sharp edges, and clean pitch or resin from blades. Moisture and condensation can encourage rust, which can roughen cutting edges and interfere with accurate measurements. If a chisel comes back from a damp shed with a dull edge and orange spots, clean and dry it promptly, protect exposed steel, and store it somewhere dry.
- Before cutting: Secure the material and check your work area.
- During machine work: Use eye and hearing protection, manage dust, and keep hands clear.
- After work: Clean tools, dry them, and store blades and measuring tools safely.
Make these checks part of your routine, not an occasional cleanup. A loose handle, damaged cord, or out-of-square tool can undermine the work before you notice the cause. Regular inspection gives you a chance to fix the problem before it affects a project or compromises control.
Frequently Asked Questions
What tools should a beginner buy first?
Start with a reliable square and measuring tool, a marking tool, a saw suited to your projects, a few chisels, clamps, and sharpening equipment. Add a plane if you plan to do hand-tool work, plus eye protection and dust protection suited to the task. For example, someone making a small box needs accurate layout and secure workholding before a specialized machine.
Is it better to buy a set or individual woodworking tools?
A set is convenient when its contents match your work and the quality is consistent. Buying individually gives you more control and can help you avoid tools you will not use. Compare the useful pieces in the kit with their individual cost, and check measuring tools rather than trusting the packaging.
How many chisels do I need to get started?
A small range of useful widths is enough for many beginner projects. Choose widths that suit the joints and details you plan to make, then add less common sizes when a project calls for them. A sharp chisel you know how to use can be more useful than a large set of dull ones.
Are hand tools or power tools better for beginners?
Neither is best for every beginner. Hand tools suit quiet, small-scale work; power tools can speed repetitive cutting and sanding. Choose based on your space and projects, then learn safe setup, workholding, and dust control for the tools you use.
What safety gear belongs in a woodworking kit?
Include eye protection, secure workholding, and dust protection appropriate to the work. Add hearing protection for loud tools and use push sticks when a cut calls for them. Follow the tool maker’s directions, and do not wear gloves near rotating machinery because they can catch.
How can I tell if a woodworking square is accurate?
Draw a line along the square, flip the square over, and draw a second line from the same point. If the lines diverge, the tool may be out of square or your setup may have shifted. Check it against a known reference before relying on it for a project with tight-fitting corners.
Conclusion
Pick a small group of tools that fits the next project you can picture clearly: the board you will measure, the cut you will make, and the joint you will fit. Give accuracy, sharpening, secure workholding, and safety gear a place in the budget. A few tools you understand and maintain will serve you better than a crowded box you rarely open.
Start with one well-marked line and one careful cut. The rest of the workshop can grow with the things you make.