
To avoid burn marks with flush trim bits, you should maintain a steady router speed—preferably medium to high RPM—and control your feed rate to stay consistent and moderate. Move gradually and don’t force the bit through the material, as rushing can generate excess heat. Ensuring the correct cutting depth and smooth, even pressure helps prevent burns. Keep these tips in mind, and you’ll discover more ways to produce flawless cuts with ease.
Key Takeaways
- Maintain a consistent, moderate router RPM to prevent sudden heat buildup and burning.
- Use a steady feed rate—neither too slow nor too fast—to minimize friction and burn marks.
- Set the cutting depth just slightly deeper than the material’s thickness for smooth, efficient cuts.
- Test on scrap material to adjust speed and depth before working on the final piece.
- Keep pressure light and even during routing to reduce heat and achieve cleaner edges.

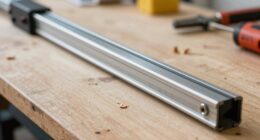
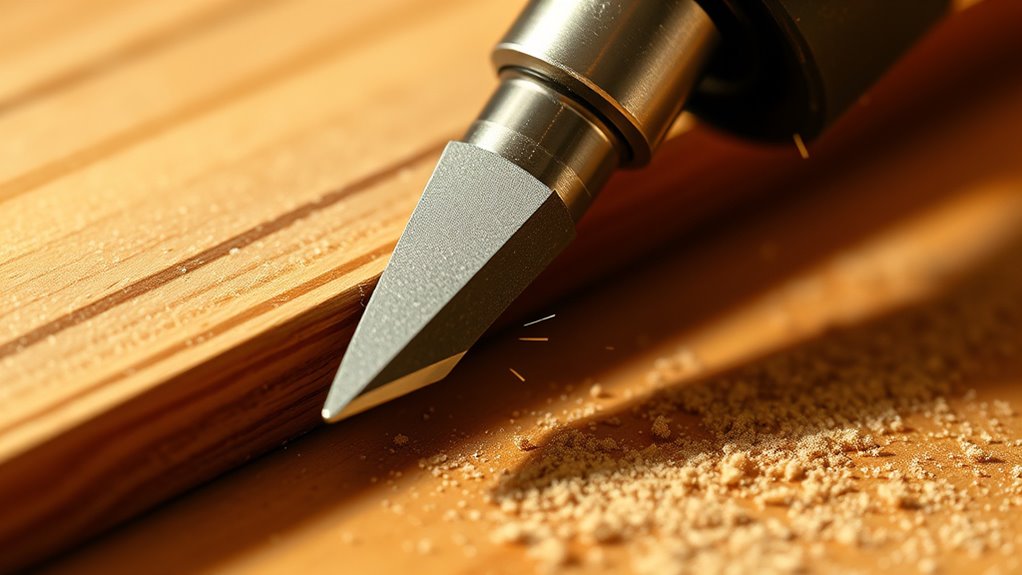
Have you ever struggled to achieve perfectly smooth and flush edges on your woodworking projects? If so, you’re not alone. Using a flush trim bit can help you get those clean, professional finishes, but getting the right speed settings is essential to avoid burn marks. One key factor to weigh is your cutting depth. You want to set it just slightly deeper than the material’s thickness, ensuring the bit cuts efficiently without overloading the tool. If your cutting depth is too shallow, the bit might struggle, leading to uneven cuts and increased friction that causes burning. Conversely, if it’s too deep, you risk overloading the bit and creating excessive heat, which also results in burn marks. Find that sweet spot where the bit just clears the material, providing a smooth cut without unnecessary strain.
Alongside cutting depth, your feed rate plays a critical role in preventing burn marks and ensuring a clean finish. Feed rate refers to how quickly you move the workpiece through the cutter or how fast you guide the router along the edge. A slow feed rate might seem safer, but it can cause the bit to linger too long on one spot, generating heat and leaving burn marks. On the other hand, moving too quickly can cause the bit to bite into the material aggressively, leading to rough edges and potential burning due to increased friction. The best approach is a steady, controlled feed rate—neither too slow nor too fast. Maintaining a consistent speed allows the bit to cut efficiently, reducing heat buildup and ensuring a smooth, flush edge.
When you’re setting up your router, pay careful attention to both the cutting depth and feed rate. Test on scrap material first to dial in the perfect settings. Use light, even pressure, and let the bit do the work without forcing it. Remember, a slower, controlled feed rate combined with an appropriate cutting depth minimizes heat and reduces the chances of burn marks. Keep your router’s RPM at a consistent level to further stabilize the cut and avoid sudden changes that could cause burning or chipping. By fine-tuning these variables—cutting depth and feed rate—you’ll produce cleaner, more professional-looking edges with your flush trim bits, saving yourself time and frustration in the workshop. Additionally, understanding material properties can help you choose the optimal settings and prevent burning.
Frequently Asked Questions
What Type of Wood Is Best for Flush Trimming?
When choosing wood for flush trimming, you should consider the wood grain and finish quality. Softwoods like pine or cedar are easier to work with because their grain is less dense, reducing burn marks. Hardwoods like maple or cherry give a smoother finish, but their dense grain can cause burn marks if you don’t use the right speed. Opt for softer woods for better control and a cleaner finish.
Can Flush Trim Bits Be Used on Plastic or Other Materials?
Think of your tool as a key opening new possibilities. While flush trim bits primarily serve woodwork, they’re also compatible with plastic and alternative materials, like acrylic or PVC. Just make certain you adjust your speed settings to prevent burning or melting. Use slow, steady passes for plastic compatibility, and remember, not all materials respond the same. With the right approach, these bits can skillfully shape a variety of surfaces beyond wood.
How Do I Maintain and Clean My Flush Trim Bits?
To keep your flush trim bits in top shape, regularly clean them with a brush to remove debris and apply bit lubrication to prevent rust. Store your bits in a dry, organized container to avoid damage. Before use, inspect for dull edges or buildup, and clean them after each project. Proper maintenance guarantees smooth cuts and extends their lifespan, making your woodworking safer and more efficient.
Are There Specific Brands Known for Durable Flush Trim Bits?
Ever wonder which brands stand out in the world of flush trim bits? When choosing, think of brand reliability as your trusty compass, guiding you to durable options. Top brands like Freud, Whiteside, and Diablo are known for their tool compatibility and long-lasting performance. These brands are a safe bet, ensuring smooth cuts without the worry of premature wear. Trust these names to keep your projects precise and frustration-free.
What Safety Precautions Should I Follow When Using These Bits?
When using flush trim bits, always prioritize safety. You should wear eye protection to guard against flying debris. Before starting, inspect your tool to verify it’s in good condition and the bit is securely mounted. Keep your hands clear of the spinning bit, and use push sticks if necessary. Follow the manufacturer’s speed recommendations to prevent burn marks and ensure a smooth, safe cut every time.
Conclusion
By carefully adjusting your speed settings with flush trim bits, you can substantially reduce burn marks and guarantee a cleaner finish. For instance, imagine a woodworker working on a delicate MDF project; lowering the speed prevented scorching and preserved the material’s integrity. Remember, experimenting with your router’s speed before starting your cut can make all the difference. When you prioritize proper settings, you’ll achieve professional results and extend your tools’ lifespan, making every project smoother and more precise.