
To achieve a professional look, you should sand between coats to create a smooth, durable finish. Wait until each coat is fully cured, not just tacky, to prevent smearing or damage. Sand lightly to remove imperfections, dust, and create a better grip for the next layer. Using the right tools enhances results and makes the process easier. Keep going—you’ll uncover more tips to perfect your project seamlessly.
Key Takeaways
- Sand after each coat once fully cured to smooth imperfections and enhance paint adhesion.
- Use appropriate tools and light sanding to avoid damaging the previous layer.
- Wait until the paint is fully dried to prevent smearing or peeling during sanding.
- Sanding creates a slightly rough surface that improves subsequent coat bonding for a professional finish.
- Proper sanding reduces bumps, dust, and drips, resulting in a sleek, durable, and high-quality appearance.
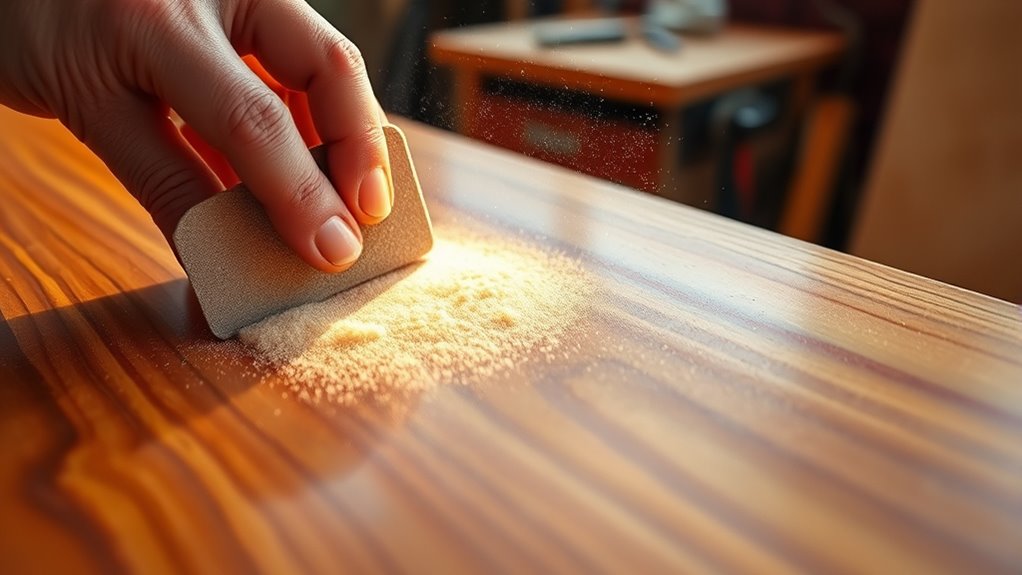
Have you ever wondered why sanding between coats is vital? It’s a step many overlook, but it plays a crucial role in guaranteeing your finished project looks smooth and professional. When you apply paint, each coat needs time to dry properly. Drying time isn’t just about waiting; it allows the solvents to evaporate, giving the paint a firm surface to work with for the next layer. If you rush this process, the subsequent coats may not adhere well, leading to uneven texture or peeling down the line. Sanding between coats helps you manage this process. It creates a slightly rough surface, which improves paint adhesion for the next layer, guaranteeing a better bond and a longer-lasting finish.
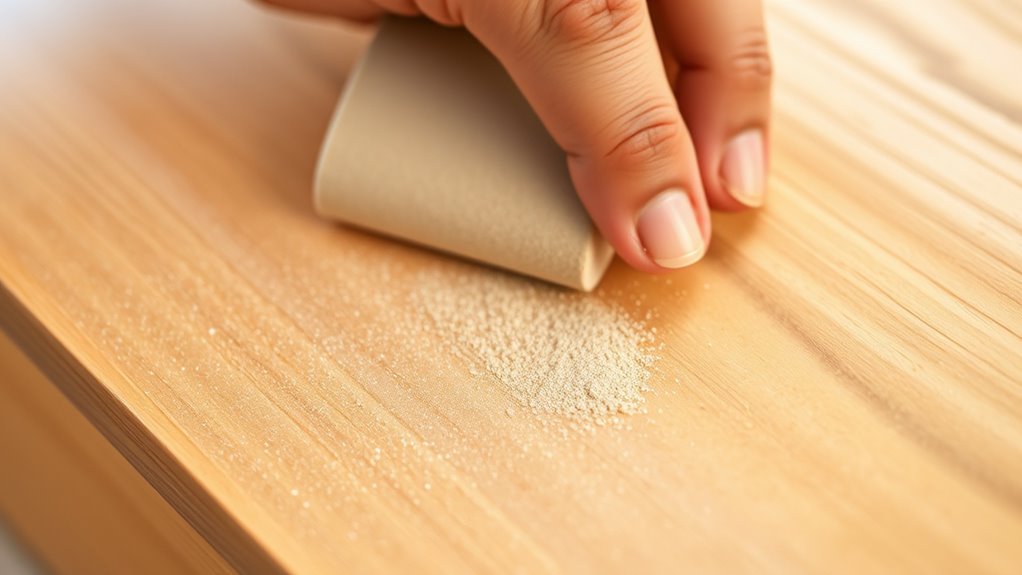
The act of sanding after each coat might seem like an extra step, but it’s worth the effort. When you sand, you remove tiny imperfections, dust particles, or any drips that may have formed during application. This results in a much smoother surface for the next coat, reducing the risk of bumps or uneven patches. Furthermore, by breaking the glossy surface of the previous layer, you help the new paint grip more effectively. This improves overall durability and appearance, giving your project a professional-grade finish. Skipping this step can leave you with a finish that looks less refined and may require additional touch-ups later.
Timing is key when it comes to sanding between coats. You want to wait until the paint has dried sufficiently—not just tacky to the touch, but fully cured enough to handle light contact without smudging. Most paints specify a drying time on the label, but it’s wise to check the surface. If you sand too soon, you risk smearing or damaging the previous layer; if you wait too long, you might miss the opportunity to enhance adhesion. Properly timed sanding ensures each coat bonds well, preventing issues like peeling or bubbling over time. It’s a simple step that greatly influences the longevity and quality of your paint job.
In the end, sanding between coats is about precision and patience. It’s a small step that yields big results—smoother surfaces, better paint adhesion, and a professional look you can be proud of. It might add some extra time to your project, but the improved finish and durability are well worth the effort. When you follow this process carefully, you turn a good paint job into a truly exceptional one, making your hard work stand out with a flawless, durable finish. Additionally, choosing the right tools for sanding can make the process more efficient and effective.

Romeda 8-Pack Sanding Sponge, Four Grits Per Pack 60/80/120/220, Washable and Reusable Handmade Sandpaper Block, Drywall Sandpaper Blocks for Wooden Drywall Sheetrock and Metal Glazing
【ASSORTED GRIT SANDING BLOCKS】 8 sand blocks, 4 sizes from coarse to ultra-fine sand, 60/80/120/220 grit, 2 blocks…
As an affiliate, we earn on qualifying purchases.
As an affiliate, we earn on qualifying purchases.
Frequently Asked Questions
What Type of Sandpaper Is Best for Between Coats?
You should use fine-grit sandpaper, typically between 220 and 320 grit, for sanding between coats. This helps smooth the surface without damaging the underlying layers. Use gentle, even sanding techniques, applying light pressure to avoid scratches. A light sanding with fine grit creates a key for the next coat and ensures a smooth, professional finish. Remember to clean off dust before applying the next layer for best results.
How Long Should I Wait Before Sanding Between Coats?
You should wait until the surface feels firm and dry to the touch, usually about 2-4 hours after applying a coat. This drying time guarantees proper surface preparation, preventing smudges or imperfections. Rushing to sand too soon can disturb the layer beneath. Be patient, let the paint or finish set fully, so when you sand, it’s like polishing a gemstone—smooth, even, and ready for the next coat.
Can I Over-Sand and Damage the Finish?
Yes, you can over-sand and damage the finish if you’re not careful. To protect your work, practice sanding safety by using fine-grit paper and gentle pressure. Always remove dust properly with dust removal techniques like a tack cloth or vacuum before applying the next coat. Over-sanding can create uneven surfaces or remove too much finish, so sand lightly and check your progress frequently to avoid damage.
Is It Necessary to Clean the Surface After Sanding?
Think of your surface as a blank canvas—cleanliness is key. After sanding, you need to thoroughly clean the surface to remove dust and debris, ensuring a smooth finish. Proper surface preparation with diligent dust removal prevents imperfections and helps your paint or stain adhere perfectly. Skipping this step is like painting over a dusty mirror—you won’t get that flawless, professional look you’re aiming for.
How Do I Prevent Scratches When Sanding Between Coats?
To prevent scratches when sanding between coats, use gentle hand sanding with fine-grit sandpaper. Always dust removal thoroughly before applying the next coat to avoid embedding debris into the finish. Keep your hand light on the surface and sand evenly, ensuring you don’t press too hard. Regularly clean the surface, and switch to finer grits as you progress, which helps maintain a smooth, professional look without scratches.

4 Pack Hand Sanding Sponge Set -120 220 320 400 Grit- Coarse Medium Fine Grit Sanding Block, Sander Sponges for Wood-Working Drywall Metal, Washable and Reusable Sponge for Rust Removal Polishing
Assorted Grit Sanding Blocks – This set includes 4 sponge sanding blocks (4 x 2.6 x 0.7 inches)…
As an affiliate, we earn on qualifying purchases.
As an affiliate, we earn on qualifying purchases.
Conclusion
Don’t skip sanding between coats—it’s your secret to a flawless finish. Some might think it’s unnecessary or time-consuming, but trust me, it’s worth the effort. Sanding smooths out imperfections and guarantees each layer bonds perfectly, giving you that professional look. Even if you’re pressed for time, taking a few extra minutes will make a huge difference in the final result. So, embrace the process—you’ll love the polished, smooth finish it creates!

POWERTEC Vacuum Sanding Block Set w/ 1" OD Dust Extraction, Dust-Free Hook and Loop Sandpaper (40, 80, 120, 180, 240 Grit, 10 Each) for Woodworking, Sanding Tool for Auto Body, Paint, Drywall (71514V)
INCLUDES: (1) Hand Sanding Block Tool with Built-in 1” OD Adapter, (50) Assorted Sander Pads
As an affiliate, we earn on qualifying purchases.
As an affiliate, we earn on qualifying purchases.

YNZDRWA 8 Pack Sanding Sponge, Washable and Reusable Sanding Blocks for Drywall Wood Metal Furniture, 60/80/120/220 Grit Sandpaper Block Assortment
【ASSORTED GRIT SANDING BLOCKS】Includes 8 sanding blocks in 4 grits, from coarse to superfine specifications in 60/80/120/180/220 grit,…
As an affiliate, we earn on qualifying purchases.
As an affiliate, we earn on qualifying purchases.