
To build rustic log benches around your fire pit, choose sturdy, flat-sided logs and cut them to the desired length for stability. Place them securely on level ground, using large rocks or metal stakes if needed to prevent shifting. Sand rough edges and consider adding cushions for comfort. Incorporate natural decor elements like lanterns or plants to enhance the charm. Stay tuned to learn tips on safety and creating a cozy outdoor atmosphere with your new rustic benches.
Key Takeaways
- Select sturdy, flat-sided logs suitable for stable seating around the fire pit.
- Cut logs to uniform lengths for consistency and safety in bench construction.
- Position logs securely using stakes or large rocks to prevent shifting during use.
- Maintain a minimum of 3 feet clearance from flames for safe seating.
- Enhance stability and safety by leveling ground and adding heat-resistant pads or stones beneath logs.
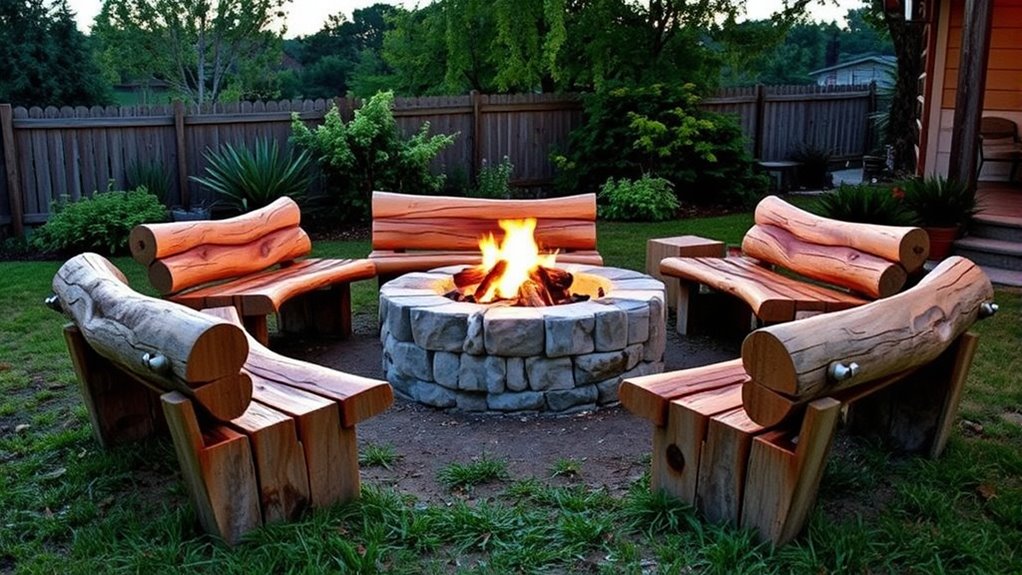
Creating your own fire pit seating is a cost-effective way to enhance your outdoor space and invite friends or family for cozy gatherings. When designing your rustic benches from logs, safety should be your top priority. Fire pit safety is essential, so guarantee your seating arrangement maintains a safe distance from the flames, typically at least three feet away, to prevent accidents or accidental burns. Choose sturdy, dry logs that won’t roll or shift easily under weight, and avoid using overly green or wet wood, which can produce excessive smoke or sparks.
Building these logs into functional benches adds a natural charm to your yard, blending seamlessly with outdoor decor ideas that emphasize rustic simplicity. You can select logs with flat sides or cut sections to create more stable seating surfaces. To keep your setup safe, sand down any rough edges or protrusions that could cause splinters, especially if kids will be around. Once assembled, consider placing a heat-resistant pad or large stone beneath the logs to protect the ground and prevent scorching your patio or grass. These small precautions not only improve safety but also prolong the life of your DIY seating.
Building log benches with flat surfaces and safety in mind enhances your outdoor space beautifully.
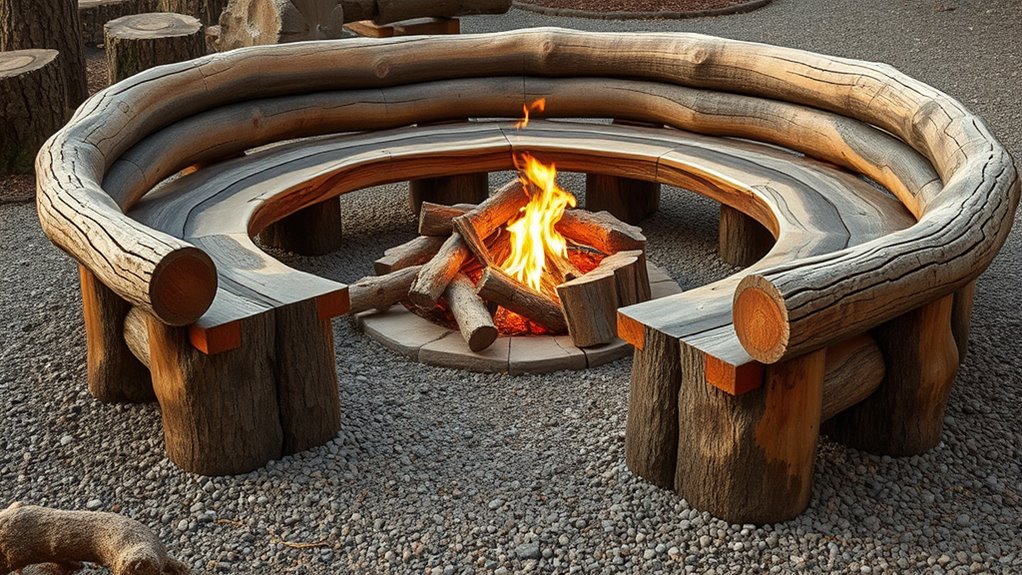
When it comes to outdoor decor ideas, log benches lend a cozy, inviting feel and serve as a focal point in your yard. You can arrange them in a semicircle around your fire pit, ensuring everyone has a clear view of the flames and can engage comfortably. To boost the rustic aesthetic, add cushions or throws made from outdoor-friendly fabrics, which provide extra comfort and a splash of color. Incorporate natural elements like potted plants, lanterns, or string lights to create a warm, welcoming atmosphere that complements your handmade seating.
Constructing log benches is straightforward: you simply select suitable logs, cut them to the desired length, and position them securely. If you want added stability, you can anchor the logs with metal stakes or use large rocks underneath to level uneven ground. Regularly check the stability of your benches, especially after storms or heavy winds, to ensure ongoing safety. These DIY rustic benches not only save money but also give you a sense of accomplishment, turning your outdoor space into a charming retreat. With attention to fire pit safety and thoughtful outdoor decor ideas, your homemade log seating becomes a perfect spot for relaxing evenings, storytelling, and making memories under the stars.
Frequently Asked Questions
What Tools Are Needed to Cut and Shape Logs?
To cut and shape logs, you’ll need a sharp chainsaw and safety gear like gloves and goggles for chainsaw safety. Start with a sturdy work surface and clear the area. Use log carving techniques to achieve your desired shape, making precise cuts with the chainsaw. Remember to follow safety guidelines, keep the chainsaw sharp, and take your time to carve smoothly and accurately.
How Do I Prevent Logs From Rotting Over Time?
Think of your logs like a brave knight facing the elements. To keep them from rotting, you should treat the logs with a weatherproof sealant or wood preservative. Choosing the right wood, like cedar or redwood, naturally resists decay. Regularly inspect and reapply protective treatments, especially after rain or snow. Proper placement, avoiding ground contact, also helps extend their life, ensuring your rustic benches stand strong for many seasons.
Can I Customize the Size of the Log Benches?
Yes, you can customize the size of log benches. Log size flexibility permits you to choose different lengths and diameters, fitting your space and style preferences. You have a variety of bench dimension options, so you can cut logs to your desired length or stack them for height variations. Just make sure the logs are sturdy and stable, and that your cuts are precise for a comfortable, safe seating area around your fire pit.
What Safety Precautions Should I Take During Construction?
Think of construction like balancing fire safety and tool safety—you need both to avoid sparks flying out. Wear protective gear, keep a fire extinguisher nearby, and make certain your workspace is clear of flammable materials. Use sharp tools carefully, always cutting away from your body, and unplug power tools when not in use. By staying alert and cautious, you’ll build sturdy log benches safely, creating a cozy space without risking accidents.
How Weather-Resistant Are Log Fire Pit Seats?
Your log fire pit seats are fairly weather-resistant if you apply a good weatherproof coating. It helps protect the logs from moisture and decay, enhancing log preservation. Regularly reapplying the coating, especially after heavy rain or snow, keeps the benches durable and looking rustic. Keep the logs dry and sheltered when not in use to extend their lifespan, ensuring your seating stays sturdy and inviting season after season.
Conclusion
Building your own rustic log benches transforms your fire pit into a cozy gathering spot, turning outdoor space into a warm, inviting hearth. Just like logs stacked together create a sturdy fire, your DIY seating creates a foundation for lasting memories. With a little effort, you’ll craft a welcoming circle that feels as natural and enduring as the logs themselves. So, grab your tools and let your creativity spark—your perfect outdoor retreat is just a few cuts away.