To construct a picnic table with attached benches, start by selecting durable materials like pressure-treated lumber or cedar, and carefully measure and cut your pieces to guarantee everything fits well. Assemble the tabletop, attach the benches securely with galvanized screws, and finish with weatherproof sealant for longevity. Follow safety precautions at every step, and double-check measurements for stability and comfort. Keep going to discover essential tips that make your project successful and long-lasting.
Key Takeaways
- Select durable, weather-resistant lumber like cedar, redwood, or pressure-treated wood for longevity and safety.
- Measure and cut all components precisely, ensuring proper fit for the tabletop and attached benches.
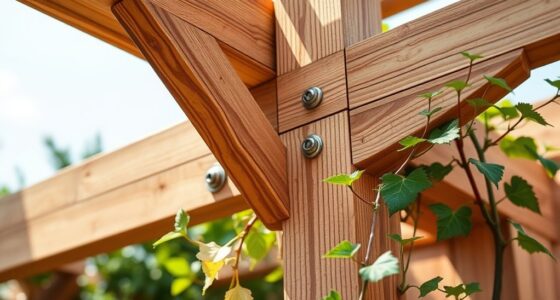
- Use galvanized or stainless-steel fasteners to securely assemble the table and benches, avoiding overtightening.
- Attach benches to the table frame with proper spacing and ensure stability and comfort for users.
- Finish the completed table with weatherproof sealants or stain to protect against outdoor elements.

Building a picnic table yourself is a rewarding project that adds functional charm to your outdoor space. When you start planning, one of the first steps is material selection. Choosing the right materials guarantees your table will be durable, weather-resistant, and safe for family gatherings. Typically, pressure-treated lumber is a popular choice because it withstands moisture and pests, but cedar and redwood are also excellent options for their natural resistance and aesthetic appeal. Avoid softwoods like pine for the main structure, as they tend to warp or decay faster. Consider the environmental impact and your budget as well, since some materials cost more but offer longer-lasting performance. Once you’ve selected your materials, it’s essential to pay close attention to safety precautions throughout the construction process. Handling tools like saws, drills, and clamps demands respect and caution—always wear safety goggles and gloves to protect your eyes and hands. Keep your workspace clear of clutter to prevent accidents, and double-check that your tools are in good working order before use. When measuring and cutting your lumber, take your time to ensure precision; mistakes here can compromise the stability of your table. As you assemble the frame, use sturdy fasteners like galvanized or stainless-steel screws to prevent rust and guarantee longevity. Be cautious not to overtighten, which can strip the wood or weaken joints. During assembly, make sure all pieces are aligned properly, and use clamps to hold everything steady. It’s also wise to work in a well-ventilated area, especially if you’re using paints, stains, or sealants, which can emit fumes. Follow the manufacturer’s safety instructions carefully when applying these finishes. When attaching the benches to the table, double-check the measurements for comfort and stability. Secure everything tightly, but avoid overtightening, which could crack the wood. Throughout the project, keep your workspace organized and work methodically to avoid mishaps. Additionally, understanding the cybersecurity vulnerabilities associated with digital tools can help safeguard your project plans if you share designs or plans online. Once completed, give your table a thorough inspection, ensuring all fasteners are tight and there are no sharp edges or splinters. Applying a weatherproof finish will help protect your work and extend the life of your picnic table. Building your own table involves careful material selection and strict adherence to safety precautions, but the result will be a sturdy, attractive centerpiece for your outdoor gatherings. Not only will you gain a sense of accomplishment, but you’ll also enjoy many memorable moments around your handcrafted picnic table for years to come.

Rust-Oleum WOODLIFE 902 Wolman Classic Clear Wood Preservative-Above Ground, Quart, 0.95 Liters
It is easy to use
As an affiliate, we earn on qualifying purchases.
As an affiliate, we earn on qualifying purchases.
Frequently Asked Questions
What Materials Are Best for Weather-Resistant Picnic Tables?
You should choose weatherproof finishes and durable wood options for your picnic table. Pressure-treated wood, cedar, and redwood are excellent durable choices that resist rot and insects. Applying weatherproof finishes like sealants or stains provides extra protection against moisture and UV rays, helping the wood last longer outdoors. By selecting these materials and finishes, your picnic table will withstand the elements and stay looking great for years.
How Long Does It Typically Take to Build a Picnic Table?
It typically takes about 6 to 10 hours to build a picnic table with attached benches when you follow detailed DIY woodworking plans. Your project time depends on your skill level, the complexity of your design, and having the right tools. Using quality DIY tools speeds up the process, and carefully following woodworking plans guarantees accurate cuts and assembly. Break the project into manageable steps to finish efficiently and enjoy your sturdy new table sooner.
Can I Customize the Size of the Benches?
Imagine sculpting a piece of art that fits your needs—yes, you can customize the size of your benches. Adjust the bench height to match your desired seating capacity, making it comfortable for everyone. You can extend or shorten the benches, tailoring them to your space and guests. This way, your picnic table becomes a perfect reflection of your style and needs, inviting friends and family to gather comfortably.
What Safety Precautions Should I Follow During Construction?
You should always wear safety gear like goggles, gloves, and ear protection to shield yourself from debris and loud noise. Follow power tool safety guidelines by securing materials firmly, unplugging tools when not in use, and keeping your workspace clean. Never rush, and double-check measurements before cutting. Staying alert and cautious minimizes accidents, ensuring a safe construction process. Prioritize safety to enjoy building your picnic table without injuries.
How Do I Maintain and Clean the Finished Table?
Think of your picnic table as a cherished friend; it needs care to last. To maintain it, regularly clean with gentle brushing and mild soap, avoiding harsh chemicals. Use wood preservation techniques like sealing and staining to protect against weather and wear. This keeps your table looking great and extends its life. Remember, consistent cleaning techniques and preservation are your secret weapons to keep it inviting and durable for years to come.

Hillman Fastener 40932 Galvanized Phillips Drive Deck Screw, 8 X 2 1/2-Inch, (Pack of 50)
Galvanized finish provides excellent corrosion protection
As an affiliate, we earn on qualifying purchases.
As an affiliate, we earn on qualifying purchases.
Conclusion
Now that you’ve built your own picnic table with attached benches, imagine hosting family gatherings or neighborhood barbecues right in your backyard. For example, Sarah designed hers last summer, and now her kids have a favorite spot for snacks and games. With your new skills, you can create a durable, custom piece that turns outdoor dining into a fun, shared experience. Just like Sarah, you’ll enjoy countless memorable moments around your handcrafted table.

Olympic WaterGuard 11 oz. Clear Exterior Waterproofing Wood Sealer Spray
Ready to use clear sealant and waterproofer
As an affiliate, we earn on qualifying purchases.
As an affiliate, we earn on qualifying purchases.

Jack and June Premium Cedar Wood Rectangular Picnic Table Easy Assembly Rounded Corners Comfortable for Kids and Adults
RECTANGULAR PICNIC TABLE — Comfortable place to socialize with friends or family for kids or adults
As an affiliate, we earn on qualifying purchases.
As an affiliate, we earn on qualifying purchases.