
To minimize waste when creating cutting diagrams, focus on careful planning and layout optimization. Use software tools that help you arrange pieces efficiently, considering grain direction, kerf width, and potential overlaps. Experiment with different configurations to find arrangements that reduce scraps and maximize material use. Precise visualization and automatic layout adjustments make your process smoother and more cost-effective. Keep exploring these strategies to turn your projects into more efficient, waste-free outcomes.
Key Takeaways
- Use specialized software with nesting algorithms to optimize piece arrangement and reduce material waste.
- Incorporate material grain direction, kerf width, and overlaps into the layout planning for efficiency.
- Experiment with multiple layout options digitally to identify the most waste-minimizing configuration before cutting.
- Generate detailed cut lists and reports to ensure precise, error-free cuts and maximize material utilization.
- Continuously adjust and refine diagrams based on software feedback to achieve the most efficient use of raw material.
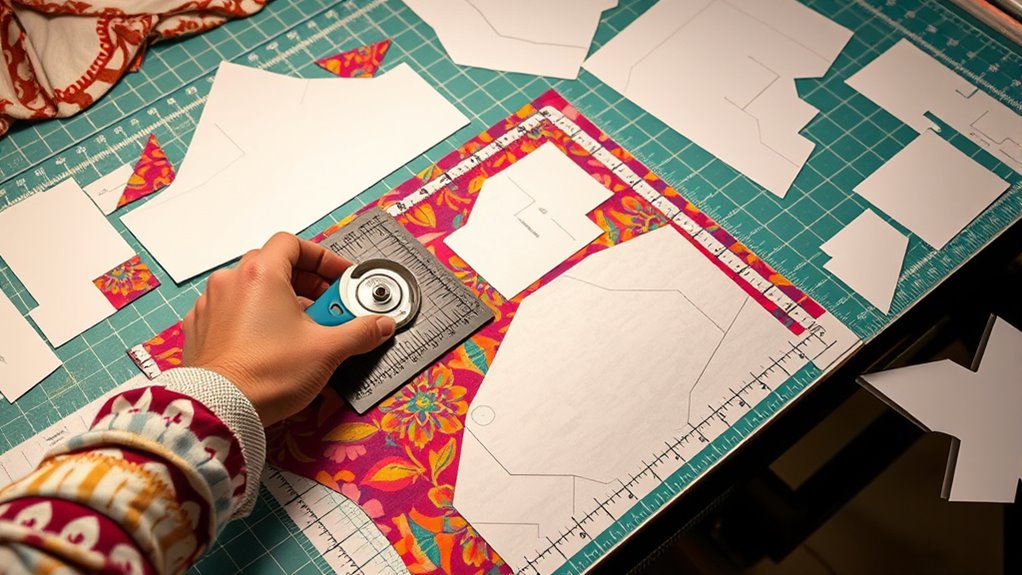
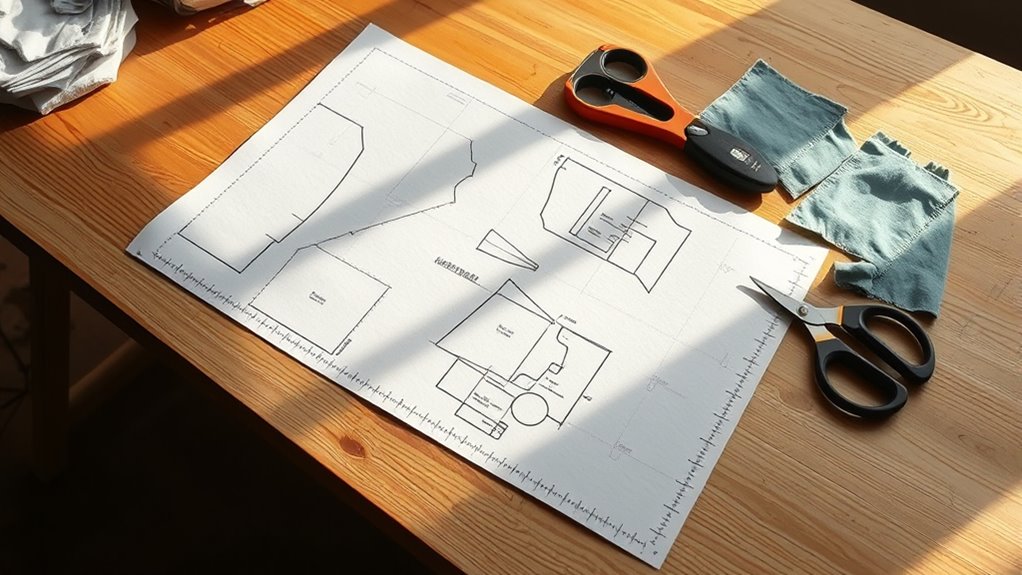
Have you ever wondered how to accurately plan and visualize complex cuts for your projects? Creating effective cutting diagrams is essential for maximizing material efficiency and reducing waste. When you understand the layout of your cuts, you can make smarter decisions about how to arrange pieces on your material, saving both money and time. The key to achieving this lies in leveraging the right software tools that streamline the process and provide precise visualizations. These tools allow you to experiment with different arrangements before making any cuts, ensuring you use every inch of your material wisely.
Using software tools is a game-changer because they enable you to quickly generate and modify cutting diagrams. Instead of sketching by hand and manually calculating layouts, you can input your measurements and let the program handle the complexities. Many programs also offer features like nesting algorithms, which automatically arrange your parts in the most efficient way possible. This not only improves material efficiency but also reduces the risk of errors that can occur with manual planning. Plus, these tools often provide 3D previews, so you can see exactly how your pieces will fit together before cutting begins.
Material efficiency is at the heart of creating good cutting diagrams. By optimizing your layout, you minimize waste scraps and make the most out of your raw materials. This is especially critical when working with expensive or limited supplies, where every inch counts. When planning your cuts, consider the grain direction, kerf width, and potential overlaps. Software tools can help you account for these factors, automatically adjusting your layout to maximize yield. In addition, these programs often include features for saving multiple versions of your diagrams, so you can compare different arrangements and choose the best one.
Another benefit of using software tools is their ability to generate detailed cut lists and reports. These documents guide your cutting process, reducing errors and ensuring consistency across projects. They also help in communicating exact specifications to your team or cutting service, avoiding misunderstandings. As you become more familiar with these tools, you’ll notice how much easier it is to plan complex cuts accurately and efficiently. This approach not only saves you money but also speeds up production, allowing you to focus more on design and craftsmanship. Additionally, understanding the importance of storage conditions can help maintain the integrity of your materials and further reduce waste. Ultimately, integrating software tools into your workflow empowers you to create precise cutting diagrams that make the most of your materials and minimize waste.

Paint Sprayer Indoor Outdoor, 1000W Electric Handheld HVLP Spray Paint Gun with 3 Patterns 6 Nozzles, Easy to Clean & Use, Stain Sprayer for House Painting, Furniture, Cabinets, Walls, Doors, Fences
【Powerful 1000W Motor — Fast, Efficient, Reliable】Powered by a robust 1000W aluminum-wrapped copper motor, this paint sprayer delivers...
As an affiliate, we earn on qualifying purchases.
Frequently Asked Questions
How Do I Choose the Best Software for Cutting Diagrams?
You should choose software that offers excellent compatibility with your existing tools and has an intuitive user interface. Look for programs that are easy to learn, saving you time and reducing errors, while ensuring they work seamlessly with your hardware and file formats. Reading reviews and trying free demos can help you assess how well the software fits your workflow. Ultimately, select one that boosts efficiency and minimizes waste through precise, user-friendly features.
Can Cutting Diagrams Be Used for Irregular Shapes?
Yes, cutting diagrams can be used for irregular shapes. You’ll need to create custom layouts that fit these shapes precisely, reducing waste and optimizing material use. Use software that allows you to import irregular designs and adjust the layout accordingly. By doing this, you guarantee your cuts are efficient and waste is minimized, even with complex or unique shapes. This approach guarantees a tailored, precise cutting process for any shape.
How Do I Adjust Diagrams for Different Material Thicknesses?
You should adjust your cutting diagrams for different material thicknesses through material adaptation and thickness adjustments. To do this, modify your measurements to account for thicker or thinner materials, ensuring your pieces fit correctly. Use a calculator or software to increase or decrease cut lines proportionally, and always verify your adjustments with test cuts. This way, your diagrams stay accurate, minimizing waste regardless of material thickness variations.
What Are Common Mistakes to Avoid When Creating Diagrams?
🚫 Don’t overlook layout accuracy, or you’ll waste valuable material. Avoid common mistakes like neglecting material optimization, which leads to inefficient cuts, or miscalculating dimensions, causing errors down the line. Always double-check measurements and make certain your diagrams reflect actual material properties. Rushing through the process or ignoring small details can considerably reduce waste. Stay meticulous and precise to maximize material use and minimize costly mistakes.
How Do I Incorporate Waste Recovery Into the Diagram?
To incorporate waste recovery into your diagram, start by analyzing leftover pieces after initial cuts. Use waste recovery strategies like identifying potential reuse or recycling options. Then, apply diagram modification techniques to optimize remaining material placement, reducing scrap. Adjust the layout to integrate waste recovery steps, ensuring minimal waste and maximum efficiency. This approach helps you visualize waste recovery processes clearly and promotes sustainable material usage.
Amazon Product B0FVFCW9XP
As an affiliate, we earn on qualifying purchases.
Conclusion
By mastering the art of creating cutting diagrams, you turn raw material into a well-orchestrated symphony, minimizing waste at every turn. Think of your diagrams as a blueprint for efficiency, guiding your cuts like a seasoned conductor leading an orchestra. With careful planning, you’ll reduce scraps and save costs, transforming your workspace into a model of precision. Embrace these techniques, and watch your material dance perfectly into place, leaving waste behind like a fading echo.

Tilswall HVLP Paint Sprayer, Ultra-Light Electric Spray Gun with 20 fl oz Detachable Cup, 2 Nozzles & 3 Patterns, Perfect for Furniture, Cabinets, Fence, Walls, Doors, Garden & DIY, Pink
ULTRA-LIGHT PAINT SPRAYER - The all-new TILSWALL DREAMER paint sprayer gun features aerospace-grade lightweight materials and a streamlined...
As an affiliate, we earn on qualifying purchases.

Cordless Paint Sprayer, 650W Spray Paint Gun with Battery 2 × 4.0mAh, 6 Brass Nozzles & 1400ML (47 fl.oz) Container, Paint Sprayer for House Painting Graffiti Wall Fence Furniture DIY Projects
【Powerful Paint Sprayer】Built with a powerful 650W pure copper motor, this cordless paint sprayer delivers a high spray...
As an affiliate, we earn on qualifying purchases.