To create durable wooden picture frames, you’ll want to master miter joints reinforced with miter keys and using rabbets for mounting glass and artwork. Miter keys fit into cross-cut slots to strengthen corners and add a decorative touch, while rabbets create a ledge for the picture or glass to sit securely. Combining these techniques boosts both the strength and appearance of your frames. Keep exploring, and you’ll discover even more ways to elevate your craftsmanship.
Key Takeaways
- Miter keys reinforce miter joints, increasing the frame’s stability and durability.
- Rabbets are cut into the frame’s edges to hold the glass, artwork, and backing securely.
- Combining miter joints with keys enhances both strength and aesthetic appeal of wooden frames.
- Proper rabbet dimensions ensure a snug fit for the artwork and protective glazing.
- Finishing techniques like sanding and sealing protect the frame and highlight the craftsmanship.

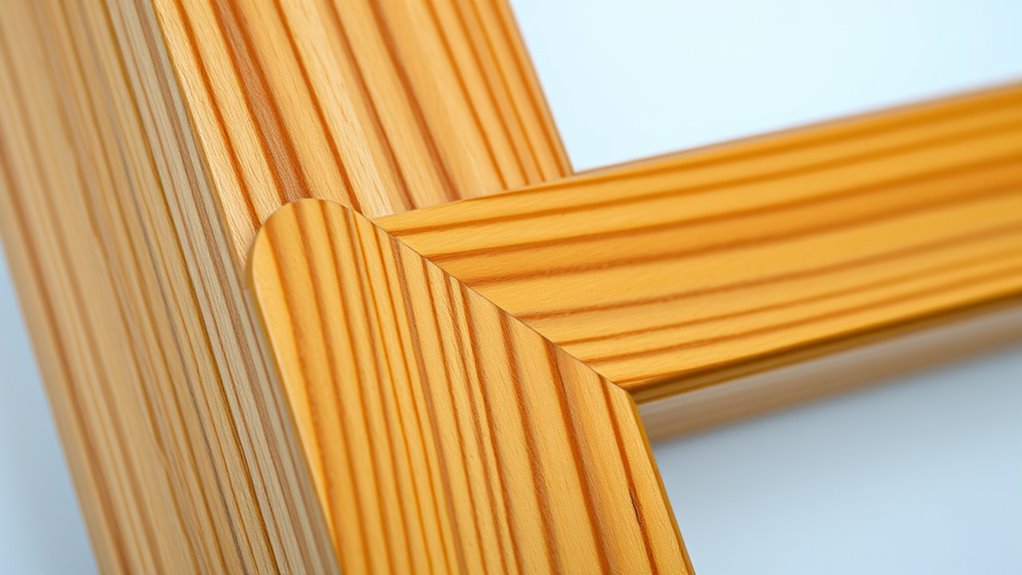
Have you ever wondered why wooden picture frames remain a popular choice for displaying your cherished photos? The appeal lies not only in their natural beauty but also in the craftsmanship behind their construction. When making a wooden frame, the joinery techniques you choose play a crucial role in ensuring strength and durability, as well as a polished appearance. Miter joints are a common method, where two pieces of wood are cut at a 45-degree angle and joined to form a neat corner. To reinforce these joints, you might incorporate miter keys—small, square or rectangular inserts that fit into slots cut across the joint. These keys add both stability and an aesthetic touch, showcasing your attention to detail.
Using joinery techniques like miter keys enhances the frame’s structural integrity and lends a handcrafted look that many appreciate. When you combine this with proper finishing methods, you elevate your project even further. Finishing methods involve sanding, staining, sealing, and sometimes applying decorative touches such as paints or varnishes. After assembling your frame, you’ll want to smooth all surfaces, ensuring no rough edges or splinters remain. Applying a stain or paint not only enhances the wood’s natural grain but also protects it from moisture and wear over time. A clear varnish or lacquer can add a glossy shine, making your frame stand out and lasting longer.
Choosing the right finishing methods depends on the look you’re after. If you prefer a rustic, natural appearance, a simple oil or wax finish can deepen the wood’s character while maintaining its organic feel. For a more polished look, multiple coats of lacquer or polyurethane create a smooth, durable surface that resists scratches and moisture. The process of finishing is just as important as the joinery itself because it influences the frame’s overall aesthetic and longevity. When you take the time to carefully apply these finishing techniques, your wooden picture frame becomes a true work of art—one that complements your photo and enhances your space.
In essence, mastering joinery techniques like miter joints with keys and employing effective finishing methods ensures your wooden picture frame is both beautiful and durable. These craftsmanship skills allow you to create a frame that doesn’t just hold your photo but also tells a story of quality and care. Whether you’re a seasoned woodworker or a hobbyist, understanding how these elements work together helps you craft frames that are as timeless as the images they hold. Additionally, paying attention to wood properties can help you select the best materials for your project, ensuring longevity and visual appeal.

ANNASAMDO, 50 Pack Acrylic Photo Frame Insert Keychain Blank Picture Key Ring for DIY Craft
- Package Quantity: 50 acrylic photo frame inserts
- Keychain Size: 2.95 x 1.96 inches
- Material: Acrylic and metal, durable craftsmanship
As an affiliate, we earn on qualifying purchases.
As an affiliate, we earn on qualifying purchases.
Frequently Asked Questions
How Do Miter Keys Improve Frame Strength?
Miter keys improve frame strength by providing joint reinforcement, preventing the corners from coming apart over time. They fit snugly into slots cut across the mitered corners, adding durability and stability. Plus, they enhance the frame’s aesthetic by creating an attractive, detailed look. You’ll find that using miter keys not only strengthens your frame but also gives it a professional, polished appearance that elevates its overall quality.
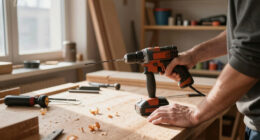
What Tools Are Needed to Cut Rabbets Accurately?
You’ll need a router with the right bits or a saw with suitable blades to cut rabbets accurately. A router equipped with a rabbeting or straight bit makes precise cuts, while a saw with dado blades can also do the job. Some may worry about accuracy; using sharp, quality tools guarantees clean, consistent cuts. Double-check measurements and set your tools properly to achieve perfect rabbets every time.
Can Miter Keys Be Added After Frame Assembly?
Yes, you can add miter keys after frame assembly to enhance the frame’s strength and aesthetic appeal. To do this, carefully drill holes into the miter joints, insert the keys, and glue them in place. This technique reinforces the construction and adds a decorative touch. Just make certain your cuts are precise, and you align the keys properly to achieve a professional look and durable frame construction.
Are There Different Types of Wood for Picture Frames?
Yes, there are different types of wood for picture frames, each with unique wood grain and wood finishes. You might choose hardwoods like oak or cherry for durability and rich grain patterns, or softer woods like pine for a lighter look. Consider how the wood grain complements your artwork, and select a wood finish that enhances the natural beauty or provides the desired protective coat. Your choice impacts both style and longevity.
How Do I Prevent Wood From Splitting When Cutting Rabbets?
A stitch in time saves nine, so take care when cutting rabbets. To prevent wood from splitting, always cut with the grain direction, and make certain your wood is well-seasoned. Use sharp tools, and make shallow passes rather than deep cuts. These steps help maintain the wood’s integrity, reducing the risk of splitting and ensuring a clean, professional finish for your picture frame.
Conclusion
Now that you understand how miter keys and rabbets enhance your wooden picture frames, you’re equipped to craft pieces that stand the test of time. Think of your project as a garden — every joint and detail is a seed that, with care and precision, will bloom into a beautiful display. Keep practicing these techniques, and you’ll create frames that not only hold pictures but also tell stories, enduring like ancient trees rooted in craftsmanship.