To create a DIY wooden mirror, start by choosing a frame style that matches your decor, like modern or farmhouse, and pick suitable wood such as oak or pine. Measure and cut your pieces precisely using a miter saw, then assemble and sand them smoothly. Finish with a stain, paint, or oil to enhance the wood’s natural beauty, and seal with a protective coating. If you keep exploring, you’ll find helpful tips to perfect each step.
Key Takeaways
- Choose a framing style and wood type that complement your home decor and desired aesthetic.
- Cut and assemble the frame with precise miter or organic-shaped cuts for a handcrafted look.
- Sand all surfaces thoroughly to ensure smoothness and proper adhesion of finishes.
- Apply stain, paint, or oil in thin, even coats to enhance wood grain and achieve your desired color.
- Seal the finished frame with polyurethane or varnish for durability, then attach it to the mirror carefully.

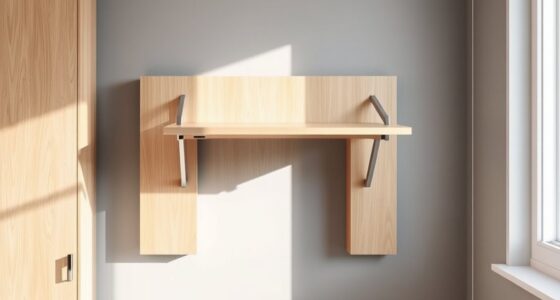
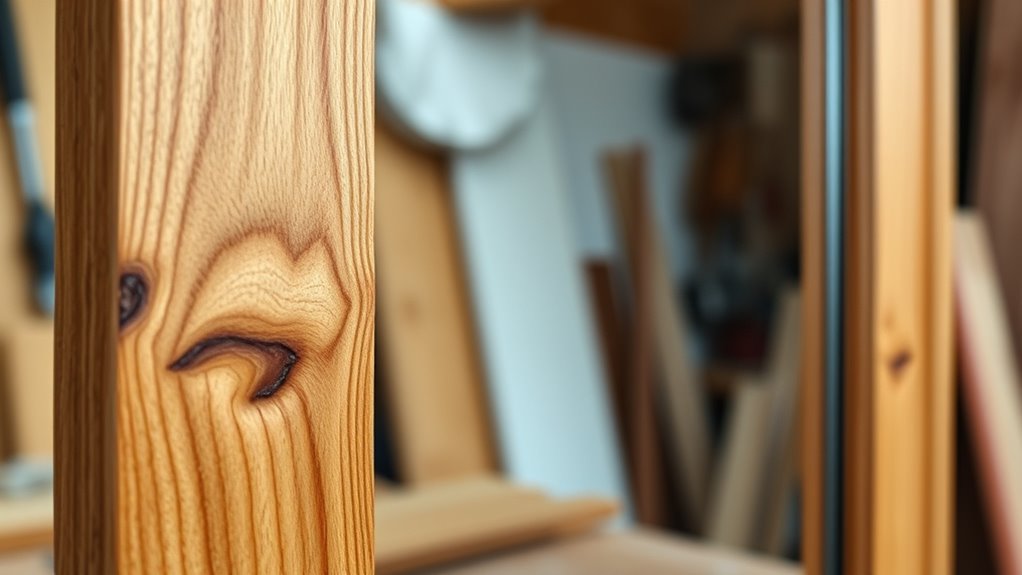
Have you ever wanted to add a personalized touch to your home decor? Crafting your own wooden mirror is a rewarding way to do just that. The key to creating a stunning piece lies in your choice of mirror framing and the wood finishing techniques you employ. When it comes to mirror framing, you have a variety of options to match your style, from sleek modern designs to rustic, farmhouse-inspired looks. Selecting the right wood and shape sets the foundation for your project. You might choose oak for durability and a classic appearance, or pine for a softer, more rustic vibe. Once you’ve picked your wood, shaping the frame becomes the next step. You can cut it to size using a miter saw for precise angles, or opt for a more organic, handcrafted look with rounded edges.
After you’ve assembled the frame, it’s time to focus on wood finishing techniques that will enhance the beauty of your project. Sanding is the first *indispensable* step; it smooths out rough edges and prepares the surface for staining or painting. Take your time with this step, working through progressively finer grits of sandpaper until the surface feels silky. Now, you can decide how to finish your wood. If you want a natural look, applying a clear wood stain or a protective oil like tung or linseed oil will bring out the wood’s natural grain and color. For a more vibrant or vintage appearance, consider using a paint or a tinted stain. Applying these finishes with a brush or cloth, you’ll want to work in thin, even coats, allowing each layer to dry thoroughly before adding the next.
Additionally, understanding juice cleansing and its effects can inspire you to incorporate natural, eco-friendly finishes like beeswax or homemade oils, which are healthier options for furniture care. To add depth and durability, sealing your finished frame with a clear polyurethane or matte varnish is recommended. This not only protects the wood from moisture and wear but also enhances its appearance. When your frame is complete and dry, carefully attach it to your mirror glass. You might choose to add decorative elements like carved details or painted accents to customize your mirror further. The combination of thoughtful mirror framing and expertly applied wood finishing techniques results in a one-of-a-kind piece that reflects your personality. Whether you’re aiming for a minimalist frame or a highly detailed design, this DIY project allows you to craft a mirror that seamlessly fits your space and style, giving your home a unique, handcrafted touch.
wooden mirror frame kit
As an affiliate, we earn on qualifying purchases.
As an affiliate, we earn on qualifying purchases.
Frequently Asked Questions
What Types of Wood Are Best for DIY Mirror Frames?
You should choose softwoods like pine or cedar for DIY mirror frames because they have attractive wood grain and are easy to work with. If you’re on a budget, pine offers a great balance of affordability and good appearance, while cedar adds a rich look and natural resistance. Both options allow you to customize finishes easily, giving your mirror a beautiful, personalized touch.
How Do I Prevent Wood From Warping Over Time?
To prevent wood from warping over time, you should control the wood moisture levels and maintain stable environmental conditions. Keep your wood in a controlled environment with consistent humidity and temperature, avoiding direct sunlight and damp areas. Store your wood properly before use, and consider sealing or finishing it to protect against moisture fluctuations. Regularly check and adjust your environment to ensure your wooden mirror frame stays flat and stable over time.
Can I Customize the Finish for a Distressed Look?
You can definitely customize the finish for a distressed look—think of it as giving your mirror character. Using techniques like sanding, applying a wash, or adding chipped paint, you can achieve a unique distressed finish that matches your style. Experiment with different customization options, such as rubbing in stain or using wax, to create the perfect aged appearance. It’s a fun way to add personality and make your DIY project truly one-of-a-kind.
What Tools Are Essential for Building a Wooden Mirror Frame?
You’ll need vital tools like a saw for cutting the wood, a measuring tape for accurate measurements, and a square for proper angles. Use measuring techniques to guarantee your frame fits perfectly, and employ sanding methods to smooth edges before finishing. A drill for assembly and clamps to hold pieces in place are also essential. These tools help you craft a sturdy, precise wooden mirror frame with a professional look.
How Do I Securely Attach the Mirror to the Wooden Frame?
To securely attach the mirror to your wooden frame, start by applying a high-quality mirror adhesive evenly on the back of the mirror. Then, use frame mounting brackets to hold it firmly in place. Press the mirror against the frame, ensuring proper alignment, and let the adhesive cure as per the manufacturer’s instructions. This method guarantees a strong, secure hold while keeping your mirror looking professional.

Metabo HPT 10-Inch Single Bevel Compound Miter Saw, 15-Amp Power Saw with Xact Cut Shadow Line, Precision Miter Angles, Single Bevel 0-45°, 40T TCT Miter Saw Blade, Lightweight Design, C10FCG2
POWERFUL AND PRECISE: This 10-inch single bevel compound miter saw features a 15-Amp motor delivering high power for…
As an affiliate, we earn on qualifying purchases.
As an affiliate, we earn on qualifying purchases.
Conclusion
As you finish your DIY wooden mirror, it’s funny how the perfect piece seems to find you just when you need it. Maybe it’s the hours spent sanding and painting that sparked your creativity, or perhaps that piece of scrap wood was waiting for its moment to shine. Either way, you’ve created something unique and beautiful, proof that sometimes, the best projects come together when you least expect it. Now, enjoy your stunning, handcrafted mirror!
wood finishing supplies for furniture
As an affiliate, we earn on qualifying purchases.
As an affiliate, we earn on qualifying purchases.
sealant polyurethane varnish
As an affiliate, we earn on qualifying purchases.
As an affiliate, we earn on qualifying purchases.