
To elevate your wooden projects, start by embracing the natural grain with transparent, light stains like honey or pale oak to showcase texture and imperfections. Add depth with dark hues and layered colors, creating rich multi-tonal finishes. Incorporate patterns using stencils or blending techniques for unique designs. Personalize your work with custom color blends, metallic accents, and artistic effects. Continue exploring these creative staining methods to transform your projects into stunning, one-of-a-kind pieces.
Key Takeaways
- Use transparent stains like honey or pale oak to showcase natural wood grain and texture for a rustic, minimalist look.
- Incorporate metallic accents or finishes to add elegance and visual interest to stained wood surfaces.
- Experiment with layered staining techniques, blending multiple colors for depth and complex visual effects.
- Apply stencils or masking to create geometric, floral, or intricate patterns for personalized designs.
- Combine contrasting stains and metallic details to produce bold, dynamic projects that stand out.

Light Brown Wood Stain Repair Kit, Brush-On Touch-Up Stain Bottles, Golden Oak, Early America, Cherry, Red Oak, Interior and Exterior Wood, 4 fl oz Total by spot.
- Penetrates Wood for Natural Blending: Absorbs into scratches to match wood grain
- Light Wood Color Set: Includes Golden Oak, Early America, Cherry, Red Oak
- Built-In Brush for Precise Application: Ensures smooth, drip-free touch-ups
As an affiliate, we earn on qualifying purchases.
As an affiliate, we earn on qualifying purchases.
Embracing Natural Grain With Transparent and Light Stains

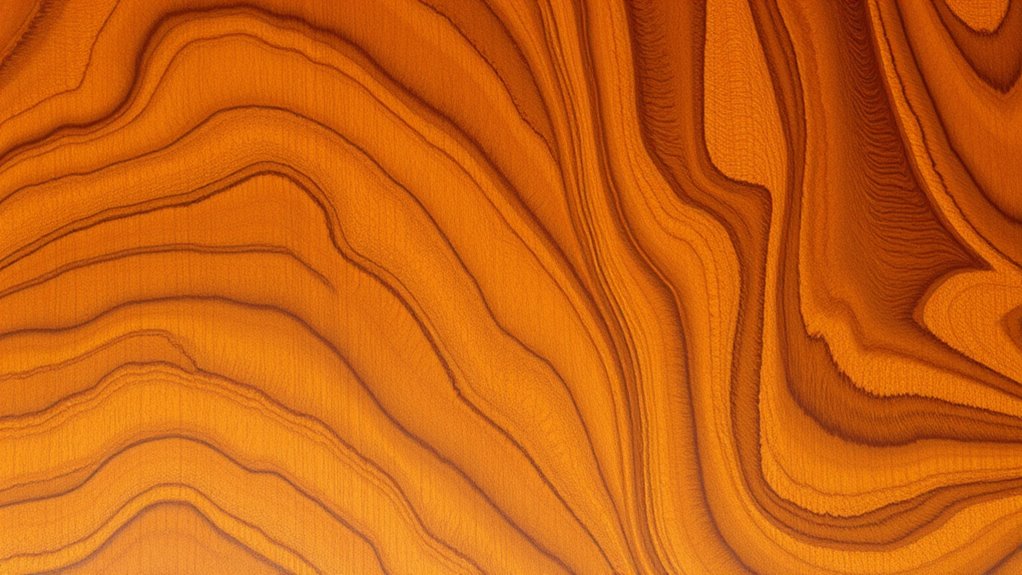
To truly highlight the natural beauty of wood, embracing transparent and light stains is an effective approach. These stains penetrate the surface, allowing the natural grain and texture to stay visible, which enhances the wood’s inherent charm. Using light stains like honey or pale oak creates a subtle, warm glow that accentuates intricate grain patterns without overwhelming the natural character. Applying a clear polyurethane or satin finish over the stain adds a protective layer while maintaining the wood’s authentic look, giving a slight sheen. To guarantee the best results, wipe or brush the stain evenly to prevent blotching. Light stains are especially suited for rustic, Scandinavian, or minimalist styles, emphasizing the unique markings and imperfections that make each wooden piece special. Developing your creative practice can help you experiment with different stains and finishes to achieve truly personalized results. Incorporating automation technologies into your process can also streamline application and improve consistency. Additionally, understanding the importance of color consistency can help ensure uniform results across multiple projects. Exploring professional techniques can further elevate the quality of your stained woodwork.
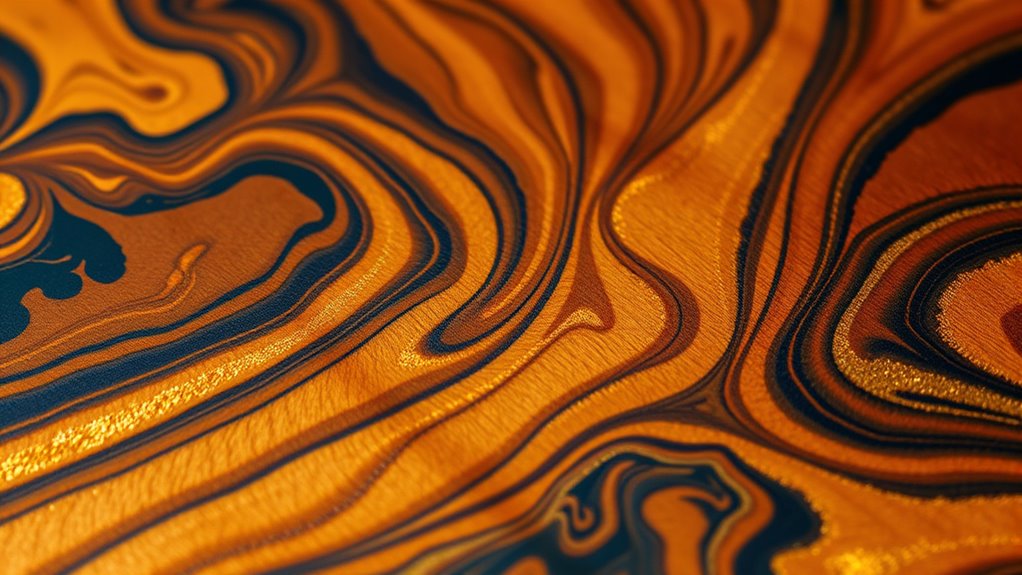
Creating Depth and Drama With Dark and Bold Colors
Dark and bold stains like ebony or espresso instantly transform wooden surfaces by adding striking contrast and a sense of depth. With a dark stain, you emphasize the wood grain, creating a rich, layered staining effect that enhances intricate patterns. Applying multiple coats deepens the color, boosting both depth and contrast for a more dramatic look. Combining dark stains with lighter shades through techniques like distressing or layered staining produces a dynamic, multidimensional appearance. To achieve a professional finish, proper preparation is essential—sanding thoroughly and using a pre-stain conditioner guarantees even penetration and prevents blotchiness. Additionally, understanding Self Watering Plant Pots can inform how you seal and protect stained surfaces from moisture damage over time. Whether you’re aiming for a statement piece or a bold architectural element, these techniques help you create surfaces that exude sophistication and visual impact.
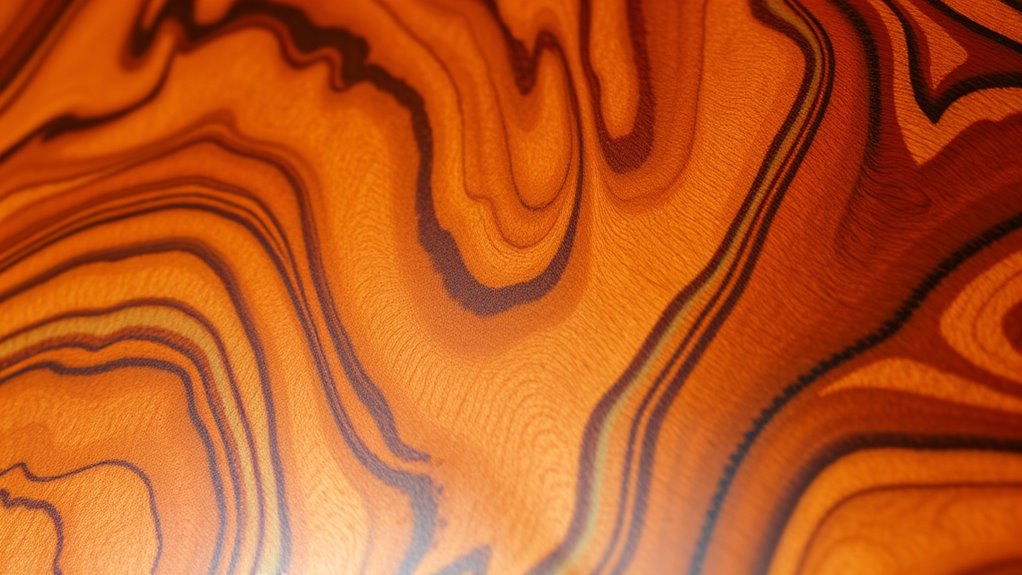
Mastering Ombre and Gradient Effects for a Modern Touch

Creating a smooth ombre or gradient effect on wood adds a sleek, contemporary touch to your projects. To achieve this, start with the lightest stain and gradually layer darker hues, blending each shade seamlessly. Use a sponge, brush, or rag to feather the edges during staining, ensuring smooth progressions without harsh lines. Work in small sections, applying each new layer while the stain is still wet, which helps create a cohesive gradient. Allow the lighter colors to dry before adding deeper tones, building depth and richness step by step. Practice on scrap wood to perfect your blending techniques and find the ideal stain combinations. Incorporating visualization techniques can help you plan and execute your staining projects with greater precision. Proper technique during staining is essential to achieve the desired transition effects and avoid uneven coloring. Mastering color blending is crucial for a flawless ombre or gradient finish. With patience and precision, you’ll master the art of staining wood with ombre and gradient effects, elevating your projects with a modern, stylish finish.
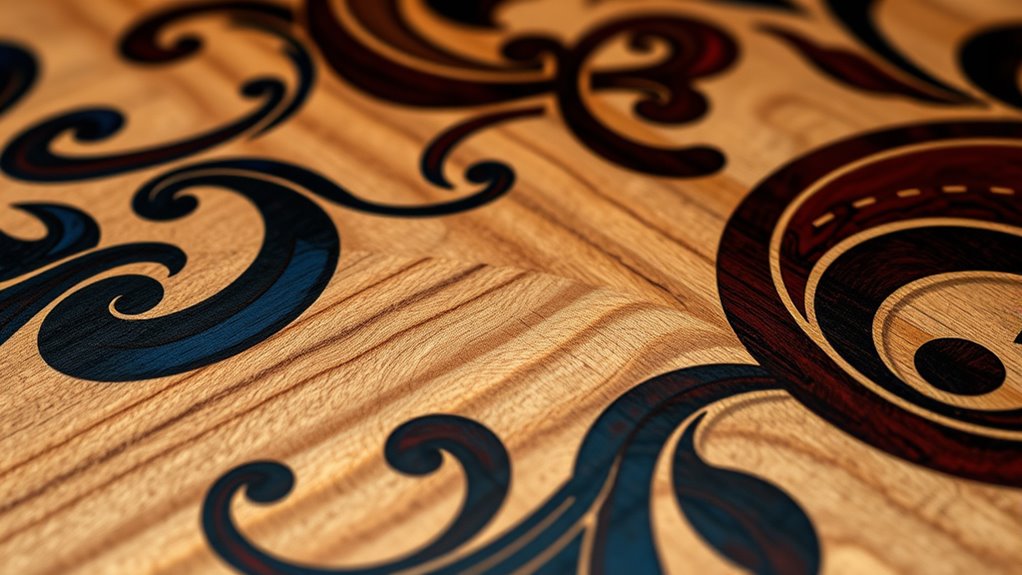
Incorporating Patterns and Stenciling for Unique Visual Interest

Using stencils with wood stain lets you create precise patterns like geometric shapes or floral designs that add personality to your projects. You can experiment with contrasting colors to make patterns stand out or blend subtly for a more refined look. By layering stains or using masking techniques, you’ll craft intricate, eye-catching designs that turn simple wood into a work of art. Incorporating vintage decor can further enhance the rustic charm of your stained wood pieces. Additionally, understanding support hours for related services can help you access tutorials and expert advice when needed. Considering wood treatment options can also help preserve your designs and ensure long-lasting beauty. Exploring different filtering technologies can improve the overall quality of your finished project by protecting it from moisture and environmental damage. Being aware of lease terms can also help in planning maintenance or modifications to your wood projects over time.
Stencil Pattern Techniques
Applying stencil patterns to your wooden projects is an effective way to add visual interest and customization. Start with proper stencil techniques by securing the stencil firmly with painter’s tape to prevent shifting. Use stencil brushes or sponges to apply stain evenly within the pattern, avoiding bleeding and ensuring clean lines. For striking effects, experiment with layering stains or combining staining patterns with different shades for depth and texture. To achieve crisp edges, remove the stencil carefully while the stain is still wet or semi-dry. This step helps prevent smudging and creates sharp, professional-looking designs. Additionally, practicing on scrap wood allows you to refine your technique and achieve more precise results. Incorporating local ingredients can also enhance the visual appeal by adding natural textures and colors to your designs. Understanding compatibility factors can help you select the best staining methods and patterns for your project, ensuring a harmonious and visually appealing final piece. Moreover, developing cultural intelligence can inspire unique design motifs by drawing on diverse cultural aesthetics, adding a global flair to your woodworking art. Being aware of skilled craftsmanship techniques can further elevate your stained patterns, making your projects stand out with craftsmanship and style. By mastering these techniques, you can craft unique, eye-catching stained patterns that elevate your wooden projects with style and sophistication.
Creative Color Combinations
By combining different stain colors and patterns, you can achieve eye-catching effects that add depth and personality to your wooden projects. Experiment with color combinations like dark and light shades to create striking gradient effects through staining wood. Layering stains enhances visual interest, revealing complex color transitions and highlighting the natural grain and texture. Incorporating pattern techniques such as stenciling with contrasting or metallic paints can add intricate designs that stand out. Using painter’s tape to mask sections guarantees clean borders, making geometric or floral patterns pop with vibrant accents. This approach allows you to craft personalized, artistic pieces that blend subtle color shifts with bold visual elements, elevating your woodworking projects with unique, professional-looking staining designs. Understanding Gold IRA options and their advantages can also inspire you to incorporate metallic accents or finishes that mimic precious metals, adding a touch of elegance. Exploring staining techniques can further expand your creative possibilities and help you achieve the desired visual impact. Additionally, understanding the importance of timely project completion can help you organize your staining process efficiently and avoid delays.
Combining Multiple Stains for a Rich, Multi-Tonal Finish
Combining multiple stains can transform your wooden projects into visually stunning pieces with depth and complexity. This technique achieves a rich, multi-tonal finish that emphasizes the wood grain and adds visual interest. By using stain blending and layering techniques, you can create smooth progressions between light and dark shades, giving your project dimension. Contrasting hues, like gray and brown or blue and amber, produce striking, customized staining designs. To guarantee a cohesive look, proper surface preparation and strategic application are essential to prevent bleeding or uneven blending. Whether you’re layering stains wet-on-wet or applying a glaze, these methods allow you to craft intricate, multi-tonal effects that elevate your woodworking and highlight the natural beauty of the wood. Understanding the influence of symbolism in staining can also help you choose colors that evoke specific moods or themes in your projects.
Personalizing Wooden Art With Custom Color Blends and Accents
Building on the idea of blending multiple stains for rich effects, personalizing wooden art with custom color blends and accents lets you create truly one-of-a-kind pieces. You can experiment with mixing different stains to achieve unique hues tailored to your style. Use layered stains or accents like stenciled patterns to add depth and visual interest. Techniques like dry brushing or glazing with contrasting stains help highlight intricate details and create custom effects. Incorporating metallic or colored stains alongside natural wood tones results in bold, striking finishes. Precise control over stain application, including wiping and layering, allows you to craft personalized designs that stand out.
Personalize wooden art with custom stains, layering, and accents for unique, striking designs.
- Mix custom color blends for unique hues
- Add accents through layered stains and stenciling
- Use contrasting stains for depth
- Apply metallic or colored stains for bold effects
Frequently Asked Questions
How Do I Choose the Right Stain Color for My Wood Project?
Choosing the right stain color depends on your desired look and the wood type. Think about whether you want a natural, rustic, or bold finish. Test samples on scrap wood to see how the stain interacts with the grain and color. Consider your space’s color scheme and lighting. Trust your instincts and go for a shade that complements your project’s style, ensuring you’re happy with the final result.
What Tools Are Best for Applying Creative Staining Techniques?
When applying creative staining techniques, you need the right tools to achieve your desired look. Use high-quality brushes for detailed work and smooth application, foam brushes for even coverage on larger surfaces, and rags for wiping and blending colors. Spray bottles or airbrushes work well for gradients and subtle effects. Always choose tools suited for your stain type and project size to guarantee precision and a professional finish.
How Can I Prevent Blotching or Uneven Stain Application?
To prevent blotching or uneven stain application, you should start by sanding your wood thoroughly to create a smooth surface. Next, apply a pre-stain conditioner to even out absorption. Always use a high-quality brush or cloth for even application, working in the direction of the grain. Wipe off excess stain promptly, and work in small sections to guarantee consistent color. These steps help achieve a flawless, professional finish.
What Sealing or Finishing Options Enhance Stained Wooden Surfaces?
Sealing and finishing your stained wood can truly transform your project. You’ll want to choose a clear, protective finish like polyurethane, varnish, or lacquer to lock in color and add durability. Sand lightly between coats for a smooth surface, and apply evenly to avoid streaks. These finishes not only enhance the stain’s rich hues but also shield your wood from moisture and wear, ensuring your masterpiece remains pristine over time.
Can Creative Staining Be Done on Outdoor Wooden Furniture?
You can definitely do creative staining on outdoor wooden furniture. Just guarantee you choose weather-resistant stains and sealers to protect your design from the elements. Use techniques like layering colors or adding patterns to make your furniture stand out. Proper preparation, like cleaning and sanding, is essential. With the right products and creativity, your outdoor pieces will look unique and vibrant while staying durable against the weather.
Conclusion
By mastering these creative staining techniques, you’ll turn ordinary wood into breathtaking masterpieces that captivate everyone who sees them. Your projects will go from simple to stunning, transforming your space into an art gallery of your own making. With just a few strokes, you can create effects so mesmerizing, they’ll leave people speechless—and you’ll be known as the ultimate wood-staining wizard. Get ready to elevate your woodworking game to legendary status!