Pocket screws give you a fast, strong way to join wood pieces securely and seamlessly. To maximize strength, space screws about 1 to 1.5 inches from edges and keep consistent intervals, which helps distribute stress evenly. Use appropriate screw lengths and avoid over-tightening to prevent splitting. Plugging the holes with matching dowels or plugs enhances finish and durability. Keep learning more to discover how these techniques can elevate your woodworking projects further.
Key Takeaways
- Proper screw length (1 ¼ to 2 inches) and spacing (1 to 1.5 inches from edges) ensure joint strength and even stress distribution.
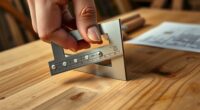
- Using quality pocket hole jigs guarantees accurate hole placement, enhancing the durability of the joint.
- Avoid over-tightening screws to prevent wood splitting and maintain the integrity of the joint.
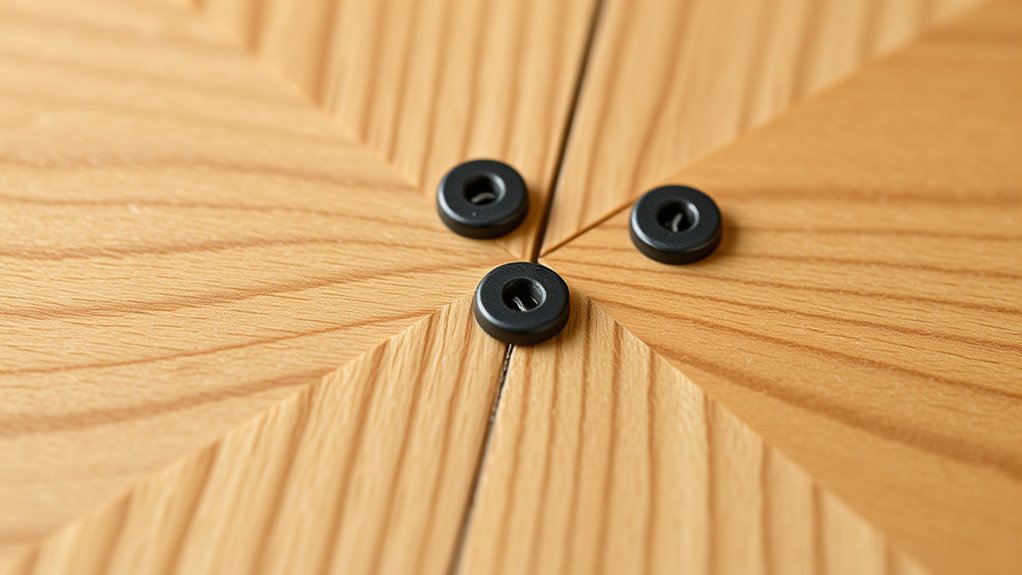
- Plugging holes with matching dowels or plugs improves aesthetic appeal and reinforces the joint’s strength.
- Pre-drilling pilot holes in hardwoods and sanding plugs flush results in cleaner, more durable joints.

Have you ever wondered how woodworkers create strong, seamless joints quickly? The secret often lies in the use of pocket screws, a versatile method that ensures reliable connections with minimal effort. When working with a wood joint, the key is to understand how to properly use pocket screws for maximum strength and durability. This technique involves drilling an angled hole into one piece of wood, then driving a screw through that hole into the adjoining piece. The result is a tight, flush joint that’s perfect for face frames, cabinetry, and furniture. To achieve the best results, it’s crucial to follow some solid installation tips. First, selecting the right pocket hole jig is essential. A quality jig helps you drill accurate, consistent holes, which is indispensable for both strength and appearance. When setting up your jig, make sure it’s aligned properly and that the drill bit is sharp. Proper spacing of the pocket screws also matters—generally, placing them about 1 to 1.5 inches from the edges and at regular intervals along the joint ensures even stress distribution. Avoid over-tightening the screws, as this can cause the wood to split or deform, compromising the joint’s integrity. Instead, tighten just enough to pull the pieces tightly together without crushing the wood fibers. Using the right length and type of screw is equally important. Too short, and the screw won’t penetrate deeply enough; too long, and it could poke through the other side. Typically, 1 ¼ to 2-inch screws work well for most projects. You should also consider pre-drilling pilot holes if working with hardwoods or dense woods to prevent splitting. Once the joint is assembled, you might want to plug the pocket holes for a cleaner look. Wood plugs are easy to insert using a matching dowel or plug cutter, and they hide the screws neatly. After gluing and clamping the joint, drive the plugs flush and sand the surface smoothly for a seamless finish. This not only improves the aesthetic but also reinforces the joint’s strength. The beauty of pocket screws lies in their speed and reliability, making them a favorite among both amateurs and professionals. With proper technique and attention to detail, you can achieve joints that are both strong and visually appealing. Remember, the right installation tips, combined with careful spacing and plugging, can elevate your woodworking projects from ordinary to exceptional. Practice makes perfect, so don’t hesitate to experiment with different spacing, screw lengths, and plugging methods to find what works best for your specific project. Additionally, understanding financial management principles can help you budget for quality tools and materials, ensuring your projects are both high-quality and cost-effective. With patience and precision, you’ll be able to produce sturdy, seamless wood joints that stand the test of time.
Frequently Asked Questions
What Are the Best Types of Wood for Pocket Screw Projects?
For pocket screw projects, you should choose hardwoods like oak, maple, or cherry because they have tight wood grains, providing better strength and stability. Confirm the wood has low moisture content to prevent warping or splitting over time. Softwoods like pine can work too but may require more careful preparation. Always check the moisture level and select wood with consistent grain to achieve strong, durable joints.
How Do Pocket Screws Compare to Dowels and Biscuits?
Pocket screws offer quick, strong joints with excellent alignment, making assembly faster and more precise than dowels or biscuits. They provide good screw longevity, ensuring the joint stays secure over time. While dowels and biscuits excel in providing a more seamless look and distributing stress evenly, pocket screws are ideal when you need a sturdy, easy-to-assemble connection that maintains proper joint alignment, especially in furniture projects.
Can Pocket Screws Be Used for Load-Bearing Furniture?
Imagine a sturdy, well-constructed table holding your favorite books. Yes, pocket screws can be used for load-bearing furniture, but only if you guarantee joint stability and material compatibility. When properly spaced and plugged, they provide solid connections that handle weight well. However, for heavy-duty projects, consider reinforcing with additional fasteners or alternative joints to guarantee safety and longevity.
What Safety Precautions Should I Take When Using Pocket Screw Jigs?
When using pocket screw jigs, always wear safety gear like eye protection and hearing protection to prevent injury. Make sure to follow proper technique by securing your workpiece firmly and aligning the jig correctly. Keep your hands clear of the drill bit’s path and work in a well-lit area. Double-check your measurements and settings before drilling to guarantee safety and accuracy. Stay alert and avoid distractions throughout the process.
How Do I Repair or Disassemble Pocket Screw Joints?
To disassemble pocket screw joints, carefully unscrew the pocket screws with a drill or screwdriver, applying steady pressure to avoid damaging the wood. For repair techniques, you might need to fill any holes with wood filler, then re-drill and re-screw if necessary. If the joint is too tight or damaged, disassemble gently to prevent splitting, and replace the screws or reinforce the joint as needed.
Conclusion
Now that you know about pocket screws, their strength, spacing, and plugging, you’re ready to tackle your woodworking projects with confidence. Think of pocket screws like the sturdy branches of a tree—each one supporting the whole. When you space them correctly and plug the holes, your creations will hold together beautifully, just like a well-built bridge. So go ahead, get your screws in place, and enjoy crafting with the same ease as a bird soaring through the sky.