
Dado joints are key for creating strong shelves and cabinet sides by cutting precise grooves or rabbets into the wood. You can use tools like a table saw with a dado blade or a router to make these cuts, ensuring they fit snugly with the other pieces. Accurate measurements and steady technique are essential for clean, durable joints. If you explore further, you’ll discover detailed steps to perfect your dado joints for professional results.
Key Takeaways
- Dado joints create strong, stable grooves for shelving and cabinet sides, ensuring durable assembly.
- Tools like table saws, routers, and chisels allow precise cutting of grooves and rabbets.
- Accurate measurements and setup are essential for tight-fitting, professional-looking joints.
- Using multiple shallow passes with a router reduces tear-out and enhances joint quality.
- Proper joinery techniques improve load capacity and overall structural integrity of furniture.
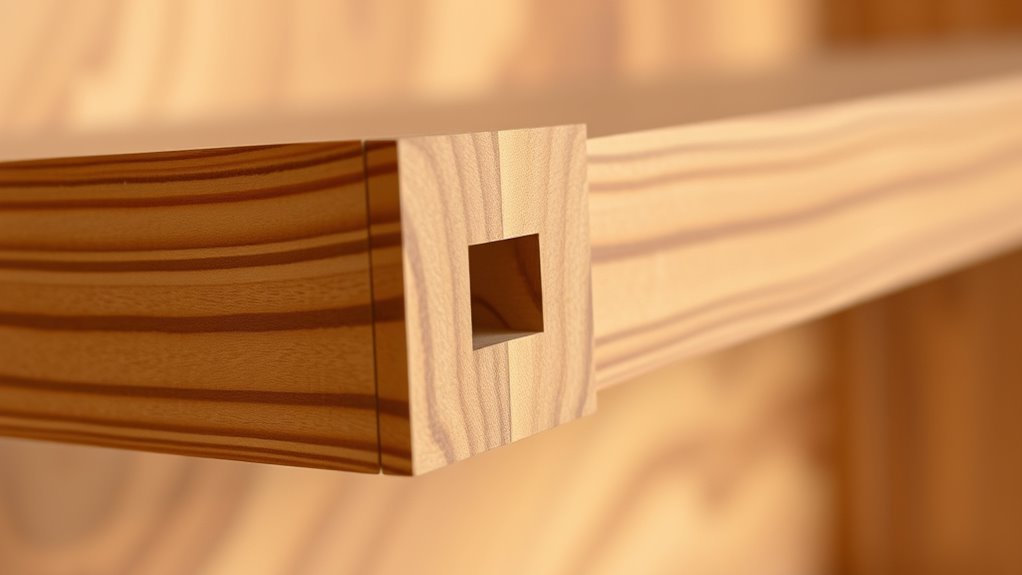
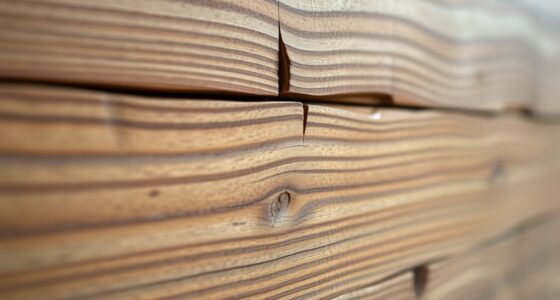
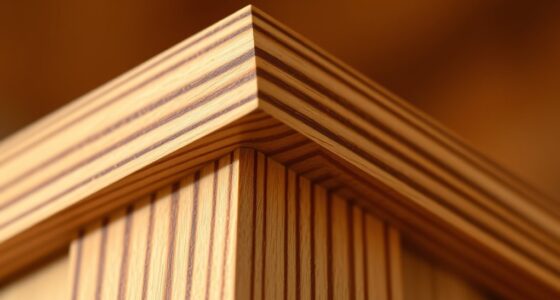
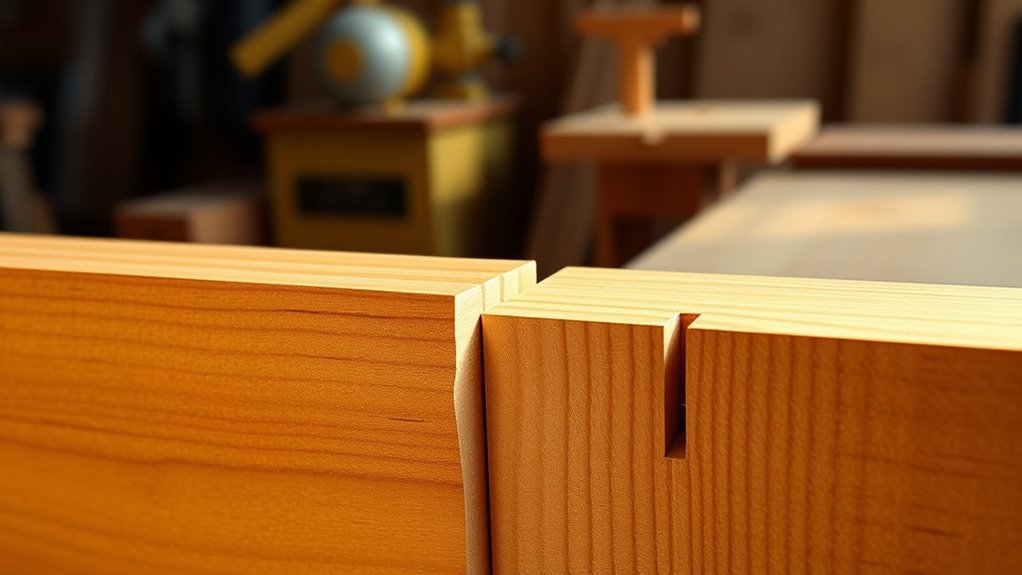
A dado joint is a woodworking technique where a slot, or groove, is cut into one piece of wood to fit another piece snugly. This method is fundamental in creating strong, stable joints for shelves, cabinets, and other furniture projects. When you’re working with this technique, understanding how to execute it correctly involves familiarizing yourself with various woodworking techniques and the right joinery tools. These tools include a table saw, dado blade, router, or a chisel and mallet, depending on the precision and scope of your project.
Dado joints create strong, stable connections by fitting perfectly cut grooves into wood pieces.
The most common method for making dado joints is using a table saw equipped with a dado blade set. This setup allows you to cut wide, clean grooves quickly and accurately. To achieve a perfect fit, you need to measure carefully and set the blade height precisely. It’s vital to mark your cut line on the wood, then use a fence guide to ensure consistent, straight cuts across your material. When you run the wood through, keep your hands clear of the blade and push steadily to avoid wobbling, which could compromise the joint’s fit.
Alternatively, a router can be used for more detailed or curved dado joints. With a straight bit and a router table or a handheld router, you can carve grooves with high precision. This method offers flexibility if you need to customize the groove’s width or depth, especially for intricate projects. When using a router, make multiple shallow passes rather than a single deep cut. This approach minimizes tear-out and results in cleaner joints.
For smaller projects or touch-ups, hand tools like chisels and mallets come in handy. After scoring the outline of the dado with a chisel, you can remove the waste material carefully, ensuring the groove fits the mating piece exactly. This method demands patience and a steady hand but provides excellent control for fine-tuning your joints.
In all cases, proper joinery tools are essential for achieving tight, durable dado joints. Precision is key, so double-check your measurements and cut settings before proceeding. The quality of your joinery tools directly impacts the strength and appearance of your finished piece. Whether you’re creating shelves that need to hold weight or cabinet sides that require sturdy connections, mastering the use of these tools and techniques guarantees your work will stand the test of time. Additionally, understanding the importance of accurate measurements can significantly improve your joint quality and overall project success. With practice, you’ll develop a feel for how each tool interacts with the wood, leading to cleaner cuts and better-fitting joints every time.

The Mibro Group 416381 Carbide Stacking Dado Blade Set – 14 Pieces, Silver, 8"
Cuts smooth and precise grooves with clean edges, square shoulders and flat bottoms
As an affiliate, we earn on qualifying purchases.
As an affiliate, we earn on qualifying purchases.
Frequently Asked Questions
What Tools Are Best for Cutting Dado and Rabbet Joints?
For dado cutting and rabbet making, you’ll want a good table saw or router. A dado blade set on your table saw makes quick, precise cuts for dado joints, while a router with a straight bit is excellent for rabbets. Use a push stick for safety, and set your fence accurately. These tools let you achieve clean, snug joints for sturdy shelving and cabinets, making your project easier and professional-looking.
How Do I Prevent Wood Splitting When Making These Joints?
Imagine gently guiding your saw through soft, forgiving wood rather than forcing it. To prevent wood splitting during dado or rabbet cuts, support the wood with proper clamps and use the right blade to minimize stress. Applying tape along the cut line can also help prevent splintering. For extra strength, consider joint reinforcement techniques like glue or biscuits, ensuring your joints stay tight without damaging the wood.
Can These Joints Be Used With Plywood or MDF?
You can definitely use dado joints with plywood or MDF, but consider material compatibility and joint strength. Plywood and MDF work well because they’re stable and less prone to splitting like solid wood. To guarantee strong joints, use appropriate glue and fasteners, and cut carefully to avoid splintering. Remember, dado joints provide good support for shelving and cabinets, especially when combined with these materials’ durability.
What Are the Common Mistakes to Avoid When Assembling?
Think of assembly as a dance—you need perfect timing and steps. Avoid common mistakes like rushing measurements; measure twice to guarantee accuracy. When applying glue, don’t skimp—too much causes mess, too little weakens the joint. Also, don’t forget to clamp properly, or your pieces might shift. Keep your workspace organized, and double-check your cuts. With careful attention, your dado joints will fit snugly and hold strong.
How Do I Ensure Perfect Fit for These Joints Every Time?
To guarantee a perfect fit every time, focus on joint alignment and measuring accuracy. Double-check your measurements before cutting, using a reliable ruler or marking gauge. Keep your saw blade aligned properly and cut slowly for precision. Test fit joints as you go, making small adjustments if needed. Properly supporting your workpiece also helps maintain alignment, preventing gaps or tight spots. Practice consistently to develop your skills and confidence.

6Pcs Straight Router Bit Set 1/4 Shank, Double Flute Straight Bit Dado Straight Cut Router Bit, Cut Dia 3/4", 5/8", 1/2", 3/8", 5/16", 1/4", Straight Router Bit for Woodworking Groove by SICWOOD
Carbide Tipped 2 Flute: SICWOOD 6pcs straight router bit set with 1/4 shank, Cut Dia 3/4", 5/8", 1/2",…
As an affiliate, we earn on qualifying purchases.
As an affiliate, we earn on qualifying purchases.
Conclusion
Think of dado joints as the sturdy bridges in your woodworking castle, connecting walls and beams with confidence. Just like a well-placed bridge makes travel smoother, these grooves and rabbets keep your shelves and cabinets steady and secure. Mastering them is like building a strong foundation for your craftsmanship. With each joint, you’re crafting more than furniture—you’re creating a lasting piece of your own story, sturdy and reliable, ready to stand the test of time.

KONDITO Professional Wood Chisel Set – Complete Chisel Kit with 6 CRV60 Steel Blades (6–38mm), 2 Sharpening Stones & Hardwood Case – Wood Carving Chisels for Joinery, Sculpting & Woodworking Tools
【PREMIUM WOOD CHISEL SET FOR WOODWORKING & CARVING】This professional-grade wood chisel set includes six sizes (6mm to 38mm)…
As an affiliate, we earn on qualifying purchases.
As an affiliate, we earn on qualifying purchases.

Essential Joinery: The Fundamental Techniques Every Woodworker Should Know
As an affiliate, we earn on qualifying purchases.
As an affiliate, we earn on qualifying purchases.