Did you know that approximately 30% of DIY enthusiasts struggle with removing drill bits from their tools? This common challenge can lead to wasted time and frustration, particularly when you’re in the middle of an important project. Understanding how to remove a drill bit effortlessly can make a world of difference in your experience. In this quick guide for drill bit change, we’ll walk you through essential techniques and tips for efficiently changing your drill bits. This knowledge is vital not only for enhancing your drill operation but also for maximizing your overall project efficiency.
Key Takeaways
- Effortless drill bit removal significantly improves project efficiency.
- Understanding your tool’s features is crucial for quick changes.
- Knowing when to change bits can prolong the life of your drill.
- Safety precautions are essential to avoid accidents during bit removal.
- Choosing the right drill bit type impacts your project outcomes.
The Importance of Knowing How to Remove a Drill Bit Effortlessly
Understanding the importance of drill bit removal is crucial for anyone utilizing power tools. If you don’t know how to change a drill bit effectively, you risk damaging your equipment and potentially injuring yourself. Proper techniques make a significant difference in achieving efficient drill usage.
Hassle-free drill bit change not only enhances your productivity but also prolongs the lifespan of both your drill and the bits themselves. Whenever you handle a drill, ensuring you can remove and replace bits without hassle becomes a valuable skill that saves both time and effort during projects.

When you master the technique, you can avoid frustrating interruptions, allowing you to focus on your tasks. Transitioning from one bit to another seamlessly will empower you to tackle various projects more efficiently.

Gifts for Men,THOSAF Damaged Screw Extractor Set,Fathers Day Gifts for Dad from Daughter Son,Mens Gifts for Dad,Husband,Stripped Screws Bolt Drill Bit Tools for Easy Removal of Rusty Broken Screw
APPLY TO MOST DRILLS : 6 pieces screw extractors work with any drill and all the screw size…
As an affiliate, we earn on qualifying purchases.
As an affiliate, we earn on qualifying purchases.
Understanding Your Drill: Key Features to Consider
Before you change a drill bit, it is essential to understand several key features of your drill. Familiarity with these drill features makes the process smooth and hassle-free. One of the first things to consider is the types of drills available. Each type serves different purposes and has its unique advantages.
Another critical aspect to examine is the chuck types. You may encounter keyed chucks or keyless chucks, each requiring different techniques for bit removal. Keyed chucks utilize a specialized key to tighten and loosen the grip on the drill bit, while keyless chucks offer convenience with a simple twist to release or secure the bit.
Knowing your drill’s specifications enables you to choose the right tools and procedures for effective bit removal. This understanding ultimately enhances your drilling experience and ensures that you can tackle any project with confidence.


Waltool 8Pcs Universal 4 in 1 Drill Chuck Key Wrench and 3/4" 5/8" 1/2" 3/8" 1/4" 5/32" T-Handle Keyless Chuck Drill Press for Electric Drill Clamping Tool
What you Get: The 8pcs Drill Chuck Key Wrench set contains 3/4" (20mm), 5/8" (16mm), 1/2" (13mm), 3/8"…
As an affiliate, we earn on qualifying purchases.
As an affiliate, we earn on qualifying purchases.
How to Remove a Drill Bit Effortlessly
Removing a drill bit might seem challenging, but with the right methods, you can do it easily. Understanding how to change drill bit is crucial for maintaining your tools and ensuring a smooth operation. Below, you’ll find step-by-step guides tailored for both keyless and keyed drills.
Step-by-Step Guide for Keyless Drills
Keyless drills simplify the bit removal process. To begin, make sure the drill is powered off. Grip the chuck tightly and twist it counterclockwise. As you do this, the internal mechanism will loosen the drill bit. Keep a firm grip to avoid any slipping. Once loose, gently pull the bit out. If you’re unsure, a test run by tightening and loosening a different bit can enhance your confidence in keyless chuck removal.
Step-by-Step Guide for Keyed Drills
Keyed drills require a bit more precision. Start by ensuring your drill is off and disconnected from power. Locate your chuck key, which is often found attached to the drill. Insert the key into the chuck and turn it counterclockwise to release tension on the drill bit. This is the pivotal step in keyed chuck removal. After loosening, you can slide the drill bit out. Always perform a safety check on the key to avoid potential damage to your drill.

| Drill Type | Removal Method | Tips |
|---|---|---|
| Keyless | Grip and twist chuck | Ensure a secure hold |
| Keyed | Use chuck key for loosening | Check key integrity |
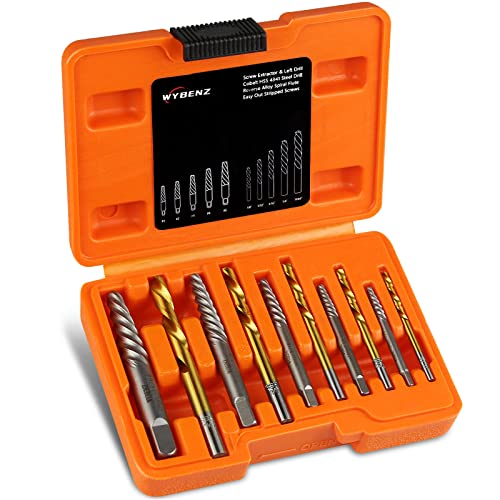
14Pcs Screw Extractor and Left Hand Drill Bits Set, Easy Out Screw Extractor Set, Broken Bolt Extractor Kit Bolt Remover, Reverse Cobalt HSS Steel Drill Bit for Remove Stripped Screws and Broken Bolts
Save Time and Effort: Broken bolt extractor kit are used to remove stuck, broken or screwed tools. The…
As an affiliate, we earn on qualifying purchases.
As an affiliate, we earn on qualifying purchases.
Choosing the Right Drill Bit for Your Project
Selecting drill bits tailored to your specific tasks can significantly enhance your efficiency and the quality of your work. Understanding the various types of drill bits available allows you to choose the most suitable option for your project. Each type serves a distinct purpose, which is essential to recognize before making your final decision.
Types of Drill Bits and Their Uses
There are several types of drill bits designed for specific materials and applications. Here are some common options:
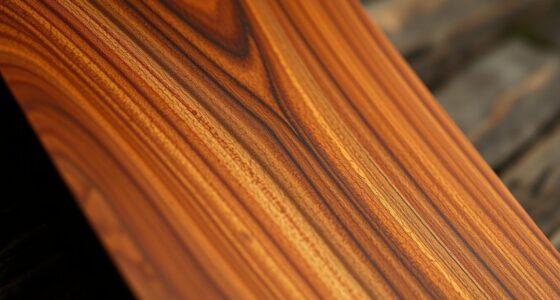
- Brad Point Bits: Ideal for woodworking, they provide precise drilling and clean holes.
- Masonry Bits: Designed for drilling into brick, concrete, or stone, featuring a carbide tip for durability.
- Twist Bits: Versatile bits suitable for various materials, including metal and plastic, known for their spiral design.
- Spade Bits: Great for making large holes in wood, they are cost-effective and easy to use.
- Hole Saw Bits: Perfect for cutting circular holes in a range of materials, such as wood and metal.
Material Comparison for Drill Bits
The performance of your drill bits largely depends on their materials. Here’s a comparison of common drill bit materials:
| Material | Durability | Common Uses |
|---|---|---|
| High Carbon Steel | Moderate | Wood and softer materials |
| High-Speed Steel | Good | Metal and hard materials |
| Titanium-Coated | High | Metal, plastic, and wood |
| Cobalt | Very high | High-strength materials like stainless steel |
Understanding these drill bit materials will aid you in selecting drill bits that offer the best performance for your particular project needs.


TUOBEO Cordless Nail Drill Electric Nail File Kit, Rechargeable Efile Set, Portable Acrylic Gel Nail Polish Remover Machine, Pedicure Manicure Tool, 11 Bits, 56 Sanding Bands, Salon Home, Purple
1.5h Charge, 7h Use: TUOBEO electric nail drill kit is designed for ultimate convenience, allowing you to enjoy…
As an affiliate, we earn on qualifying purchases.
As an affiliate, we earn on qualifying purchases.
Safety First: Essential Precautions Before Removal
Before attempting any drill bit removal, following proper drill safety precautions is essential for your safety. Start by ensuring that the drill is powered off and unplugged. This simple step can prevent accidents and unexpected activation while you work.
Wearing appropriate safety gear, such as goggles and gloves, adds an extra layer of protection during the process. Safety goggles shield your eyes from debris, while gloves help you maintain a solid grip and protect your hands from sharp edges.
Maintaining a clean workspace contributes to drill operation safety. A tidy area minimizes the risk of tripping or losing focus during the task. Additionally, take a moment to inspect both the drill and the bit for defects, such as cracks or warping. Preparing properly for safe drill bit removal can significantly reduce the chances of injuries or damage.

Tools You Might Need for Effortless Bit Removal
When it comes to changing drill bits, having the right tools can make the entire process smoother and more efficient. Familiarizing yourself with essential drill maintenance tools and accessories for drill use can enhance your experience and ensure your equipment remains in top-notch condition. Here’s a closer look at some important items you will want to have on hand.
Common Accessories for Drill Maintenance
- Chuck Key: Essential for tightening and loosening bits in keyed chucks, providing a secure grip on the drill bit.
- Wrenches: Useful for adjusting various fittings, ensuring that attachments are firmly secured.
- Cleaning Tools: Keeping your drill clean prevents buildup and helps maintain optimal performance.
- Lubricants: Regular application keeps moving parts functioning smoothly and reduces wear and tear.
Understanding Chuck Types
Knowledge of different chuck types is critical for efficient bit removal and installation. Here are the two primary types:
| Chuck Type | Description | Best For |
|---|---|---|
| Keyed Chuck | Requires a chuck key to secure the drill bit; offers a stronger grip. | Heavy-duty applications where secure bits are essential. |
| Keyless Chuck | Allows for easy bit changes without additional tools; simply twist to secure or release the bit. | Quick changes in lighter-duty tasks. |

Dealing with Stuck Drill Bits: Tips and Tricks
Experiencing stuck drill bits can be frustrating, but there are effective strategies you can use to tackle this issue. Start by applying gentle pressure when trying to remove the bit. Sometimes, a light touch works wonders as excessive force can make the problem worse. If this doesn’t help, consider using lubrication such as oil or penetrating fluid. A few drops around the area can facilitate a smoother release.
In cases where the drill bit remains stuck, turn to tools you have on hand. A screwdriver can serve as a lever to assist in freeing the bit. Insert the screwdriver gently between the chuck and the bit, applying even pressure to help loosen it without damaging the surrounding parts. Understanding how to navigate these stuck drill bits is key to successful drill troubleshooting.
Don’t forget to maintain your drill properly to avoid future issues. Regular maintenance can significantly reduce the chances of facing stubborn bits. By being proactive and familiarizing yourself with these solutions for stuck bits, you will be better equipped to achieve trouble-free drilling sessions.

Maintaining Your Drill for Optimal Performance
Regular maintenance is crucial for keeping your drill in top shape. Implementing effective drill maintenance tips can significantly enhance the performance and lifespan of your drill. Take a moment to consider the following essential practices:
- Clean your drill after each use. Dust, dirt, and debris can harm both the drill and the bits. A quick wipe down will prevent buildup.
- Inspect the drill and bits regularly. Check for signs of wear or damage. Early identification allows for repairs or replacements, minimizing the risk of accidents.
- Store your drill properly. Keep it in a dedicated case or shelf, away from moisture and extreme temperatures. Proper storage plays a vital role in drill care.
By adhering to these maintenance practices, you can contribute to the longevity of your drill. This not only ensures safety but also leads to more efficient project outcomes. Prioritizing drill care enhances your overall experience and productivity during any drilling task.

The Rotabroach Range: Quality Drill Bits You Can Trust
If you’re on the lookout for quality drill tools, the Rotabroach brand stands out among the best drill bit brands available today. Known for their exceptional performance and reliability, Rotabroach drill bits are designed to tackle a variety of applications with ease.
Among the impressive offerings are the M2AL and TCT annular cutters, each delivering precise drilling experiences. M2AL bits provide high-speed capabilities, making them ideal for diverse materials. On the other hand, TCT annular cutters are perfect for heavy-duty tasks, ensuring longevity and endurance.
| Type of Drill Bit | Material | Applications |
|---|---|---|
| M2AL Annular Cutters | High-Speed Steel | General purpose, soft to medium materials |
| TCT Annular Cutters | Tungsten Carbide Tipped | Heavy-duty drilling, hard materials |
Choosing Rotabroach means investing in durable products that help you achieve professional results. Their consistent quality and innovative designs make them a trustworthy choice for both DIY enthusiasts and professionals alike.

Conclusion
As we wrap up this guide, it’s clear that understanding the essentials of drill bit removal is paramount for anyone working with power tools. This summary of drill bit removal highlights the importance of knowing the type of drill and the necessary techniques for changing bits safely. Whether you utilize keyless or keyed drills, familiarity with your equipment will empower you to handle bit changes confidently.
Final thoughts on bit changing reaffirm that preparation and proper technique not only enhance your efficiency but also contribute to your overall safety. By adhering to the safety precautions outlined here, you’ll be better equipped to tackle any drilling project without hassle. Ultimately, mastering the art of drill bit removal will transform your experience and effectiveness with power tools in your projects.
In conclusion, take these insights and incorporate them into your routine to enjoy a seamless drilling experience. With practice and the right knowledge, you can streamline your workflow and achieve impressive results every time.