To create stunning DIY wooden wall art with geometric patterns, start by planning your design with clear sketches of shapes like triangles, hexagons, or diamonds. Choose quality woods and use precise cutting tools for clean edges. Assemble your pieces carefully with glue and clamps, then finish with stain or sealant to highlight the natural beauty. Proper hardware guarantees secure hanging. If you keep exploring, you’ll discover how to master techniques that make your artwork truly stand out.
Key Takeaways
- Plan your design with sketches of geometric shapes like triangles, hexagons, or diamonds for a cohesive pattern.
- Select quality wood types and use precise measuring and cutting tools for clean, accurate shapes.
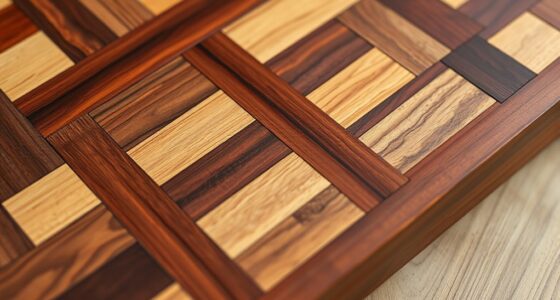
- Combine contrasting woods or stains to create depth and visual interest in your geometric pattern.
- Assemble pieces with wood glue, ensuring perfect alignment and secure fastening for a polished look.
- Finish with stain, paint, or sealant, then securely hang using appropriate hardware to showcase your handcrafted wall art.

Creating your own wooden wall art is a rewarding way to add a personal touch to your home decor. When you immerse yourself in designing and building geometric patterns, you’re engaging in a craft that showcases your creativity and skill. Wooden craftsmanship allows you to manipulate different types of wood, stains, and finishes, giving each piece a unique character. As wall decor trends evolve, many homeowners are leaning towards geometric designs because they bring a modern yet timeless appeal to any space. By making your own piece, you’re not just following trends—you’re setting your own style that reflects your personality.
Creating personalized wooden wall art blends craftsmanship with modern style, showcasing your creativity and adding unique character to your home.
Starting with a clear plan helps guarantee your project turns out exactly as you envision. Sketch out your geometric pattern, choosing shapes like triangles, hexagons, or diamonds. These simple forms can be combined to create intricate, eye-catching designs. Once you have your pattern, select the types of wood that will best suit your project. Think about contrasting woods or different stains to add depth and visual interest. Using quality materials enhances your wooden craftsmanship, making the finished wall art durable and aesthetically pleasing. Keep in mind that the trending wall decor pieces often feature clean lines and symmetrical arrangements, so precision in your cuts and assembly is key.
When it comes to cutting your wood pieces, make sure to measure carefully and use sharp tools. A good miter saw or a jigsaw will give you clean, accurate cuts that fit together seamlessly. Sand all edges thoroughly—smooth surfaces not only look professional but also prevent splinters and injuries. For assembly, use wood glue and clamps to hold your pieces securely in place as they dry. This step requires patience, but it pays off in the form of a polished, high-quality final product. Additionally, understanding visual cues can help you align pieces more precisely during assembly. Once assembled, you can finish your piece with stain, paint, or a clear sealant to highlight the natural beauty of the wood and protect it over time.
Hanging your geometric wooden wall art is the final step, and it’s worth investing in proper hardware to guarantee it stays secure. When you create your own wall decor, you’re not just decorating; you’re curating a piece of art that embodies craftsmanship, precision, and style. Your handmade geometric pattern will stand out as a proof of your skills and taste, elevating your interior and aligning with current wall decor trends. Plus, you’ll enjoy the satisfaction that comes with knowing you crafted a unique piece that adds warmth and personality to your home.

Lifelines FlowCrafts, Layered Wooden Wall Art – Framed Art Piece with 9 Layers, 5 Paint Colors, 9 Adhesive Patterns & Picture Frame – Sensory Arts & Crafts Kit for Teens & Adults – DIY Wall Décor
Layered Wooden Wall Art Craft Kit: Paint and personalize a three-dimensional art piece that showcases your signature style!…
As an affiliate, we earn on qualifying purchases.
As an affiliate, we earn on qualifying purchases.
Frequently Asked Questions
What Types of Wood Are Best for Geometric Wall Art?
You should choose hardwoods like oak, maple, or cherry for your geometric wall art because they have attractive wood grain and are durable. These woods respond well to wood treatment, allowing you to enhance their natural patterns or stain them for different effects. Softwoods like pine can work too, but they may dent more easily. Always consider the grain direction to achieve clean, sharp geometric designs.
How Do I Choose the Right Colors for My Design?
Choosing the right colors is like painting a story—your color palette sets the mood. You’ll want to take into account contrast techniques to make your geometric patterns pop and guarantee harmony. Think about the room’s existing decor and lighting, then select colors that complement or stand out intentionally. Stick with a cohesive color palette, mixing neutrals with bold hues, to create visual interest and balance in your wooden wall art.
Can I Customize Patterns for Different Wall Sizes?
Yes, you can customize patterns for different wall sizes by adjusting the pattern scaling based on your wall measurements. Measure your wall carefully, then resize your design proportionally to guarantee it fits well. This way, the geometric pattern remains balanced and visually appealing, regardless of the wall size. Taking precise wall measurements and scaling your pattern accordingly helps you create a cohesive, customized wooden wall art piece.
What Safety Precautions Should I Take During Construction?
You should always wear personal protective equipment like safety goggles, ear protection, and a dust mask to prevent injuries. Follow workspace safety guidelines, such as keeping your area clean, securing tools properly, and ensuring good ventilation. Avoid distractions, unplug power tools when not in use, and handle sharp tools carefully. These precautions help you stay safe and prevent accidents during your DIY wooden wall art project.
How Do I Hang and Secure Wooden Art on Walls?
To hang and secure your wooden art, first choose the right hanging hardware like D-rings, sawtooth hangers, or picture hooks based on weight. Use proper wall mounting techniques, such as measuring and marking level spots, and verify anchors or screws are securely anchored into studs or drywall. For added stability, consider using a level to keep your art straight and prevent shifting over time.

Musanpou Wooden Geometric Home Wall Decor Slatted Wood Design Wall Sculpture,Set of 3 Wood Wall Art decorate,Boho Bathroom Bedroom Living Room rustic Home Decoration
Home wall decoration gifts:This wooden home decor can be a nice housewarming gift on birthdays, wedding days, anniversaries,…
As an affiliate, we earn on qualifying purchases.
As an affiliate, we earn on qualifying purchases.
Conclusion
Now that you’ve crafted your geometric wooden wall art, it’s funny how the pieces seem to fit perfectly into your space—almost as if they were meant to be there all along. Sometimes, the best projects come together when you least expect it, turning a simple idea into a stunning focal point. So, hang your masterpiece with pride, knowing that your creativity and a few scraps of wood brought this beautiful design to life—just like it was destined to be.

5 Pack Wood Grain Tool,Woodgraining Tool Kit,Texture Pattern with Handle Roller Rubber Empaistic Graining Tool Paint Look Like Wood for DIY Wall Room Art Decoration
【SET OF 5 WOOD GRAIN TOOL】Our wood graining painting tool set contains 5 different types of rollers. Specially…
As an affiliate, we earn on qualifying purchases.
As an affiliate, we earn on qualifying purchases.

PAIION Types of Wood Metal Sign Woodworking Knowledge Infographic Wall Poster for School Flower Shop Bar Cafe Home Kitchenes 8×12 Inch
Professional Knowledge and education posters can be gifts for children, biological lovers, adults, or decorated for your home,…
As an affiliate, we earn on qualifying purchases.
As an affiliate, we earn on qualifying purchases.