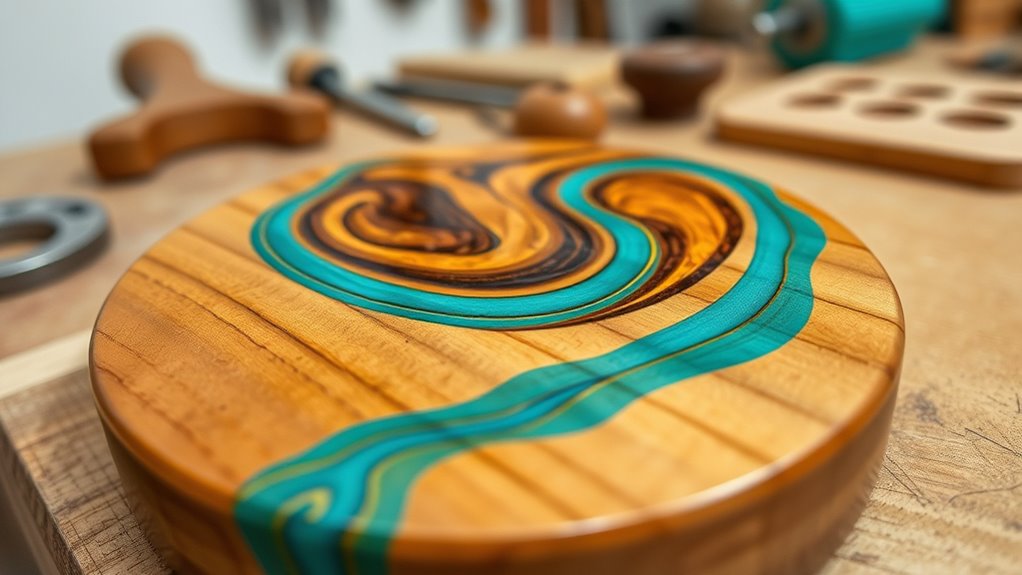

To create wooden coasters with inlay and epoxy resin, start by selecting high-quality hardwoods like maple or walnut for durability and aesthetics. Sketch your design carefully, creating precise recesses for inlays such as contrasting wood, stones, or metal accents. Sand and prepare the surface, then insert the inlay materials securely. Pour and level epoxy resin over the surface for a glossy, protective finish. With attention to detail, you’ll craft stylish coasters that combine art and function—plus, more tips await as you continue.
Key Takeaways
- Select high-quality hardwoods and compatible inlay materials for durability and aesthetic appeal.
- Precisely carve recesses for inlays using accurate measurements and steady tools.
- Embed contrasting inlay materials securely into recesses, ensuring flush alignment before sealing.
- Pour epoxy resin carefully to cover the surface, removing bubbles for a glossy, magnified finish.
- Sand and polish the edges after curing for a professional, durable, and visually appealing coaster.

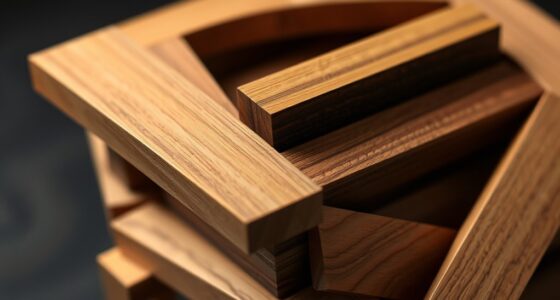
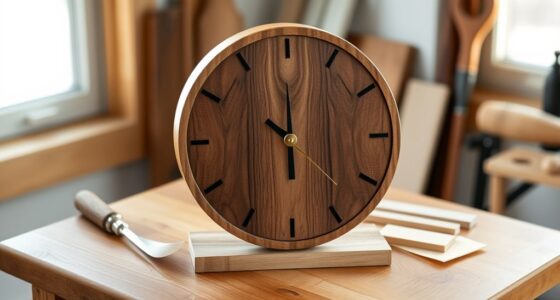
Creating wooden coasters is a rewarding DIY project that allows you to add a personal touch to your home decor. When starting out, you’ll want to consider your design techniques carefully, as they’ll determine the overall look and feel of your coasters. The first step is mastering the art of material selection. Choose high-quality hardwoods like maple, cherry, or walnut for durability and aesthetic appeal. These woods have tight grains that work well with inlay work and resist moisture, making them perfect for coasters. You can also experiment with softer woods like pine or cedar if you prefer a rustic look, but keep in mind they might require extra sealing to prevent damage. Once you’ve picked your materials, you’ll want to think about the design techniques that will bring your vision to life. Inlay work, for example, involves embedding contrasting materials—such as different woods, stones, or even metal—into the surface for a striking visual effect. To do this effectively, you’ll need precise measurements and a steady hand, using tools like routers and chisels to carve out recesses for your inlay materials. When planning your design, sketch it out first, considering symmetry and balance, so your inlays don’t look cluttered or uneven. The choice of materials for inlay is also vital; you want items that complement your base wood and are compatible with epoxy resin later on. Brightly colored stones or metallic accents can add a pop of contrast, while subtle wood inlays can create a more understated elegance. After your design is finalized, you’ll cut your base wood pieces to size, sand them smoothly, and then carefully create the inlay recesses based on your sketches. Once the recesses are ready, you can insert your inlay materials, securing them with glue and ensuring they sit flush with the surface. The next step involves sealing the entire coaster with epoxy resin, which not only enhances the design but also provides a waterproof, durable finish. When applying epoxy, work in a dust-free environment and pour slowly to avoid bubbles, using a heat gun or torch to remove any that form. The epoxy will level out, creating a glossy surface that magnifies your inlay work and adds depth to the design. Proper material compatibility is essential to ensure a strong bond between your inlays and the resin. As the resin cures, you’ll want to sand and polish the edges for a clean, professional look. With patience and attention to detail, your handcrafted coasters will not only protect your surfaces but also showcase your artistic skills, making them a stylish addition to any space.

Unfinished Natural with Tree Bark Wood Slices 10 Pcs 4.2-4.7 inch Disc Coasters Wood Coaster Pieces Craft Wood kit Circles Crafts Christmas Ornaments DIY Crafts with Bark for Crafts Rustic Wedding
Diameter: approx 4.2-4.7inch(11-12cm);Thickness: approx 0.4inch(1cm)
As an affiliate, we earn on qualifying purchases.
As an affiliate, we earn on qualifying purchases.
Frequently Asked Questions
What Types of Wood Are Best for Inlay Designs?
You should choose hardwoods like maple, cherry, or walnut for inlay designs because their fine wood grain makes intricate inlay techniques easier. These woods are durable, hold detail well, and contrast beautifully with other materials, enhancing your design. Avoid softwoods, which can chip or wear easily. The smooth, tight wood grain helps you achieve precision, resulting in a polished, professional look for your inlay work on wooden coasters.
How Do I Prevent Epoxy Resin From Yellowing Over Time?
Hold onto your DeLorean—epoxy resin can yellow over time, but you can fight it! To prevent this, use UV protection through special resin additives or a UV-resistant top coat. These additives help block harmful sunlight that causes discoloration. Applying a clear, UV-protective layer after your project cures is key. Regularly keep your coasters out of direct sunlight, and you’ll enjoy their vibrant look for years.
Can I Customize Coaster Shapes Beyond Standard Circles?
Yes, you can customize coaster shapes beyond standard circles by using custom shape templates and creating intricate cut designs. You’ll need a scroll saw or jigsaw to carefully cut your chosen shape from wood, following your templates. This allows you to craft unique, personalized coasters that match your style. Just make certain you sand the edges smoothly and seal the wood properly before applying epoxy resin for a professional finish.
What Safety Precautions Are Necessary When Working With Epoxy Resin?
When working with epoxy resin, you need to wear protective gear like gloves and a mask to avoid skin contact and inhaling fumes. Guarantee proper ventilation in your workspace by opening windows or using fans, as epoxy releases potentially harmful fumes during curing. Always follow the manufacturer’s safety instructions, work in a well-ventilated area, and handle the resin carefully to prevent accidents and health issues.
How Durable Are Inlaid Wooden Coasters With Epoxy Coating?
Your inlaid wooden coasters with epoxy coating stand as resilient as a fortress, built to last through daily use. Once the resin curing process is complete, they become a sturdy shield for your drinks. The epoxy enhances the wood grain, adding depth and beauty, while the durable layer resists scratches and moisture. With proper care, these coasters will keep their charm, enduring countless gatherings and moments shared around your table.

Shabebe Epoxy Resin, 32OZ Epoxy Resin Crystal Clear, Not-Yellowing No-Bubble, Self Leveling Easy Pour/Mix 1:1 Casting Kit & Coating for DIY Jewelry Making, Art Resina Clear Crafts, Molds, River Tables
Safe and Odorless: Our Resin Epoxy is specially formulated for ARTISTS. The 2 part epoxy Crystal Clear &…
As an affiliate, we earn on qualifying purchases.
As an affiliate, we earn on qualifying purchases.
Conclusion
Creating wooden coasters with inlay and epoxy resin is a rewarding project that lets you showcase your creativity. With patience and a steady hand, you’ll craft unique pieces that stand out. Remember, practice makes perfect—don’t be afraid to learn from any slips along the way. When you finally see your finished coasters, you’ll realize that patience truly pays off. Keep at it, and you’ll have beautiful, functional art that’s worth every effort.

Peachtree Woodworking Supply Veneer Variety Pack for Marquetry and Inlay Work with 15 Square Feet of Domestic •Exotic •Various Grain and Color Dyed Raw Wood Veneers •No Two Packs are Alike
Finally an assortment of colored veneers in various wood types that are ideal for marquetry, inlay, woodworking projects…
As an affiliate, we earn on qualifying purchases.
As an affiliate, we earn on qualifying purchases.

SKPPC 40Pcs Unfinished Laser Engraving Carving Blank Wood Pieces for Painting, Coasters, DIY Arts Craft Project, Staining and Decorations
Quantity and Size: You will receive 40 pcs unfinished square corner wood, enough for your DIY crafts projects…
As an affiliate, we earn on qualifying purchases.
As an affiliate, we earn on qualifying purchases.