
To prevent heat cracks in your turned projects, focus on maintaining a steady, moderate sanding speed. Rushing can cause heat buildup, which weakens the wood and leads to cracks. Keep your tool moving smoothly and evenly, applying consistent pressure without pressing too hard. Avoid staying in one spot too long. If you follow these guidelines, you’ll reduce heat stress on the wood, ensuring a flawless finish. Continue with these tips to master heat-safe sanding techniques.
Key Takeaways
- Maintain a steady, moderate sanding speed to prevent excessive heat buildup.
- Avoid applying excessive pressure; let the abrasive do the work at a consistent pace.
- Regularly lift the sander to avoid prolonged contact that causes localized heat.
- Follow a systematic sanding pattern aligned with the grain to reduce friction.
- Use progressively finer grits to minimize heat generation during grit transitions.
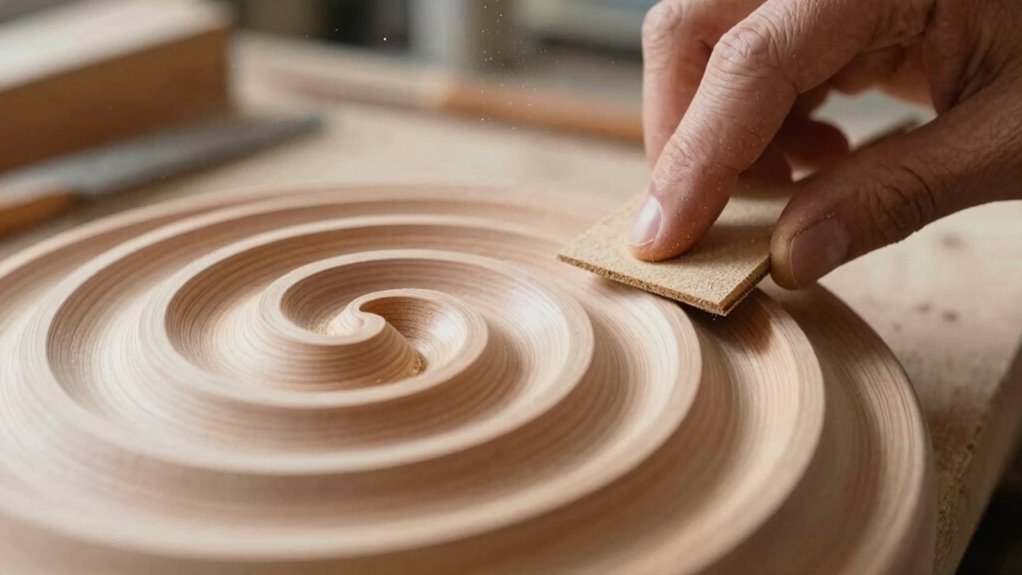
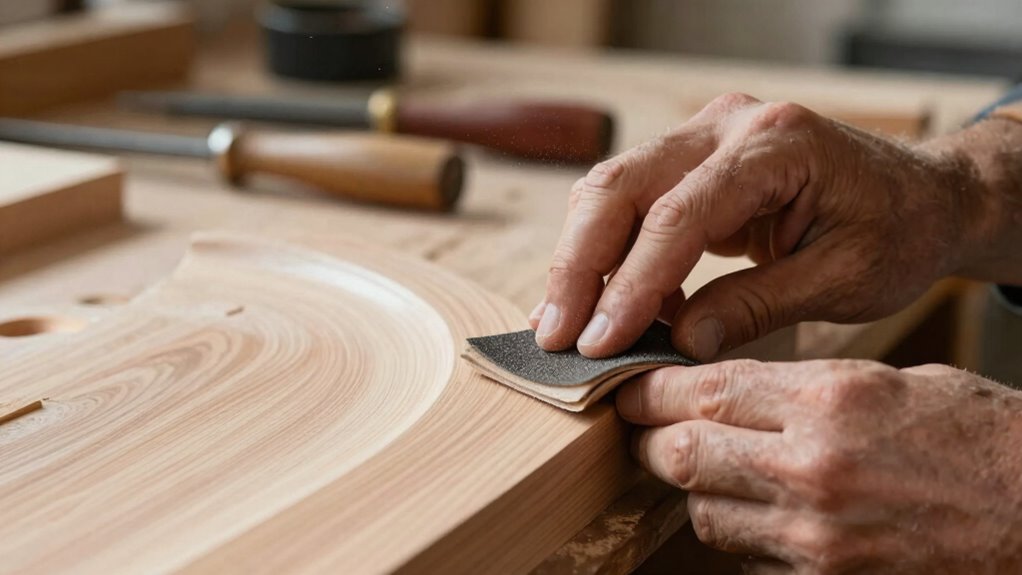
Sanding is a vital step in finishing turned projects, shaping their surface to reveal the beauty of your craftsmanship. Proper sanding not only smooths out imperfections but also enhances the natural grain of the wood. To achieve the best results, you need to pay close attention to grain direction and follow a logical sanding sequence. These two elements work together to produce a flawless finish and prevent issues like scratches or heat cracks that can ruin your work.
Proper sanding enhances wood grain and prevents flaws for a flawless finish.
First, understanding grain direction is crucial. Wood grain runs in specific patterns, and sanding against the grain can cause scratches that are difficult to remove. Always examine your project to identify the grain flow, which may vary across different sections. When sanding, move your abrasive along the same direction as the grain. This approach reduces resistance, minimizes scratches, and promotes a cleaner surface. Changing grain direction isn’t necessary at every step but be cautious when transitioning between different areas, especially if the grain changes significantly. Going against grain can create rough spots and increase the risk of heat buildup, which can lead to cracks.
Next, follow a proper sanding sequence to ensure a smooth, professional finish. Start with a coarse grit sandpaper, such as 80 or 100, to remove rough spots, tool marks, and imperfections. Always sand with the grain, maintaining consistent pressure. Once the surface feels even and smooth, switch to a medium grit, like 150 or 180, to refine the surface further. Finish with fine grits such as 220 or higher to achieve a silky-smooth texture. This gradual progression reduces the likelihood of heat buildup, which can cause the wood to expand unevenly and develop heat cracks. Remember, rushing through the grit progression can trap scratches and imperfections, so take your time at each stage.
Pay attention to the sanding sequence, moving systematically from coarse to fine grits. Avoid skipping steps, as this can leave behind scratches that show up after finishing. Also, use a consistent sanding pattern—either circular or linear—depending on your project, but always stay aligned with the grain. This consistency ensures an even surface and prevents uneven removal of material, which could distort your project’s shape or create uneven stress points. Additionally, understanding the importance of grain direction can help you prevent common sanding issues and achieve a high-quality finish.

Romeda 8-Pack Sanding Sponge, Four Grits Per Pack 60/80/120/220, Washable and Reusable Handmade Sandpaper Block, Drywall Sandpaper Blocks for Wooden Drywall Sheetrock and Metal Glazing
- Assorted Grits Included: 60/80/120/220 grit, 8 pieces
- Color-Coded for Grit Size: Grey, Blue, Green, Orange
- Durable High-Density Sponge: Flexible, tear-resistant, long-lasting
As an affiliate, we earn on qualifying purchases.
As an affiliate, we earn on qualifying purchases.
Frequently Asked Questions
What Types of Wood Are Best for Turning Projects?
You should choose woods with fine, even wood grain like maple, cherry, or walnut for turning projects. These woods respond well to turning speed, reducing the risk of heat buildup that causes cracks. Hardwoods are generally better because they’re stable and less prone to chipping or cracking. Always monitor your turning speed to prevent heat stress, especially with softer woods, ensuring a smooth, crack-free finish.
How Do I Prevent Dust During Sanding?
You might think dust control isn’t essential, but it really is. To prevent dust during sanding, use a vacuum attachment or a dust extraction system to capture particles at the source. Wear a mask and safety glasses, and work in a well-ventilated area. Employ proper sanding techniques—light pressure and consistent motion—to reduce dust. These steps keep your workspace cleaner, safer, and make your sanding more effective.
What Safety Gear Should I Wear While Sanding?
When sanding, you should wear protective eyewear to shield your eyes from dust and debris, and respirator masks to prevent inhaling fine particles that can harm your lungs. Always choose a mask rated for dust protection, and verify your eyewear fits snugly to prevent dust from reaching your eyes. This safety gear keeps you protected and helps you breathe easier while working on your project.
Can I Use Power Tools for Sanding Turned Projects?
Using power tools for sanding turned projects is like guiding a skilled dancer—precise and controlled. You can definitely use them, but focus on proper sanding techniques and gentle tool selection to avoid heat buildup and cracks. Opt for variable speed buffers or sanders, and keep the tool moving steadily. This guarantees a smooth finish without damaging your project, making your work safer and more efficient.
How Do I Repair a Heat Crack if It Occurs?
To repair a heat crack, start by gently cleaning the cracked area. Use fine-grit sandpaper for sanding heat cracks carefully, removing any loose wood or debris. Then, apply wood filler or epoxy designed for crack repair, smoothing it out with a putty knife. Once it’s dry, sand lightly to blend the repair. Regularly inspect your project to catch heat cracks early and prevent further damage.
Conclusion
By following the speed rule during sanding, you prevent heat cracks from ruining your beautiful project. Imagine the smooth, flawless surface you’ve worked so hard to achieve, now marred by a simple mistake. It’s like rushing a delicate dance—too fast, and you risk losing control. Slow down, stay steady, and let your craftsmanship shine through. In the end, patience turns your work from a potential disaster into a stunning masterpiece you’ll be proud of.