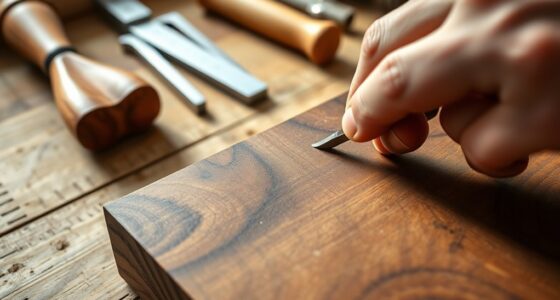

To master the art of scribing, start by carefully measuring irregular surfaces to identify any deviations. Use a contour gauge to capture surface profiles and transfer these onto your trim or cabinet piece. Mark your cut lines precisely, following surface contours, and make test cuts on scrap material. With proper tools and steady hands, you’ll achieve a seamless fit that adapts perfectly to uneven surfaces. Keep practicing these techniques to guarantee your projects look professional—more tips await to help you perfect your craft.
Key Takeaways
- Use a contour gauge to accurately copy irregular surface profiles for precise scribing.
- Mark the surface contours with a pencil and straightedge before cutting.
- Make test cuts on scrap material to verify the fit before final trimming.
- Follow the surface’s curves closely during cutting to ensure a snug, seamless fit.
- Regularly check measurements and fit during installation to maintain accuracy and avoid gaps.

Fitting trim and cabinets is a crucial step that can greatly enhance the look of your space. To achieve a seamless, professional finish, you need to master the art of scribing, which involves precisely fitting pieces to uneven walls and irregular surfaces. The foundation of a perfect fit begins with proper measuring techniques. You should start by carefully evaluating the area, taking note of any deviations or imperfections in the wall or ceiling. Use a long, flexible measuring tape or a ruler to record these irregularities, rather than relying solely on standard measurements. This way, you’ll understand exactly where gaps exist and how much material needs to be removed for a snug fit. Accurate measurements are essential; even a small miscalculation can result in gaps or uneven lines, compromising the aesthetic and durability of your installation.
Once you’ve gathered your measurements, the next step involves tool selection. Choose tools that will give you precision and control. A fine-tooth saw or a multi-tool with an oscillating blade is ideal for trimming or shaping the trim or cabinet edges. A sharp utility knife can help make fine adjustments. For marking cut lines, a pencil and a straightedge or a square are your best friends. When it comes to fitting curved or irregular surfaces, a contour gauge becomes invaluable. This tool allows you to copy the exact profile of your wall or ceiling, ensuring your cuts follow the surface’s contours accurately. Additionally, understanding measuring techniques is fundamental to achieving a perfect fit, as it ensures your cuts are precise and tailored to irregular surfaces.
As you move forward, keep in mind that measuring techniques extend beyond initial measurements. Regularly check your progress against your measurements, making adjustments as needed. When cutting, always double-check your measurements before making any cuts, and consider making test cuts on scrap material to verify your accuracy. Proper tool selection not only makes the process smoother but also minimizes errors, saving you time and frustration. Use clamps to hold pieces steady during cutting and fitting; this ensures precision and safety.

JOREST Connectable Contour Gauge (10+5 Inch), Gifts Ideas for Men Dad Handyman Husband Him, Shape Profile Duplicator with Lock, Outline Angle Measuring Tool, Template Tool, Tile Flooring, Scribe Edge
- Three Sizes for Versatile Use: Includes 5, 10, and 15-inch gauges
- Multi-Purpose Tool: Ideal for tiling, flooring, carpentry, and DIY
- Precise and Well-Designed: Dual scale, thin blade, adjustable tension
As an affiliate, we earn on qualifying purchases.
As an affiliate, we earn on qualifying purchases.
Frequently Asked Questions
What Tools Are Essential for Precise Scribing?
You need essential tools like a pencil, a measuring tape, and a scribing tool, such as a compass or a contour gauge, for precise scribing. Use accurate measuring techniques to capture irregular surfaces, and mark carefully to guarantee fitting. A straight edge or a combination square helps maintain marking accuracy. These tools help you follow the surface contours closely, ensuring a perfect fit for trim or cabinets every time.
How Do I Fix Uneven Wall Surfaces Before Trimming?
To fix uneven wall surfaces before trimming, start with proper wall preparation by inspecting the area and identifying high or low spots. Use a drywall sander or a sanding block to smooth out drywall imperfections, ensuring an even surface. Fill any gaps or holes with joint compound, then sand again once dry for a seamless finish. This creates a smooth, level surface, making your trim and cabinets fit perfectly.
What Are Common Mistakes in Cabinet Fitting?
You often make mistakes in cabinet fitting by rushing the cabinet alignment process, leading to uneven gaps and uneven doors. Poor measurement or ignoring wall irregularities can cause misaligned finish carpentry. Always double-check your measurements and use proper tools to guarantee precise alignment. Take your time during installation, and regularly step back to assess your work for consistency. Correctly fitting cabinets requires patience and attention to detail to achieve a professional finish.
How Can I Ensure Consistent Cabinet Door Gaps?
Think of your cabinet doors like a row of well-tuned instruments. To guarantee consistent gaps, start by checking hinge alignment; if they’re off, adjust them until the doors sit evenly. Use door latch adjustments to fine-tune the closing fit, preventing uneven gaps. Regularly measure the space with a ruler, and make small tweaks. This way, your doors will align perfectly, giving your cabinets a professional, polished look.
What Techniques Prevent Trim From Cracking During Installation?
To prevent trim from cracking during installation, focus on measuring accuracy and consider material expansion. Use precise measurements to cut trim accurately, avoiding stress points. Acclimate trim to the environment before installation, allowing for natural expansion and contraction. Avoid forcing pieces into place, which can cause cracks. Instead, secure trim gently, and use flexible caulk or filler to accommodate slight movements, ensuring a clean, crack-free finish.
Conclusion
Mastering the art of fitting trim and cabinets transforms a house into a true home, like a tailor fitting a suit to perfection. When you pay attention to every detail, you’re not just installing; you’re crafting a masterpiece that stands the test of time. Think of your craftsmanship as the brushstroke that completes a beautiful painting—each precise cut and careful fit adding depth and character. With patience and skill, you turn raw materials into a work of art.