When steaming isn’t an option, you can bend wood by making kerf cuts along your desired curve. Carefully mark your curve, then use a fine saw or kerf-cutting tool to make closely spaced cuts, about half the wood’s thickness apart. These cuts act as hinges, allowing you to flex the wood into the shape you want without cracking. Securing it in place with clamps helps it set. Keep exploring to learn more tips and tricks for successful kerf bending.
Key Takeaways
- Kerf cuts weaken the wood, allowing it to bend along the desired curve without steaming.
- Make evenly spaced, shallow cuts at about half the wood’s thickness for optimal flexibility.
- Secure the bent wood in the desired shape with clamps until it sets or dries.
- Precise marking and consistent cutting ensure smooth, natural curves without cracking.
- Suitable for dense or heat-resistant woods where steaming isn’t practical or effective.
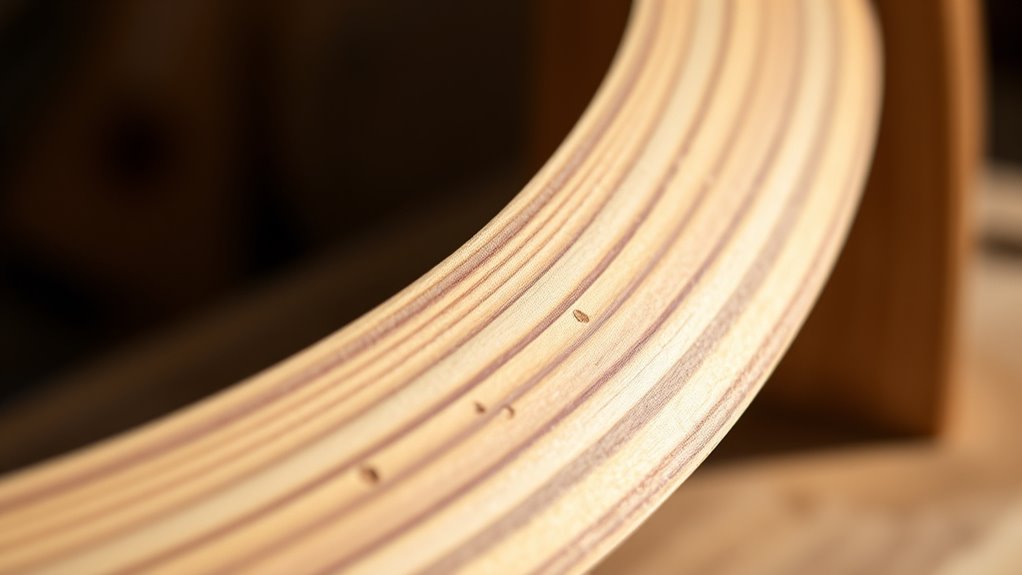
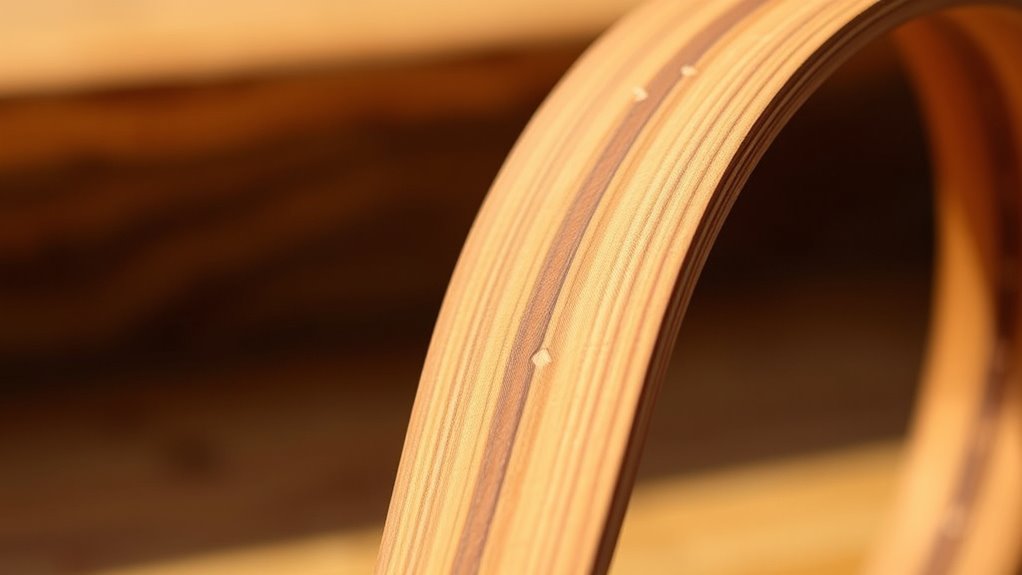
Bending wood can be challenging, but using kerf cuts offers an effective solution. When traditional methods like steaming or soaking aren’t feasible, kerf cuts provide an alternative that allows you to shape wood with precision. This technique involves making a series of closely spaced cuts on the inside of the bend, which weakens the material and enables it to flex more easily without cracking or splitting. It’s especially useful when working with thicker or denser woods that resist heat bending or lamination techniques.
If heat bending isn’t an option—perhaps because you lack the equipment or the wood is too thick—kerf cuts become your go-to method. While lamination techniques involve gluing thin layers of wood together to form a curve, kerf cuts allow you to bend a single piece of wood directly. This process offers a more straightforward approach, saving time and effort. Instead of waiting for glue to dry or risking uneven lamination, you can achieve a smooth, natural curve by carefully planning and executing your cuts. It’s a technique that demands precision; the depth, spacing, and number of cuts influence how easily the wood bends and how clean the final curve will be.
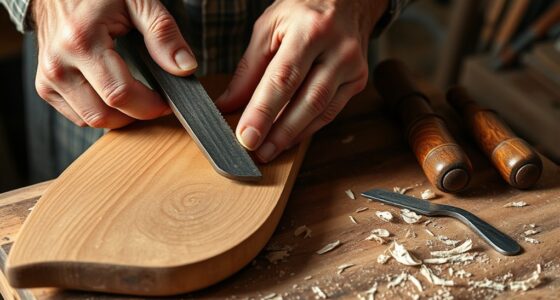
To get started, you’ll need a fine saw or a specialized kerf-cutting tool. Mark your curve carefully on the wood, then cut along the line with consistent spacing—usually about half the thickness of the wood—so the cuts don’t weaken the entire piece excessively. The closer the cuts, the more flexible the wood becomes, but too many can compromise its strength. Once all the cuts are made, gently flex the wood along the curve. The cuts will act as hinges, allowing the wood to bend without breaking. Secure the piece in the desired shape until it sets, or use clamps to hold it in place during the process.
This method works well for furniture projects, decorative pieces, or any application where a clean, natural bend is needed. It’s especially handy when working with woods that don’t respond well to heat, or when you want more control over the final shape. Additionally, understanding the contrast ratio of your wood or material can help you anticipate how well the bent piece will display dark and light areas, ensuring a uniform appearance. With patience and careful execution, kerf cuts enable you to bend wood effectively, offering a reliable alternative to heat bending and lamination techniques. They give you the flexibility to craft complex curves without special equipment, making your woodworking projects more accessible and precise.

RUITOOL Japanese Hand Saw 6 Inch Double Edge Sided Pull Saw Ryoba SK5 Flexible Blade 14/17 TPI Flush Cut Beech Handle Wood Saw for Woodworking Tools
An Idea Gift for Woodworker, Carpenter and Craft Man
As an affiliate, we earn on qualifying purchases.
As an affiliate, we earn on qualifying purchases.
Frequently Asked Questions
Can Kerf Cut Bending Be Used on All Wood Types?
Kerf cut bending works best on softwoods like pine or cedar, but isn’t suitable for all wood types. You need to contemplate the wood grain and kerf pattern; some hardwoods with dense grain may crack or break. Softwoods with consistent grain respond well, allowing flexible bending without steam. Hardwoods often require alternative methods, as their kerf pattern may not provide enough flexibility or could damage the wood.
How Thick Can Wood Be for Effective Kerf Cut Bending?
You can bend wood with kerf cuts effectively up to about 1 inch thick, but beyond that, thickness limitations may hinder bending precision. Thinner wood generally bends more easily and accurately since the cuts create the necessary flexibility without compromising strength. If you’re working with thicker pieces, expect some challenges maintaining the desired curve, and consider adjusting the kerf spacing or cutting depth to improve results.
What Safety Precautions Are Necessary When Making Kerf Cuts?
You should always wear protective gear like safety goggles and gloves to shield your eyes and hands from splinters and debris. Make sure your workspace is well-ventilated, clean, and free from obstructions to maintain safety. Keep your hands away from the saw blade and use clamps or jigs for stability. Regularly check your tools for damage, and follow all safety guidelines to prevent accidents during kerf cut woodworking.
How Long Does the Bending Process Typically Take?
The bending process usually takes about 24 to 48 hours, depending on the wood type and thickness. Timing considerations are vital, so you should allow ample time for the wood to bend gradually and evenly. You’ll need to secure the wood in the desired shape and keep it in a humid environment during the process. Patience guarantees the wood retains its new shape without cracking or splintering.
Are There Any Post-Bending Treatments Required for Durability?
After bending your wood with kerf cuts, you should consider post-bending sealing to enhance durability. Applying protective finishes, like sealants or varnishes, helps prevent moisture absorption and cracking over time. Make sure to allow the finish to fully cure before use. This extra step guarantees your bent wood remains strong, flexible, and visually appealing, giving your project a professional look and increased longevity.

HONGDUI JF06 Kerfmaker Table Saw Slot Adjuster Mortise and Tenon Tool Woodworking Movable Measuring Block 100mm/4inch
【Precision Measurement】Accurately adjusts saw slots up to 50mm width and saw blade up to 13mm thickness for exact…
As an affiliate, we earn on qualifying purchases.
As an affiliate, we earn on qualifying purchases.
Conclusion
Next time you face a bend where steaming isn’t an option, remember kerf cuts can save the day — just like they did when you accidentally discovered that thin slices of wood can flex without breaking. It’s funny how sometimes, the solution appears right when you least expect it. So, keep experimenting with kerf cuts; you might find that the perfect curve was hiding in plain sight all along, waiting for your next creative stroke of genius.

HORUSDY 8-Pack Bar Clamps for Woodworking, 12" and 6" Bar Clamps, Wood Working Clamp Sets, Quick Clamps F Clamp with 150 LBS Load Limit (8-Pack Wood Clamps)
1. The complete set includes 4pcs 6" bar clamps,2pcs 12" bar clamps and 2pcs 6" spring clamps, which…
As an affiliate, we earn on qualifying purchases.
As an affiliate, we earn on qualifying purchases.

Joinerjetly Wood Bending Steam Generator Kit with 55" Large Foldable Steam Box, Wood Steamer for Bending Wood, Tool-Free Assembly Wood Bending Machine for Curved Woodworking Projects
Extra-Large 55" Steam Box: Fits planks up to 55 inches long, steam generator for wood bending effortlessly handling…
As an affiliate, we earn on qualifying purchases.
As an affiliate, we earn on qualifying purchases.