To create smooth profiles in curved cabinetry, focus on matching the wood grain carefully across all panels for a seamless look. Use flexible substrates or curved jigs to shape your panels, and select flexible edge banding suitable for curves. Apply the banding evenly with a hot iron or adhesive roller, then trim and smooth edges meticulously. Attention to detail guarantees a polished finish that highlights craftsmanship—keep going to discover more techniques that elevate your project to a professional level.
Key Takeaways
- Use flexible substrates and curved jigs to shape panels for smooth, consistent curves.
- Select flexible edge banding materials like veneer or PVC suited for curved surfaces.
- Carefully align wood grain patterns across panels before applying edge banding for seamless flow.
- Trim and sand edges meticulously to eliminate bubbles and rough spots, ensuring a polished finish.
- Employ proper adhesion techniques, such as hot iron or adhesive rollers, for even, secure bonding on curves.
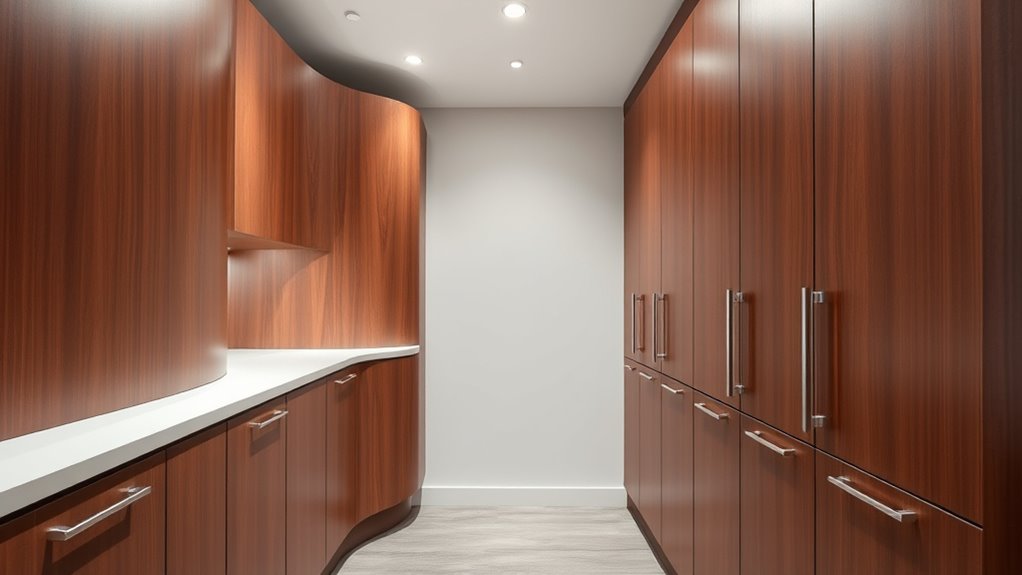
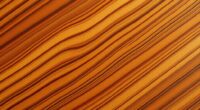
Curved cabinetry is transforming interior design by adding a sleek, modern touch to any space. When you’re creating these smooth, flowing profiles, attention to detail makes all the difference. One key to achieving a flawless look is proper grain matching. You want the wood grain to flow seamlessly across the curves, which involves carefully selecting veneer or wood panels that align naturally. Grain matching ensures the pattern continues smoothly from one section to another, giving your cabinetry a cohesive, high-end appearance. It’s a meticulous process, but the results are worth it—your curved surfaces will look polished and professionally crafted. Additionally, selecting the right headphone jack type for audio equipment can improve your workspace setup, especially if you’re integrating technology into your cabinetry project for multimedia purposes.
Proper grain matching ensures seamless, high-end curved cabinetry that looks polished and professionally crafted.
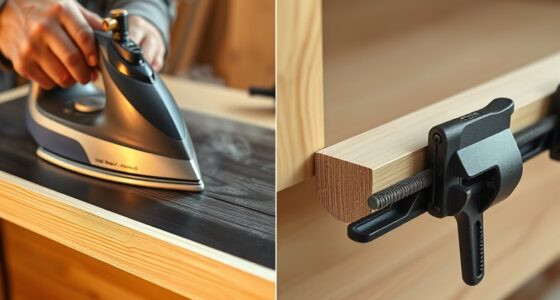
Edge banding is another essential element when working with curved cabinetry. This technique involves applying a thin strip of material—usually wood veneer, PVC, or melamine—to cover the raw edges of your panels. Proper edge banding not only improves aesthetics but also protects the edges from damage. When working with curves, you’ll need to select flexible edge banding materials that can conform smoothly to the contours without bubbling or cracking. Precision in applying edge banding guarantees your curves have clean, sharp lines, accentuating the sleek, flowing design.
To achieve perfect curves, you’ll often use a flexible substrate or a curved jig to guide your cuts and shaping. When cutting panels for curved cabinetry, it’s essential to use sharp blades and proper tools to maintain clean edges. As you shape the panels, make sure your grain matching is aligned before applying the edge banding; this prevents mismatched patterns that can detract from the overall look. When the panels are ready, you’ll carefully apply the edge banding using a hot iron or adhesive roller, ensuring it adheres evenly along the curve. Trimming excess material with a fine blade helps you achieve a precise, seamless finish.
The finishing touches involve sanding and smoothing the edges to eliminate any roughness or bubbles. This step is especially important with curved surfaces, where imperfections are more noticeable. When you take the time to match the grain and apply edge banding meticulously, your curved cabinetry will exude sophistication and craftsmanship. These techniques showcase your attention to detail and elevate the overall aesthetic, making your project stand out. With patience and precision, curved cabinetry becomes a statement piece that combines artistry with functional design, transforming any space into a modern, inviting environment.

GSCIT Club Birch Edge Banding, 3/4 inch x 50ft roll of Veneer Pre-glued Flexible, Real Wood Tape Banding for Cabinet Repair Furniture Restoration
【BRAND GUARANTEE】- GSCIT Club is a company specialized in Edge banding.
As an affiliate, we earn on qualifying purchases.
As an affiliate, we earn on qualifying purchases.
Frequently Asked Questions
What Types of Wood Are Best for Curved Cabinetry?
You should choose woods like red oak, cherry, or maple for curved cabinetry because their wood grain and flexibility make bending easier. These woods respond well to bending techniques such as steaming or lamination, allowing you to create smooth, elegant curves. Avoid harder woods that resist bending. By selecting the right type of wood, you’ll achieve beautiful, seamless curves that enhance your cabinetry’s design and durability.
How Long Does It Typically Take to Craft Curved Cabinets?
It typically takes anywhere from a few days to a couple of weeks to craft curved cabinets, depending on complexity. You’ll use bending techniques like steam bending or laminating to shape the wood, and curved molding adds to the process. The time varies with your skill level and design intricacy. Proper planning and patience guarantee smooth profiles, making the project both beautiful and functional.
Can Curved Cabinetry Be Customized for Specific Room Sizes?
Yes, curved cabinetry can be tailored for your specific room sizes. You can explore various customization options to guarantee a perfect fit, optimizing space efficiently. Working with skilled craftsmen allows you to design cabinets that follow your room’s unique curves and dimensions. This way, you maximize storage and aesthetics, creating a seamless look that complements your space perfectly. Custom curved cabinetry truly adapts to your needs.
What Maintenance Is Required for Curved Wood Surfaces?
You should regularly clean your curved wood surfaces with a soft, damp cloth to remove dust and dirt. Avoid harsh chemicals that can damage the finish. To protect the finish, apply a high-quality furniture wax or polish periodically. Keep moisture away to prevent warping, and inspect for any chips or scratches, repairing them promptly. Proper maintenance guarantees your curved cabinetry stays smooth, shiny, and well-protected over time.
Are There Cost Differences Between Curved and Traditional Cabinets?
You’ll find that curved cabinets typically cost more than traditional ones due to a higher cost comparison and material expenses. The unique shapes require custom craftsmanship, specialized tools, and additional labor, which all add to the overall price. While the aesthetic appeal is worth it, be prepared for increased costs. If budget is a concern, weigh the design benefits against these extra expenses to make an informed decision.

POWERTEC Flexible Curve Template Ruler 37", Wood Curve, Woodworking Profiling Strip, Template Tool Metal Steel, Durable Bendable Segmented Professional Contour with Knobs & Locking Mechanism – 71056
PRECISE CURVE & PATTERN DUPLICATION: Our 37” Steel Curve Template Tool helps you to easily replicate and transfer…
As an affiliate, we earn on qualifying purchases.
As an affiliate, we earn on qualifying purchases.
Conclusion
Now that you’ve explored the techniques for creating smooth, curved cabinetry, you’re equipped to bring elegant, flowing lines to your projects. With patience and precision, you can transform ordinary spaces into stunning showcases of craftsmanship. Isn’t it rewarding to see a simple idea turn into a beautiful, functional piece? Remember, mastering these curves isn’t just about technique—it’s about elevating your entire design vision. So, why settle for straight lines when you can craft something truly mesmerizing?

Boao 12 Pcs Real Wood Veneer Sheets 12 x 12 Cherry, Maple and Walnut Wood Veneer Laminate Sheets for Jewelry Boxes, Door Panels, Marquetry
Sufficient Quantity: the product contains 3 different real wood veneers, cherry, maple and walnut, 4 pieces of each,…
As an affiliate, we earn on qualifying purchases.
As an affiliate, we earn on qualifying purchases.

THARREX Digital Edge Banding Iron with LCD Screen | Extra-Long 8.2 ft Cord | Adjustable Temperature for Woodworking, Veneer & Crafts, RC Hobbies
Rapid Heat Craft Iron. Adjust temp & °C/°F with one hand using our unique scroll wheel.
As an affiliate, we earn on qualifying purchases.
As an affiliate, we earn on qualifying purchases.