When designing your outfeed and assembly table, focus on a sturdy, flat surface with adjustable height options for comfort and versatility. Incorporate storage solutions like modular drawers, pegboards, and cabinets to keep tools organized and within reach. Add casters with locking mechanisms for easy movement, and use durable materials such as hardwood or heavy-duty plywood for stability. Swapping ideas and tips can help you craft a workspace that boosts efficiency—explore more to optimize your setup.
Key Takeaways
- Incorporate durable, flat surfaces with adjustable height features for ergonomic comfort and versatile work support.
- Integrate dedicated jig-making areas with adjustable stops and clamping zones for precision.
- Use modular storage solutions like drawers, bins, and wall-mounted organizers to maximize workspace efficiency.
- Design with mobility in mind, including sturdy casters with locking mechanisms for flexible workshop arrangement.
- Ensure stability and durability with heavy-duty materials, supporting a range of projects and heavy workpieces.

A well-designed outfeed and assembly table can considerably boost your workflow and efficiency in the workshop. When you craft a table that integrates smart storage solutions and facilitates jig making, you’ll find your projects become more streamlined and enjoyable. The key is to build a versatile surface that not only supports your workpieces but also organizes your tools and accessories effectively. Incorporating dedicated storage compartments or drawers underneath or on the sides of your table ensures that everything you need is within arm’s reach, reducing downtime spent searching for tools or materials.
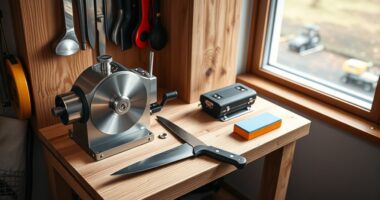
One of the primary benefits of a thoughtfully designed outfeed and assembly table is its capacity to support jig making. Jigs are essential for repetitive cuts and precise joinery, and having a stable, dedicated space for creating and using them can significantly improve accuracy. You might consider adding a flat, sturdy work surface with adjustable stops or clamping areas to hold jigs securely. Building in a dedicated section for jig making means you can quickly swap between different setups without disrupting your workflow. This setup encourages consistency and precision, making your projects more professional and saving you time in the long run.
A dedicated jig-making area enhances accuracy, consistency, and workflow efficiency in your workshop.
Storage solutions are equally vital in maximizing your workshop’s efficiency. You could opt for modular storage bins or drawers designed specifically for small hardware, screws, or router bits. Wall-mounted pegboards or slat walls above your table can hold hand tools, clamps, or measuring devices, keeping your workspace clutter-free. Consider adding vertical storage for larger items like saw blades or sanding pads. When your tools and accessories are properly organized, you spend less time hunting for parts and more time focusing on your craft. Plus, a clutter-free environment reduces the risk of accidents or damage to your tools. Additionally, implementing ergonomic features such as adjustable heights or anti-fatigue mats can greatly improve comfort during long work sessions, reducing fatigue and enhancing productivity.
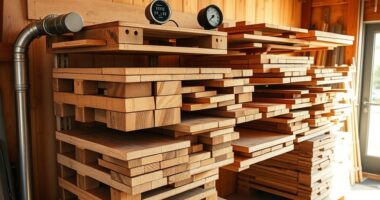
Another aspect to consider is the durability and mobility of your table. Using materials like hardwood or heavy-duty plywood ensures stability and longevity, especially if you’re frequently working on heavy or demanding projects. Casters with locking mechanisms can make your table mobile, allowing you to reposition it as needed without sacrificing stability during use. This flexibility helps you adapt your workspace to different projects or room configurations.
Frequently Asked Questions
How Do I Choose the Right Materials for My Table?
To choose the right materials for your table, focus on material selection that guarantees surface durability and withstands heavy use. Opt for sturdy, wear-resistant surfaces like hardwood, plywood, or MDF with a protective finish. Consider your work type—if you’re cutting or assembling heavy parts, prioritize durable materials that won’t chip or warp easily. Balancing cost, durability, and work surface needs helps you select the best materials for a long-lasting, functional table.
What Safety Features Should I Consider in Design?
Safety features are vital, so prioritize dust collection to prevent respiratory issues and keep your workspace clean. Incorporate ergonomic design to reduce strain and enhance comfort during long tasks. Add secure locking mechanisms on movable parts and guarantee sturdy construction to prevent accidents. Using anti-slip surfaces and proper lighting further minimizes risks. Balancing these features creates a safer, more efficient workspace where you can work confidently and comfortably.
How Can I Customize Tables for Specific Woodworking Projects?
You can customize tables for specific woodworking projects by adding features like clamp storage to keep your workspace organized and easily accessible. Incorporate dust collection ports to maintain a clean environment and improve safety. Adjust the height and surface material based on your project needs, and include modular components for versatility. Personalizing your table guarantees efficiency, safety, and comfort tailored to each unique project.
What Are the Maintenance Requirements for Different Table Surfaces?
You should regularly clean your table surface to prevent surface staining and maintain finish durability. Use appropriate cleaners for the material, and apply protective coatings or sealants as needed to prevent damage from moisture or spills. Avoid harsh chemicals that can degrade the finish. Periodically inspect for wear, and reapply finishes or sealants to keep the surface protected, ensuring your table remains durable and stain-resistant over time.
How Do I Ensure Stability for Heavy-Duty Assembly Tasks?
Imagine a sturdy foundation beneath your workpiece, providing unwavering support. To guarantee stability for heavy-duty assembly tasks, focus on proper weight distribution across your table. Use modular construction to add or remove sections as needed, maintaining balance. Secure the table to the floor if possible, and choose a durable, level surface. This combination keeps your workspace steady, safe, and efficient for demanding projects.
Conclusion
Now that you know the ins and outs of outfeed and assembly table designs, you’re better equipped to build a setup that works for you. Remember, the key is to tailor your workspace to fit your needs—after all, a well-designed table can make your projects smoother and more enjoyable. Don’t be afraid to think outside the box and put your own spin on these ideas. With a little effort, you’ll be up and running in no time!