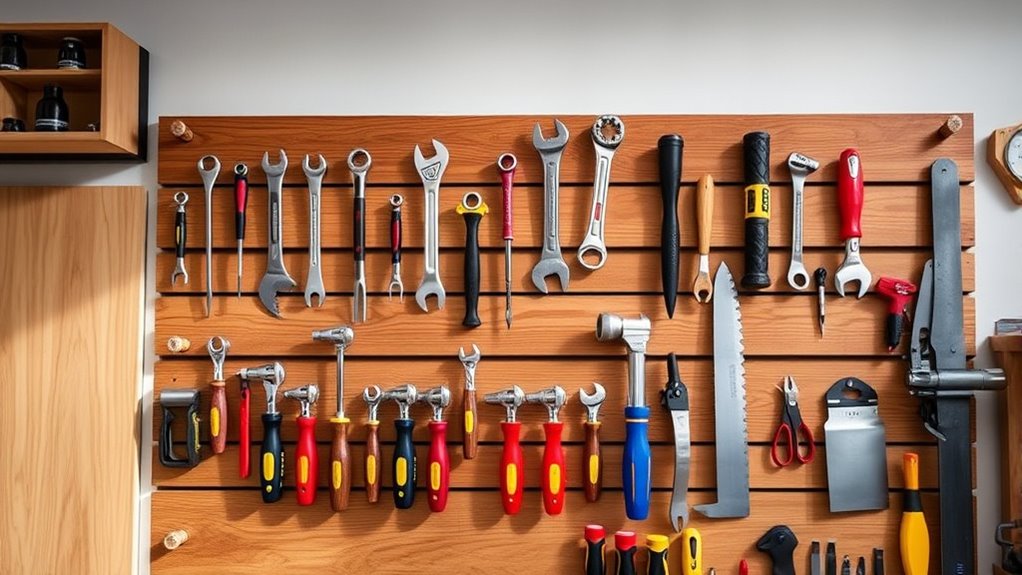
A French cleat tool wall makes organizing 20 tools quick and easy. Start by cutting sturdy plywood or MDF into 45-degree strips, then attach them securely to the wall with high-quality screws. You can customize the layout, spacing, and hooks to fit your tools and workspace. This flexible system keeps tools visible, accessible, and well-organized—perfect for finishing in just one day. Keep exploring to discover how to set up your ideal DIY tool wall.
Key Takeaways
- Plan your layout to accommodate all 20 tools with adjustable hooks and brackets.
- Use sturdy plywood cut at 45-degree angles for secure, customizable support.
- Securely fasten cleats to the wall, ensuring level placement for stability.
- Attach hooks or brackets to the cleats, organizing tools by size and type.
- Reposition and adjust hooks as your tool collection grows or changes for maximum flexibility.

Have you ever struggled to keep your tools organized and easily accessible? If so, a French cleat tool wall might be exactly what you need. This type of storage solution transforms your workspace by providing a simple, effective way to hang and arrange your tools. The beauty of a French cleat system is that it’s highly customizable, allowing you to create a tailored layout that fits your specific tools and space. Best of all, setting one up isn’t complicated, especially if you enjoy DIY projects. With some basic materials and a little effort, you can have your organized tool wall ready in just a day.
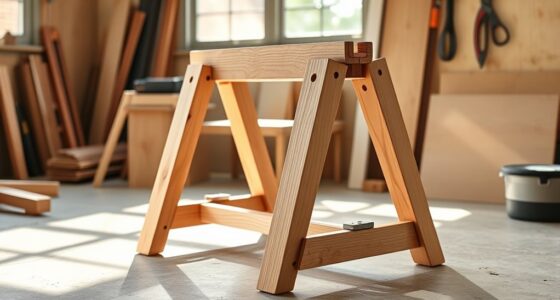
To start, you’ll want to choose the right materials for your French cleat system. Typically, a sturdy piece of plywood or MDF works well, as it can support the weight of your tools and withstand regular use. You’ll cut this board into strips that form the cleats—a 45-degree angle on each side to ensure a secure fit. These cleats act as the mounting system, so you’ll need to ensure they’re evenly spaced and securely attached to your wall. Using high-quality screws and anchors guarantees your wall can handle the weight of heavy tools like hammers, drills, and saws. Once the cleats are in place, you can attach matching brackets or hooks that hang on the angled edges, creating a versatile grid. Since the hooks are removable and repositionable, you can easily change your layout as your collection of tools grows or shifts.
Choose sturdy plywood or MDF, cut at 45 degrees, and securely attach to create a versatile French cleat tool wall.
One of the main advantages of a French cleat tool wall is its flexibility. You’re not limited to fixed shelves or compartments; instead, you can add or move hooks, bins, or magnetic strips whenever you like. This makes it incredibly convenient to keep your workspace organized as your needs evolve. Plus, DIY installation means you’re in control of the design. You can customize the height, spacing, and even the colors to match your workshop’s aesthetic. The process doesn’t require specialized skills—just some basic tools like a saw, drill, level, and measuring tape. Before you start, plan your layout carefully, mark where each cleat will go, and double-check your measurements. With patience and attention to detail, you’ll transform a blank wall into a highly functional storage area.
In the end, a French cleat tool wall isn’t just about organization; it’s about creating a workspace that works for you. It’s affordable, adaptable, and surprisingly easy to install. Whether you’re a seasoned DIYer or a beginner, building your own tool wall can be a satisfying project that pays off every time you need to find a specific tool. In just a day, you’ll have a clean, efficient setup that keeps your tools visible, accessible, and well-organized—making your projects smoother and more enjoyable.

French Cleat Picture Hanger 2 Inches Aluminum Z Hanger Supports 30lbs – Interlocking Wall Mounting Bracket Hardware Kit for Hanging Mirrors, Picture, Shelf, Whiteboard, Art, Frames (2"-2Pairs)
[ What You Get ] : 2 pairs 2 Inch french cleat picture hanger X 4 pieces self-tapping…
As an affiliate, we earn on qualifying purchases.
As an affiliate, we earn on qualifying purchases.
Frequently Asked Questions
Can I Customize a French Cleat System for Specific Tool Sizes?
Absolutely, you can customize a French cleat system for specific tool sizes. With custom cleat designs, you tailor the hooks and brackets to fit your tools perfectly. Incorporating adjustable shelving makes it even more versatile, letting you adapt the space as your collection grows. This flexibility guarantees your tools stay organized and accessible, all while maintaining a sleek, professional look in your workspace.
What Materials Are Best for a Durable French Cleat Tool Wall?
Imagine a wall where your tools hang securely, ready for use. For a durable French cleat tool wall, opt for materials with high durability like hardwood, plywood, or metal. These options resist warping and wear over time. They also support cleat customization, allowing you to tailor the system for your specific tools. Choosing strong, resilient materials guarantees your setup remains functional and sturdy, even after years of heavy use.
How Do I Prevent Tools From Slipping off the Cleats?
To prevent tools from slipping off, focus on your cleat design and tool grip. Choose cleats with a slight lip or lipless design that securely hold tools in place. Make sure your tools have textured or rubberized grips, which help them stay put. Regularly check for wear and tighten any loose fittings. Properly spacing the cleats also guarantees tools don’t bump into each other, maintaining a secure hold.
Is a French Cleat Wall Suitable for Heavy Power Tools?
Ever wondered if a French cleat wall can handle heavy power tools? Yes, it can, if you consider the weight capacity and safety considerations. You should choose strong, sturdy materials and guarantee the cleats are securely mounted to support the weight. By doing so, you’ll create a safe, efficient storage system that keeps your tools accessible and well-organized. Just make sure to regularly check the cleats for stability!
Can I Install a French Cleat System on Uneven or Textured Walls?
You can install a French cleat system on uneven or textured walls, but proper wall mounting and surface preparation are key. First, identify high spots and fill gaps or sand down rough patches. Use sturdy anchors and longer screws to secure the cleats firmly. In some cases, attaching a smooth backer board before mounting the cleats provides a flat surface, ensuring your tool wall stays secure and level.

SWANLAKE Plastic 64 Inch Adjustable Storage System, Wall Mounted Hooks Tool Organizer, Garden Tool Hangers, Black
1.Adjustable storage system is made of high-quality heavy-duty ABS material,total 4 rails,each storage unit is 16 inches,up to…
As an affiliate, we earn on qualifying purchases.
As an affiliate, we earn on qualifying purchases.
Conclusion
Think of your tool wall as a trusty ship’s mast, guiding you safely through your projects. With your French cleat system, you’ve created a sturdy rig that keeps everything within reach, ready to set sail at a moment’s notice. Now, your workspace is a well-organized harbor, where tools are your loyal crew, always prepared. Just like a seasoned captain, you’ve mastered the art of efficiency—your tool wall is your navigation chart for smooth sailing.

Gearu Heavy Duty French Cleat Jig – for 2.5″ Wood System, Aluminum Alloy Guide for Precise French Cleat Cuts & Cleat Hanger Boards, DIY Workshop & Garage Wall Organizer Jig for Storage & Shelving
PRECISION 2.5″ CLEAT CUTS: Our jig is engineered to produce uniform 2.5″ French cleat boards with clean 45°…
As an affiliate, we earn on qualifying purchases.
As an affiliate, we earn on qualifying purchases.
Kodilin Mighty Bracket Mini Split Support Tool Mini Split Wall Mounting Bracket, Ductless Air Conditioner Support for Indoor, Easy to Use by Single Person
WIDELY APPLICATION: This mini split wall mounting bracket is suitable for most indoor mini split air conditioning units,…
As an affiliate, we earn on qualifying purchases.
As an affiliate, we earn on qualifying purchases.