To glue-up complex assemblies without panic, organize your workspace beforehand by clearing clutter and preparing all tools. Plan each step carefully and visualize the process to avoid rushing. Use the right combination of clamps and employ even pressure along joints—adjust with shims if needed. Check alignment regularly and give the glue ample curing time. Mastering these open-time strategies guarantees smooth assembly, and by following the tips ahead, you’ll find handling even intricate projects becomes much more manageable.
Key Takeaways
- Plan and organize all components and tools ahead to streamline the glue-up process and reduce last-minute decisions.
- Use consistent, even clamping pressure with cauls and shims to prevent misalignment and ensure a professional finish.
- Apply techniques like partial glue application and strategic clamping to maintain control during complex assemblies.
- Allow ample drying time, checking alignment frequently to avoid rushing and ensure strong, accurate joints.
- Maintain a tidy workspace for quick adjustments and to prevent mistakes during the open-time window.
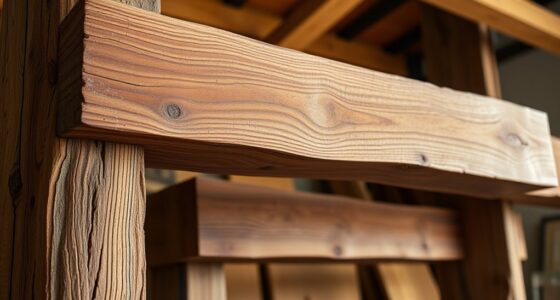
Getting glue-ups right can feel stressful, but with the right approach, you can stay calm and achieve professional results. The key is to plan ahead, especially when working on complex assemblies that require precise clamping techniques and careful workspace organization. When you’re handling multiple pieces and delicate joints, rushing or improvising can lead to mistakes, so taking a methodical approach will help you maintain control.
Proper planning and organization are essential for stress-free, professional-quality glue-ups.
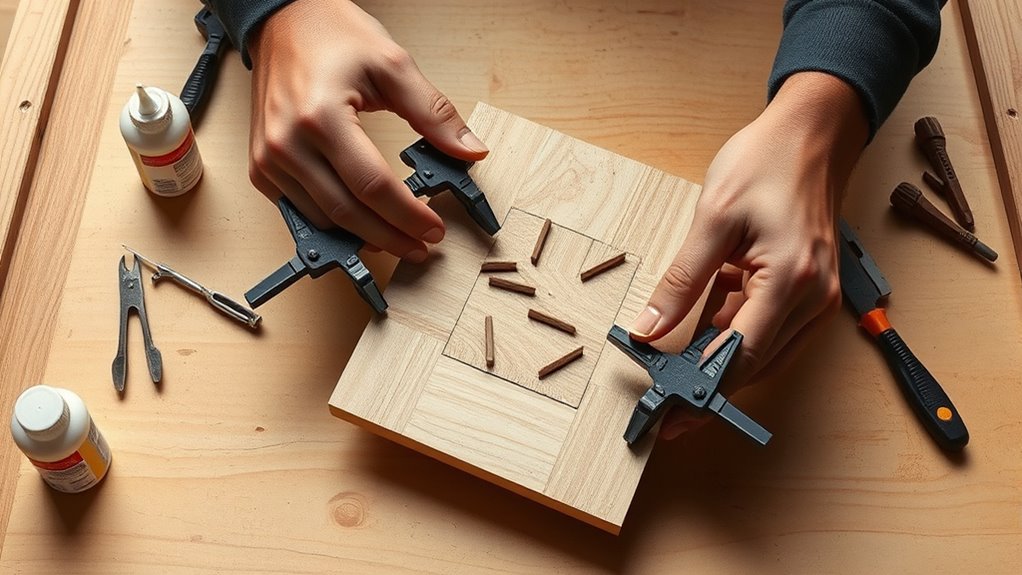
Start by organizing your workspace before you begin. Clear any clutter that might interfere with your workflow and ensure all your tools and materials are within easy reach. A tidy workspace not only speeds up your process but also reduces the risk of accidents or misplaced parts. When you’re working on a complicated glue-up, designate specific areas for different stages—clamping, drying, and finishing—so you can move smoothly through each step without confusion.
Clamping techniques are vital in managing complex assemblies. Instead of randomly tightening clamps, apply even pressure across the joints to prevent shifting or misalignment. Use a combination of clamps—bar clamps, C-clamps, or specialty clamps—based on the shape and size of your workpieces. Distribute pressure strategically, ensuring each joint is secured uniformly without over-tightening, which could cause glue squeeze-out or deformation. Remember, the goal is to hold everything in perfect alignment while the glue cures, so patience and precision are essential.
To make clamping easier, consider using cauls—flat strips of wood or other materials that distribute pressure evenly across surfaces. This technique minimizes the risk of indentations or uneven glue lines. Also, don’t forget to check your work frequently while clamping; ensure everything remains aligned and adjust if needed before the glue sets. Using scrap pieces or shims can also help fine-tune pressure where necessary.
Throughout the process, keep your workspace organized by labeling parts and keeping clamps and tools sorted by size and type. This organization reduces the time spent searching for the right clamp or component, keeping your workflow smooth and efficient. As you progress, remember that patience is key. Allow adequate drying time, and resist the temptation to rush the process. The result will be a strong, well-aligned joint that looks professional. Good lighting can also help you better monitor the alignment and quality of your glue-up, ensuring precision at every stage.

Dust Right Flexiport Power Tool Hose Kit - 3 To 12' Expandable Hose & 4 FlexiPorts - Lightweight Dust Collectors for Woodworking Power Tools - Collector Hose for Shop Vacuums, Table Saw & More
Click-Connect System: Our Flexible fittings conform to most handheld power tool dust ports and the Click-Connect feature of...
As an affiliate, we earn on qualifying purchases.
Frequently Asked Questions
How Do I Select the Right Adhesive for Complex Assemblies?
When choosing the right adhesive for complex assemblies, you need to take into account adhesive compatibility with your materials and the curing times. Check the manufacturer’s recommendations to ensure the adhesive bonds well with your surfaces without causing damage. Also, match the curing time to your workflow—faster cures for quick projects or longer open times for intricate assemblies. This way, you avoid mistakes and ensure a durable, strong bond.
What Tools Are Essential for Efficient Open-Time Management?
Imagine you’re managing an assembly line where precision matters. To keep open-time manageable, you need essential tools like timers and spreaders. Timers help you track open-time, ensuring adhesives don’t cure prematurely, while spreaders promote even application. These tools streamline quality control, prevent delays, and keep the assembly process smooth. Using them allows you to handle complex assemblies confidently, maintaining high standards without rushing or stress.
How Can I Prevent Accidental Bond Failures During Assembly?
To prevent accidental bond failures during assembly, you should prioritize workplace safety and handle adhesives carefully. Keep your workspace organized to avoid spills and guarantee proper adhesive disposal to prevent contamination. Always follow manufacturer instructions for open-time limits, and use appropriate tools to control application. By maintaining a clean environment and adhering to safety protocols, you reduce the risk of bond failures and ensure a successful assembly process.
What Are the Best Practices for Cleaning Excess Glue?
Sure, cleaning excess glue is a breeze—if you enjoy cleaning solvents and residue removal. You should start by gently wiping away excess glue right after application, using appropriate cleaning solvents to prevent stubborn buildup. Be careful not to smudge your masterpiece. Quick action keeps the surface neat, making residue removal easier later. Remember, a clean work area means fewer surprises, so don’t delay cleaning for too long.
How Do Environmental Factors Affect Open-Time and Bonding Strength?
Environmental factors like moisture impact and temperature effects considerably influence open-time and bonding strength. Higher humidity can shorten open-time by accelerating glue curing, while low moisture levels can extend it, giving you more working time. Temperature fluctuations also matter; warmer conditions speed up curing, reducing open-time, whereas cooler temperatures slow it down, allowing you to work longer. Controlling these factors helps guarantee ideal bonding without rushing or delays.

CNC Router Machine,3-Axis All-Metal with Steel Wheel Engraver Milling Machine,500W Trimmer & Linear Rail Driven,Working Area 15.75”x15.75”x2.95”,Acrylic Cutting Milling,GRBL Control (4040 PRO)
【Structural Stability】: The machine is built on a sturdy all-metal frame designed to increase stability during operation,offers a...
As an affiliate, we earn on qualifying purchases.
Conclusion
So, next time you’re faced with a complex glue-up, stay calm and remember: a little patience and planning can turn chaos into craftsmanship. Who knew that avoiding panic actually makes the process smoother? It’s almost funny how a bit of open-time strategy can save you from screams and sticky fingers. So, embrace the calm, and enjoy the surprisingly simple art of sticking things together—without losing your mind in the process.

LUNYEE 3018 PRO MAX CNC Machine 500W All-Metal CNC Router Machine 3 Axis Limit Switches & Emergency-Stop with GRBL Offline Control for Cutting Wood Acrylic MDF Plastic, Working Area: 300 x 180 x 80mm
500W Spindle & High Speed CNC Router Machine: The 500w Spindle is a Robust and Versatile Component Design....
As an affiliate, we earn on qualifying purchases.

FoxAlien Masuter Pro 3-Axis CNC Router Machine, Beginner Hobby Engraving Machine All-Metal Structure for Wood Acrylic MDF Nylon Routing Milling Carving
All-Aluminum Structure & Enhanced Stability: Engineered with an all-metal framework and linear rail Z-axis, the FoxAlien Masuter Pro...
As an affiliate, we earn on qualifying purchases.